Managing work orders with a well-designed Computer Maintenance Management System (CMMS) has several benefits. From mobile notifications that ensure maintenance technicians never miss a task to robust reporting features to monitor and improve your metrics and KPIs, you’ll see greater returns on your investment in a preventive maintenance plan, prevent breakdowns, and reduce unplanned downtime and equipment failure.
If you’re ready to say goodbye to spreadsheets, pen-and-paper maintenance processes, and unintuitive CMMS software, look no further than MaintainX, the most user-friendly CMMS on the market. We’re here to guide you through your first steps with MaintainX: creating a preventive maintenance Work Order from scratch!
Unlike other maintenance software that started out desktop-first before retrofitting to mobile, MaintainX offers a simplified and intuitive mobile app on iOS and Android. Our mobile-first task manager makes it so easy to create Work Orders that anyone with a smartphone can learn how to navigate the app in about 5 minutes.
MaintainX is suitable for a variety of organizations, including:
- Hotels
- Country Clubs
- Restaurants
- Oil and Gas/Utilities
- Manufacturing
- Fleet Management
- Facility Management
- Property Management
- Governments
- Schools
Here, we’ll walk through the step-by-step process of creating your first preventive maintenance Work Order. Creating a reactive maintenance Work Order is similar–although there is no repeating component and prioritizing the work order is crucial.
Depending on the nature of your preventive maintenance strategy, your PM schedules may require additional layers of complexity.
Should you require additional assistance, don’t hesitate to reach out. A member of our 24/5 support team will guide you through the process via phone or chat. Our Support Center provides a range of questions based on features and use cases.
Let’s get started:
Five Steps for Creating a Preventive Maintenance Work Order with MaintainX from Scratch
Easily create a preventive maintenance checklist in less than 5 minutes!
- Download the app: If you haven’t already, install the MaintainX app on your chosen device. MaintainX works on iPhones, iPads, Androids, and Desktop computers. In this tutorial, we’ll create a PM Work Order via iPhone. Your screen may appear slightly different depending on your device, but the steps will be the same.
- Open the app and create a free account: Creating an account takes less than 15 seconds! While our paid version unlocks many powerful features, the free version of MaintainX also offers robust functionality for many essential activities — including creating a work order.
- Create a Work Order: To get started, select the “+” sign in the upper right corner. The only required field is a Work Order title. You can create a blank work order and fill all the information in from scratch or take advantage of existing work order templates to speed up your process.
- Describe your Work Order (optional): Next, you can write a Work Order description. The description field can provide assigned workers with special instructions, context, and important data. Adding information here can help ensure assigned technicians are empowered to do their best work without confusion.If team members need clarification from colleagues or managers while working, MaintainX also contains an instant chat feature and work order commenting. This feature allows team members to communicate and share feedback directly within a work order (more on this below).
- Upload any relevant pictures (optional): You can add photos to help your team understand what they need to do.
- Add any relevant links (optional): You can add links to articles or resources that can help technicians as they work.
- Add your Procedure: This is the “heart” of the Work Order. Here, you will input procedures and instructions on what your team needs to do and how. You can add section headers and various form fields for Work Order organization.You can also create checklists, checkboxes, multiple-choice fields, and more to outline and emphasize maintenance needs. If you don’t want to create new procedures from scratch, you can take advantage of procedure templates in the MaintainX procedure library.
- Assign Team Members (optional): Next, select “Assign To” and choose who should be responsible for the work order once it is ready. You can assign Work Orders to both departments and individuals.The screen will change to show a database of existing team members on the MaintainX platform. You can invite new team members to the platform if you haven’t already created user accounts for them.
- Set a time frame: When is this work order due? How often should it repeat? Select the “Due Date & Schedule” prompt from the Work Order home screen, and a calendar will appear. Select a date and customize the options for a due time and start date.You will also see an option to create a schedule, allowing you to automatically repeat the work order on a daily, weekly, monthly, or yearly schedule, or according to another customizable interval.
- Select a Priority level (optional): As you can see, our Work Order screen now shows the assigned worker, due date, and repeatability options we selected from the previous step. Next, rate the Work Order a priority of none, low, medium, or high.
- Assign a Location (optional): Below is what it looks like upon opening the Location Tab. If no previously entered locations are available, begin to type a name into the location field.A blue circle will automatically appear with the option to “Create Location.” Select “Create Location,” and you will see an interface similar to the Procedure form. Here, you can customize a new location entry that can be used now and in the future.
- Add additional classifications (optional): From the bottom of the Work Order home screen, you can assign critical assets, parts, categories, and vendors similarly to the previous steps. If you need to include any additional files like PDFs, for example, formal safety documents for reference, you can attach them directly to your Work Order. Simply select “Add File” at the bottom of the Work Order home screen.This section is also a great place to add training manuals, manufacturer’s recommendations, and other essential documents that are easily misplaced.
- Add a signature field (optional): Here’s what our signature form field looks like. Once you finish, select “Done” from the top-right corner to save your work. The app will redirect you to the Work Order Home Screen for final customizations.
- Utilize Comments: Finally, don’t forget to utilize the Comments feature by switching to the Comments tab at the top-right of your screen. Managers and maintenance team members appreciate our Comments feature. Managers receive real-time, verbal confirmation of task completion, and workers can quickly ask for task clarification.Both parties can also attach files and photos directly into the comment stream. Workers can send photographic depictions of problem areas, and managers can quickly share additional documentation.
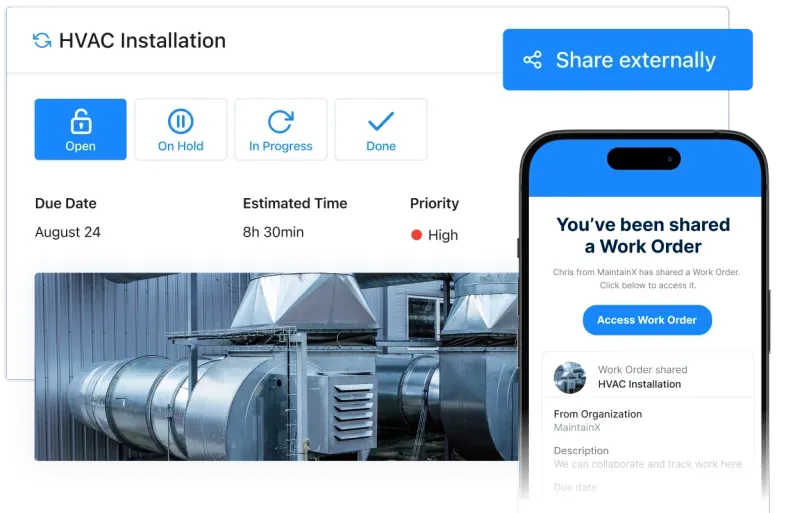
- Monitor the Work Order: Lastly, monitor your assigned Work Order for completion. Once the order is open, you will begin receiving status update notifications.The Work Order will remain open until you change the status to On-hold, In Progress, or Done. You can edit the Work Order anytime by selecting “Edit” from the top-right corner.
Congratulations—you have created your first preventive maintenance Work Order with our maintenance management software. You can manage preventive maintenance programs for specific assets, track maintenance costs and pieces of equipment, and execute preventative maintenance tasks with ease. Generate Work Orders, build a PM plan, and manage Work Orders from one platform.
Streamline Maintenance with MaintainX's All-in-One App
Preventive maintenance schedules can also help you monitor replacement parts with our asset management features. We help busy operations managers stay organized, improve employee communications, and enhance onsite safety with a convenient, real-time app that includes:
- Unlimited Work Orders: Store everything in the cloud.
- Unlimited Messaging: No more lost email threads, text messages, and undocumented phone calls.
- Unlimited Photos: Upload (and draw on) as many photos as you need to illustrate workplace problems between parties.
- Digital Audit Trails: Improve your compliance and maintain a single source of truth of equipment maintenance history.
- Robust Reporting: Generate insights to drive operational excellence and support data-driven decision-making.
Are you ready to manage your company’s maintenance and operations without the paper stacks? Global organizations like McDonald's, Marriott, and Hilton have already switched to the convenience of MaintainX.
Click here to schedule a demo or download the app for free.
FAQs


.jpeg)