


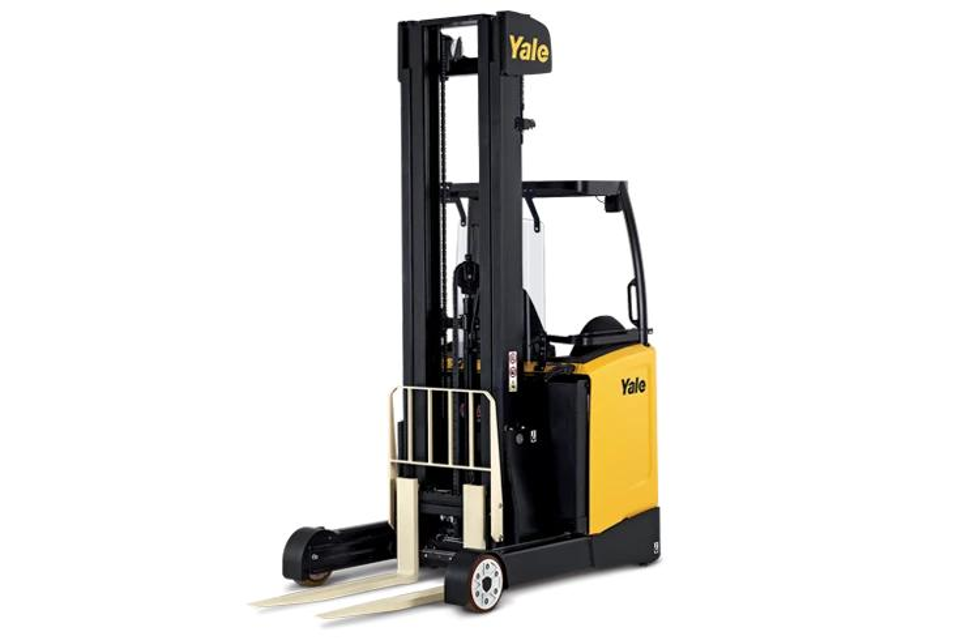
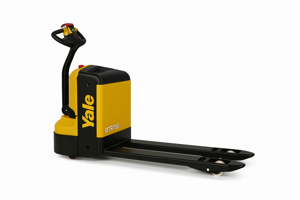
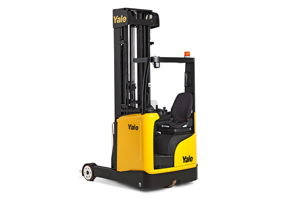
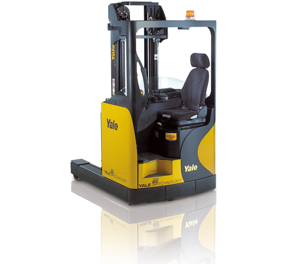
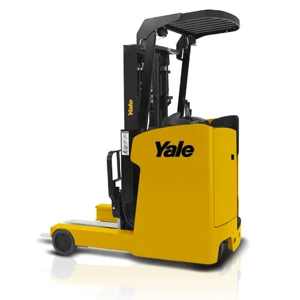
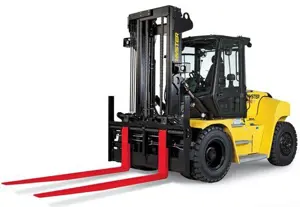
Yale Material Handling Corporation Reach Truck MR20HD
Need answers fast?
Explore the manual using AI.
Turn manuals into instant answers
with your AI-powered assistantTurn manuals into instant answers
with your AI-powered assistant
Manual for Yale Material Handling Corporation Reach Truck MR20HD
Complete asset maintenance, one click away
Get instant access to all the maintenance information you need. Empower technicians to perform preventive maintenance with asset packages, ready to use right out of the box.

Documents & Manuals
Find all the essential guides in one place.
 Tensioning Guide
- Belt-diagram
- C-120 pulleys
+ 13 more

Work Order Templates
Pre-built workflows to keep your asset running smoothly.
- Daily Electrical System Inspection
- Replace Roller and Pulley
- Install Engine B-120
+ 29 more

Procedures
Integrate maintenance plans directly into your work orders.
- Motion Industries
- Applied Industrial Technologies
- Electrical Brothers
+ 5 more

Parts
Access the parts list for your equipment in MaintainX.
- Drive Motor
- B2 Rollers
- Tensioning System
+ 40 more
Yale Material Handling Corporation Reach Truck MR20HD
Create an account to install this asset package.
Maintenance Plans for Yale Material Handling Corporation Reach Truck Model MR20HD
Integrate maintenance plans directly into your work orders in MaintainX.
Truck Base Bearings and Retractable Carriage Pins Replacement
Equipment and tools: open ended spanner 24 mm, external circlip pliers, socket wrench for self-locking ring nut, ratchet, driving tool Ø 10 mm, hammer
Before starting work, ensure that you are wearing suitable protective clothing.
Phase 1:
Carry out the retractable carriage removal procedure (see “REMOVAL OF THE RETRACTABLE CARRIAGE”).
Phase 2:
External circlip pliers
Use the circlip pliers to remove the circlip securing the bearing block (ref.A fig.1). Remove the bearing and proceed with the replacement.
Phase 3:
24 mm OPEN ENDED SPANNER - SOCKET WRENCH FOR SELF-LOCKING RING NUT - RATCHET. CLAMP GUDGEON - HAMMER

Load Cell Replacement
Equipment and tools: wooden beam, taper end pliers
Before starting work, ensure that you are wearing suitable protective clothing.
Move the truck to a safe place, away from the transit areas of other vehicles and pedestrians. Lower the forks to the ground.
Phase 1:
Using the controls in the cab, make the retractable carriage come fully out (fig.1).
Phase 2:
WOODEN BLOCK
Raise the forks just enough to be able to pass the wooden block underneath.
Place the wooden block under the forks (fig.2). Lower the forks to rest on the block and continue until the end stroke of the cylinder.
Motor Cooling Fan Replacement
Equipment and tools: medium/large crosshead screwdriver, T handle hex key 4 mm, 22 mm socket wrench with ratchet 13 mm, T handle hex key 5 mm
Before starting work, ensure that you are wearing suitable protective clothing.
Move the carriage to a safe place, away from areas of transit of other vehicles and all pedestrians. Set the key switch to OFF and disconnect the battery.
MOTOR COMPARTMENT FAN:
Phase 1
T-HANDLE HEX KEY 5 mm
Use the T-handle hex key to unscrew and remove the motor cover screw (ref.A fig.1).
Completely open the cover (fig.2).
Phase 2:
Reduction Gear Wheel Shaft Radial O-Ring Replacement
Equipment and tools: work bench, hex socket wrench 8 mm, puller, ratchet, medium elastic ring opening pliers, clamp gudgeon, brush, small flat blade screwdriver, hammer, seelant Loctite 574
Before starting work, ensure that you are wearing suitable protective clothing.
Phase 1:
Carry out the reduction unit removal procedure (see “REMOVAL OF THE REDUCTION UNIT”).
Phase 2:
HEXAGONAL 8 mm "T" SECTION SPANNER - RATCHET
Unscrew and remove the screws fastening the reducer box casing (ref.A fig.1).
Remove the cover (fig.1).
Phase 3:
Outriggers Height Check
Equipment and tools: open-ended spanner 46 mm, caliper
Before starting work, ensure that you are wearing suitable protective clothing.
Move the carriage to a safe place, away from areas of transit of other vehicles and all pedestrians. Turn the keyswitch to OFF and disconnect the battery.
Phase 1:
CALIPER
Check that the two outriggers have not been damaged and have not come loose.
Use the caliper to measure the height of the outriggers off the ground (fig.2).
The correct value of X is given in the following table:
Phase 2:
Unlock efficiency
with MaintainX CoPilot
MaintainX CoPilot is your expert colleague, on call 24/7, helping your team find the answers they need to keep equipment running.
Reduce Unplanned Downtime
Ensure your team follows consistent procedures to minimize equipment failures and costly delays.
Maximize Asset Availability
Keep your assets running longer and more reliably, with standardized maintenance workflows from OEM manuals.
Lower Maintenance Costs
Turn any technician into an expert to streamline operations, maintain more assets, and reduce overall costs.
Thousands of companies manage their assets with MaintainX

'%3e%3cpath%20fill='url(%23b)'%20d='M66.008%2080.068c-5.084-.786-9.763-3.834-12.442-8.68a16.942%2016.942%200%200%201-1.87-5.18c1.096.19%202.203.476%203.298.87%206.525%202.333%2010.836%207.68%2011.014%2012.99ZM51.47%2061.576c.488-5.524%203.62-10.716%208.847-13.597a17.132%2017.132%200%200%201%2011.335-1.882c-.798%208.145-7.43%2014.848-16.038%2015.599-1.417.119-2.799.07-4.144-.12Zm28.564-11.478a17.513%2017.513%200%200%201%203.727%204.62c4.608%208.335%201.584%2018.813-6.75%2023.409a16.988%2016.988%200%200%201-4.359%201.679%2019.624%2019.624%200%200%201-3.977-12.776c.346-7.561%204.942-13.931%2011.36-16.932Z'/%3e%3cpath%20fill='%23110F0D'%20fill-rule='evenodd'%20d='M142.831%2048.324h4.977V77.03h-4.977V48.324Zm27.278%2013.002c.322%201.048.453%202.263.453%203.62v12.073h-4.787V66.208c0-.75-.047-1.572-.154-2.143-.453-2.382-1.822-3.572-4.215-3.572-2.31%200-3.882%201.274-4.43%203.476-.143.596-.226%201.405-.226%202.25v10.8h-4.787V56.623h4.477v2.989c1.536-2.5%203.906-3.43%206.371-3.43%203.488%200%206.263%201.68%207.298%205.144Zm24.636%207.323c0%203.882-2.358%206.525-5.763%207.727-1.298.453-2.632.643-4.62.643h-10.169V48.324h9.085c1.691%200%203.156.143%204.049.38%203.465.93%205.727%203.68%205.727%207.335%200%202.441-.81%204.156-2.762%205.644%202.905%201.417%204.453%203.727%204.453%206.966Zm-15.634-8.656h4.584c1.024%200%201.917-.143%202.536-.417%201.215-.548%201.905-1.608%201.905-3.167%200-1.548-.643-2.572-1.845-3.132-.691-.31-1.762-.452-2.763-.452h-4.417v7.168Zm10.716%208.465c0-1.536-.893-3.37-3.227-3.893-.428-.095-1.036-.143-1.571-.143h-5.918v8.085h5.501c.56%200%201.429-.048%201.953-.167%201.94-.453%203.262-1.846%203.262-3.882Zm47.747-11.847-8.097%2020.408h-4.429l-8.109-20.408h5.191l5.192%2014.574%205.108-14.574h5.144Zm-20.218%2010.002c0%20.69-.036%201.262-.155%201.94h-15.943c.631%202.87%202.714%204.728%205.882%204.728%202.131%200%203.607-.882%204.703-2.525h4.87c-1.762%204.144-5.204%206.692-9.657%206.692-6.084%200-10.537-4.858-10.537-10.49%200-6.108%204.524-10.776%2010.335-10.776%206.239%200%2010.442%204.954%2010.502%2010.43Zm-4.763-1.405c-.333-2.846-2.643-4.858-5.691-4.858-2.894%200-5.287%201.929-5.621%204.858h11.312Zm-72.667%203.44c0%204.787-3.287%208.371-9.419%208.371H119.363V64.66c-1.917.274-3.87.69-5.811%201.238l4.537%2011.121h-5.418l-3.596-9.585c-5.144%202.084-10.085%205.216-14.217%209.585h-4.786L101.8%2048.312h4.56l5.68%2013.883a44.112%2044.112%200%200%201%207.323-1.774V48.312h9.084c1.703%200%203.156.143%204.061.393%203.453.929%205.727%203.667%205.727%207.323%200%201.917-.738%204.179-2.81%205.691%203.06%201.56%204.501%204.025%204.501%206.93Zm-15.634-8.667a62.664%2062.664%200%200%201%202.06-.036c1.703.012%203.239.131%204.608.37%201.441-.549%202.357-1.727%202.357-3.537%200-1.941-.881-3.144-2.488-3.667-.548-.18-1.358-.286-2.322-.286h-4.215v7.156Zm-16.55%203.905-3.715-9.894-6.394%2016.502c2.833-2.595%206.263-4.858%2010.109-6.608Zm27.254%204.74c0-2.775-3.131-4.347-8.513-4.418-.715%200-1.441.011-2.191.047v8.252h5.918c2.548%200%204.786-1.37%204.786-3.882Z'%20clip-rule='evenodd'/%3e%3c/g%3e%3cdefs%3e%3clinearGradient%20id='b'%20x1='51.47'%20x2='85.916'%20y1='62.946'%20y2='62.946'%20gradientUnits='userSpaceOnUse'%3e%3cstop%20stop-color='%23CD9F28'/%3e%3cstop%20offset='1'%20stop-color='%23ECD80B'/%3e%3c/linearGradient%3e%3cclipPath%20id='a'%3e%3cpath%20fill='%23fff'%20d='M51.47%2045.728h186.104V80.14H51.47z'/%3e%3c/clipPath%3e%3c/defs%3e%3c/svg%3e)


More from Yale Material Handling Corporation


Explore Other Assets


© 2026 MaintainX. All rights reserved.