


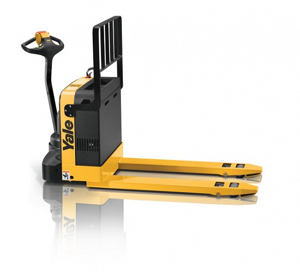
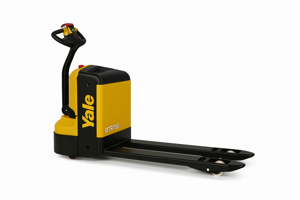
Yale Material Handling Corporation Pallet Truck MPW080
Need answers fast?
Explore the manual using AI.

Turn manuals into instant answers
with your AI-powered assistantTurn manuals into instant answers
with your AI-powered assistant
Manual for Yale Material Handling Corporation Pallet Truck MPW080
Complete asset maintenance, one click away
Get instant access to all the maintenance information you need. Empower technicians to perform preventive maintenance with asset packages, ready to use right out of the box.

Documents & Manuals
Find all the essential guides in one place.
 Tensioning Guide
- Belt-diagram
- C-120 pulleys
+ 13 more

Work Order Templates
Pre-built workflows to keep your asset running smoothly.
- Daily Electrical System Inspection
- Replace Roller and Pulley
- Install Engine B-120
+ 29 more

Procedures
Integrate maintenance plans directly into your work orders.
- Motion Industries
- Applied Industrial Technologies
- Electrical Brothers
+ 5 more

Parts
Access the parts list for your equipment in MaintainX.
- Drive Motor
- B2 Rollers
- Tensioning System
+ 40 more
Yale Material Handling Corporation Pallet Truck MPW080
Create an account to install this asset package.
Maintenance Plans for Yale Material Handling Corporation Pallet Truck Model MPW080
Integrate maintenance plans directly into your work orders in MaintainX.
Plugging Adjustment
WARNING: Do not make repairs or adjustments unless you have both authorization and training. Repairs and adjustments that are not correct can create a dangerous operating condition. Do not operate a lift truck that needs repairs. Report the need for repairs to your supervisor immediately. If repair is necessary, put a 'DO NOT OPERATE' tag on the control handle. Remove the key from the key switch.
WARNING: Disconnect the battery and separate the connector before opening the drive unit compartment cover or inspecting or repairing the electrical system. If a tool causes a short-circuit, the high current flow from the battery can cause an injury or parts damage.
WARNING: The capacitor in the motor controller can hold an electrical charge after the battery is disconnected. To prevent electrical shock and injury, discharge the capacitor before inspecting or repairing any component in the drive unit compartment. Wear safety glasses. Make certain the battery has been disconnected. Use a screwdriver or jumper wire to make a short-circuit across the B+ and B- terminals of the motor controller.
Battery disconnected and connector separated?
Capacitor in the motor controller discharged?
Turn the plugging (braking) adjustment screw
Is the adjustment screw set in the one o'clock position for default or factory setting?
Sign off on the plugging adjustment

Brush and Comutator Inspection
WARNING: Put blocks under each side of the truck under the drive unit frame. Position blocks on both sides of the load wheels. The blocks must prevent the lift truck from falling and causing injury or damage.
Raise the drive wheel off the floor. Block the lift truck. See Section 1-HOW TO PUT A LIFT TRUCK ON BLOCKS. Disconnect the battery.
Remove the drive unit compartment cover. Refer to Section 2-DRIVE UNIT COMPARTMENT COVER-REMOVAL AND INSTALLATION.
WARNING: The capacitor in the motor controller can hold an electrical charge after the battery is disconnected. To prevent electrical shock and injury, discharge the capacitor before inspecting or repairing any component in the drive unit compartment. Wear safety glasses. Make certain the battery has been disconnected.
Discharge the capacitor in the motor controller.
If used, remove the brush covers to the motor. Wear eye protection. Use a vacuum cleaner or compressed air to remove dirt and 'brush dust' from the commutator area.
Visually inspect the commutator surface. Refer to Figures 3-20 through 3-28. The commutator wears slowly in normal service. The mica must be cut below the surface of the commutator bars after a long service period or after a commutator has been turned in a lathe. Carefully rotate the armature. DO NOT damage the commutator if you use a tool to rotate the armature.
Inspect the white or gray insulation (mica) between the commutator bars. The mica must not touch the brushes or the brushes will wear very rapidly.
Install the brush covers, when used and the drive unit compartment cover. Refer to Section 2-DRIVE UNIT COMPARTMENT-REMOVAL AND INSTALLATION.
Relay Test
Warning: Perform the test with the wires disconnected from the relay contact terminals.
Enter the ohmmeter reading for the relay coil
Select the applicable chart
Does the ohmmeter reading match the chart?
Is the relay coil energized?
Are the relay contacts functioning correctly?
Sign off on the relay test
Battery Cleaning
CAUTION: Do not clean the battery with steam or hot water. Do not use a high pressure hose.
Battery compartment clean and dry
Upload a photo of the battery before cleaning
Battery washed with water and dried with compressed air
Electrolyte removed from the battery compartment
Enter the amount of soda used in lb
Enter the amount of water used in qts
Solution of bicarbonate of soda applied
Solution flushed from the battery with clean water
Relief Valve Adjustment
WARNING: Do not make repairs or adjustments unless you have both authorization and training.
Report the need for repairs to your supervisor immediately.
If repair is necessary, put a 'DO NOT OPERATE' tag on the control handle. Remove the key from the key switch.
Drive unit compartment cover removed
Dirt build up around the hydraulic unit cleaned
Pressure relieved from the hydraulic cylinder
Supply line from the pump disassembled and tee installed
Relief valve adjustment screw sealant removed and valve adjusted
Pressure gauge and tee removed from the supply line and sealant applied over the adjustment screw
Parts for Yale Material Handling Corporation Pallet Truck MPW080
Access the parts list for your equipment in MaintainX.
Operational Maintenance Manual
5192938-04
Hydraulic Oil, Normal Storage
5143618-00
Hydraulic Oil, Cold Storage
0034142-00
Hydraulic Oil, Arctic Storage
0032570-00
Gear Oil, 80W-90
3101530-34
Operational Maintenance Manual
5192938-04
Hydraulic Oil, Normal Storage
5143618-00
Hydraulic Oil, Cold Storage
0034142-00
Hydraulic Oil, Arctic Storage
0032570-00
Gear Oil, 80W-90
3101530-34
Operational Maintenance Manual
5192938-04
Hydraulic Oil, Normal Storage
5143618-00
Hydraulic Oil, Cold Storage
0034142-00
Hydraulic Oil, Arctic Storage
0032570-00
Gear Oil, 80W-90
3101530-34
Unlock efficiency
with MaintainX CoPilot
MaintainX CoPilot is your expert colleague, on call 24/7, helping your team find the answers they need to keep equipment running.
Reduce Unplanned Downtime
Ensure your team follows consistent procedures to minimize equipment failures and costly delays.
Maximize Asset Availability
Keep your assets running longer and more reliably, with standardized maintenance workflows from OEM manuals.
Lower Maintenance Costs
Turn any technician into an expert to streamline operations, maintain more assets, and reduce overall costs.
Thousands of companies manage their assets with MaintainX

'%3e%3cpath%20fill='url(%23b)'%20d='M66.008%2080.068c-5.084-.786-9.763-3.834-12.442-8.68a16.942%2016.942%200%200%201-1.87-5.18c1.096.19%202.203.476%203.298.87%206.525%202.333%2010.836%207.68%2011.014%2012.99ZM51.47%2061.576c.488-5.524%203.62-10.716%208.847-13.597a17.132%2017.132%200%200%201%2011.335-1.882c-.798%208.145-7.43%2014.848-16.038%2015.599-1.417.119-2.799.07-4.144-.12Zm28.564-11.478a17.513%2017.513%200%200%201%203.727%204.62c4.608%208.335%201.584%2018.813-6.75%2023.409a16.988%2016.988%200%200%201-4.359%201.679%2019.624%2019.624%200%200%201-3.977-12.776c.346-7.561%204.942-13.931%2011.36-16.932Z'/%3e%3cpath%20fill='%23110F0D'%20fill-rule='evenodd'%20d='M142.831%2048.324h4.977V77.03h-4.977V48.324Zm27.278%2013.002c.322%201.048.453%202.263.453%203.62v12.073h-4.787V66.208c0-.75-.047-1.572-.154-2.143-.453-2.382-1.822-3.572-4.215-3.572-2.31%200-3.882%201.274-4.43%203.476-.143.596-.226%201.405-.226%202.25v10.8h-4.787V56.623h4.477v2.989c1.536-2.5%203.906-3.43%206.371-3.43%203.488%200%206.263%201.68%207.298%205.144Zm24.636%207.323c0%203.882-2.358%206.525-5.763%207.727-1.298.453-2.632.643-4.62.643h-10.169V48.324h9.085c1.691%200%203.156.143%204.049.38%203.465.93%205.727%203.68%205.727%207.335%200%202.441-.81%204.156-2.762%205.644%202.905%201.417%204.453%203.727%204.453%206.966Zm-15.634-8.656h4.584c1.024%200%201.917-.143%202.536-.417%201.215-.548%201.905-1.608%201.905-3.167%200-1.548-.643-2.572-1.845-3.132-.691-.31-1.762-.452-2.763-.452h-4.417v7.168Zm10.716%208.465c0-1.536-.893-3.37-3.227-3.893-.428-.095-1.036-.143-1.571-.143h-5.918v8.085h5.501c.56%200%201.429-.048%201.953-.167%201.94-.453%203.262-1.846%203.262-3.882Zm47.747-11.847-8.097%2020.408h-4.429l-8.109-20.408h5.191l5.192%2014.574%205.108-14.574h5.144Zm-20.218%2010.002c0%20.69-.036%201.262-.155%201.94h-15.943c.631%202.87%202.714%204.728%205.882%204.728%202.131%200%203.607-.882%204.703-2.525h4.87c-1.762%204.144-5.204%206.692-9.657%206.692-6.084%200-10.537-4.858-10.537-10.49%200-6.108%204.524-10.776%2010.335-10.776%206.239%200%2010.442%204.954%2010.502%2010.43Zm-4.763-1.405c-.333-2.846-2.643-4.858-5.691-4.858-2.894%200-5.287%201.929-5.621%204.858h11.312Zm-72.667%203.44c0%204.787-3.287%208.371-9.419%208.371H119.363V64.66c-1.917.274-3.87.69-5.811%201.238l4.537%2011.121h-5.418l-3.596-9.585c-5.144%202.084-10.085%205.216-14.217%209.585h-4.786L101.8%2048.312h4.56l5.68%2013.883a44.112%2044.112%200%200%201%207.323-1.774V48.312h9.084c1.703%200%203.156.143%204.061.393%203.453.929%205.727%203.667%205.727%207.323%200%201.917-.738%204.179-2.81%205.691%203.06%201.56%204.501%204.025%204.501%206.93Zm-15.634-8.667a62.664%2062.664%200%200%201%202.06-.036c1.703.012%203.239.131%204.608.37%201.441-.549%202.357-1.727%202.357-3.537%200-1.941-.881-3.144-2.488-3.667-.548-.18-1.358-.286-2.322-.286h-4.215v7.156Zm-16.55%203.905-3.715-9.894-6.394%2016.502c2.833-2.595%206.263-4.858%2010.109-6.608Zm27.254%204.74c0-2.775-3.131-4.347-8.513-4.418-.715%200-1.441.011-2.191.047v8.252h5.918c2.548%200%204.786-1.37%204.786-3.882Z'%20clip-rule='evenodd'/%3e%3c/g%3e%3cdefs%3e%3clinearGradient%20id='b'%20x1='51.47'%20x2='85.916'%20y1='62.946'%20y2='62.946'%20gradientUnits='userSpaceOnUse'%3e%3cstop%20stop-color='%23CD9F28'/%3e%3cstop%20offset='1'%20stop-color='%23ECD80B'/%3e%3c/linearGradient%3e%3cclipPath%20id='a'%3e%3cpath%20fill='%23fff'%20d='M51.47%2045.728h186.104V80.14H51.47z'/%3e%3c/clipPath%3e%3c/defs%3e%3c/svg%3e)


More from Yale Material Handling Corporation


Explore Other Assets


© 2026 MaintainX. All rights reserved.