


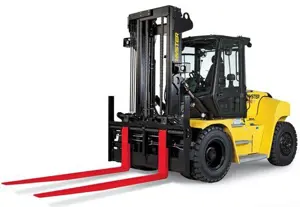
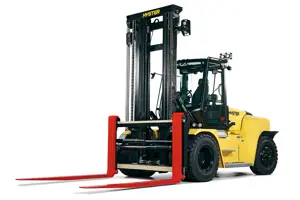
Hyster Forklift H16XM-6
Need answers fast?
Explore the manual using AI.

Turn manuals into instant answers
with your AI-powered assistantTurn manuals into instant answers
with your AI-powered assistant
Manual for Hyster Forklift H16XM-6
Complete asset maintenance, one click away
Get instant access to all the maintenance information you need. Empower technicians to perform preventive maintenance with asset packages, ready to use right out of the box.

Documents & Manuals
Find all the essential guides in one place.
 Tensioning Guide
- Belt-diagram
- C-120 pulleys
+ 13 more

Work Order Templates
Pre-built workflows to keep your asset running smoothly.
- Daily Electrical System Inspection
- Replace Roller and Pulley
- Install Engine B-120
+ 29 more

Procedures
Integrate maintenance plans directly into your work orders.
- Motion Industries
- Applied Industrial Technologies
- Electrical Brothers
+ 5 more

Parts
Access the parts list for your equipment in MaintainX.
- Drive Motor
- B2 Rollers
- Tensioning System
+ 40 more
Hyster Forklift H16XM-6
Create an account to install this asset package.
Maintenance Plans for Hyster Forklift Model H16XM-6
Integrate maintenance plans directly into your work orders in MaintainX.
500 Hourly Water Separator and Final Fuel Filter Change
!CAUTION: Disposal of lubricants and fluids must meet local environmental regulations.
Every 500 Hours
Replace the fuel/water separator and the final fuel filter.
Close the fuel shutoff valve on the fuel tank.
Remove the final fuel filter, which is located at the right-hand side of the engine, near the transmission dipstick and fill-tube.
Fill the new filter element with clean diesel fuel and install.
Remove the electrical connector from the fuel/water separator and remove the filter.
Install the new fuel/water separator and reconnect the connector.
Open the fuel shutoff valve.

2000 Hourly Transmission Oil and Oil Filter Change
!WARNING: At operating temperature, the transmission oil is hot. DO NOT permit the hot oil to touch the skin and cause severe burns. Let transmission cool before performing any maintenance.
!WARNING: DO NOT permit dirt to enter the transmission when the oil level is checked or the filter is changed. Dirt can cause damage to transmission components.
!CAUTION: Disposal of lubricants and fluids must meet local environmental regulations.
Put a suitable container under the transmission.
Remove and clean the drain plug.
Reinstall the drain plug when all oil has drained. Torque the plug to 45 N•m (35 lbf ft).
Remove and discard the old filter.
Apply clean transmission oil to the gasket of the new filter.
Install the new filter and tighten by hand.
2000 Hourly Transmission Clutch Calibration Maintenance
Warning: This procedure should be performed every 2,000 hours or after each transmission oil change.
Refer to Transmission Operations and Diagnostics 1300SRM1455 for calibration procedure.
Transmission Calibration Switch moved down to the spanner symbol
Upload a photo of the Transmission Calibration Switch in the spanner symbol position
Switch returned up to the transmission symbol
Upload a photo of the Transmission Calibration Switch in the transmission symbol position
Sign off on the transmission clutch calibration maintenance
250 Hourly/ 1 Daily Coolant Level Check
!WARNING: DO NOT remove the radiator cap when the engine is hot. When the radiator cap is removed from the expansion tank, the pressure is released from the system. If the system is hot, the steam and boiling coolant can cause burns.
!CAUTION: Additives in the coolant may damage the cooling system. Before using additives, contact your local HYSTER dealer.
Check coolant level in the expansion tank when cold. Coolant level must be between the 'MIN' and 'MAX' mark on the expansion tank.
Add coolant when level is at or below the ‘MIN’ mark.
Also add coolant when the Coolant Level Warning Light is ON during operation of the truck.
If coolant must be added, use an OAT (Organic Acid Technology) type coolant. Add coolant until just below the 'MAX' mark on the expansion tank.
When coolant has been added, make a note of the date and added quantity.
Check the cooling system for leaks if more than 1 liter (0.26 gal) of coolant must be added per 3,000 running hours.
Sign off on the coolant level check
5000 Hourly Engine Valve Adjustment Maintenance
Every 5,000 Hours
Adjust the engine valves according the values listed on the engine serial number plate on the valve cover. See Figure 31.
CAUTION: Engine coolant temperature should be lower than 60°C (140°F).
Remove the mounting nuts and isolators that secure the rocker lever cover.
Remove the connector from the exhaust pressure sensor. See Figure 32.
Remove the rocker cover and gasket underneath the EGR connection tube.
Use a barring tool to rotate the crankshaft to align the top dead center marks on the gear cover and the fuel pump gear. See Figure 33.
With the engine in this position, lash can be checked on the following rocker arms: 1l, 1E, 2l, 3E, 4l, and 5E. See Table 11.
Measure lash by inserting a feeler gauge between the crosshead and the rocker lever ball insert and socket while lifting up on the end of the rocker arm.
Unlock efficiency
with MaintainX CoPilot
MaintainX CoPilot is your expert colleague, on call 24/7, helping your team find the answers they need to keep equipment running.
Reduce Unplanned Downtime
Ensure your team follows consistent procedures to minimize equipment failures and costly delays.
Maximize Asset Availability
Keep your assets running longer and more reliably, with standardized maintenance workflows from OEM manuals.
Lower Maintenance Costs
Turn any technician into an expert to streamline operations, maintain more assets, and reduce overall costs.
Thousands of companies manage their assets with MaintainX

'%3e%3cpath%20fill='url(%23b)'%20d='M66.008%2080.068c-5.084-.786-9.763-3.834-12.442-8.68a16.942%2016.942%200%200%201-1.87-5.18c1.096.19%202.203.476%203.298.87%206.525%202.333%2010.836%207.68%2011.014%2012.99ZM51.47%2061.576c.488-5.524%203.62-10.716%208.847-13.597a17.132%2017.132%200%200%201%2011.335-1.882c-.798%208.145-7.43%2014.848-16.038%2015.599-1.417.119-2.799.07-4.144-.12Zm28.564-11.478a17.513%2017.513%200%200%201%203.727%204.62c4.608%208.335%201.584%2018.813-6.75%2023.409a16.988%2016.988%200%200%201-4.359%201.679%2019.624%2019.624%200%200%201-3.977-12.776c.346-7.561%204.942-13.931%2011.36-16.932Z'/%3e%3cpath%20fill='%23110F0D'%20fill-rule='evenodd'%20d='M142.831%2048.324h4.977V77.03h-4.977V48.324Zm27.278%2013.002c.322%201.048.453%202.263.453%203.62v12.073h-4.787V66.208c0-.75-.047-1.572-.154-2.143-.453-2.382-1.822-3.572-4.215-3.572-2.31%200-3.882%201.274-4.43%203.476-.143.596-.226%201.405-.226%202.25v10.8h-4.787V56.623h4.477v2.989c1.536-2.5%203.906-3.43%206.371-3.43%203.488%200%206.263%201.68%207.298%205.144Zm24.636%207.323c0%203.882-2.358%206.525-5.763%207.727-1.298.453-2.632.643-4.62.643h-10.169V48.324h9.085c1.691%200%203.156.143%204.049.38%203.465.93%205.727%203.68%205.727%207.335%200%202.441-.81%204.156-2.762%205.644%202.905%201.417%204.453%203.727%204.453%206.966Zm-15.634-8.656h4.584c1.024%200%201.917-.143%202.536-.417%201.215-.548%201.905-1.608%201.905-3.167%200-1.548-.643-2.572-1.845-3.132-.691-.31-1.762-.452-2.763-.452h-4.417v7.168Zm10.716%208.465c0-1.536-.893-3.37-3.227-3.893-.428-.095-1.036-.143-1.571-.143h-5.918v8.085h5.501c.56%200%201.429-.048%201.953-.167%201.94-.453%203.262-1.846%203.262-3.882Zm47.747-11.847-8.097%2020.408h-4.429l-8.109-20.408h5.191l5.192%2014.574%205.108-14.574h5.144Zm-20.218%2010.002c0%20.69-.036%201.262-.155%201.94h-15.943c.631%202.87%202.714%204.728%205.882%204.728%202.131%200%203.607-.882%204.703-2.525h4.87c-1.762%204.144-5.204%206.692-9.657%206.692-6.084%200-10.537-4.858-10.537-10.49%200-6.108%204.524-10.776%2010.335-10.776%206.239%200%2010.442%204.954%2010.502%2010.43Zm-4.763-1.405c-.333-2.846-2.643-4.858-5.691-4.858-2.894%200-5.287%201.929-5.621%204.858h11.312Zm-72.667%203.44c0%204.787-3.287%208.371-9.419%208.371H119.363V64.66c-1.917.274-3.87.69-5.811%201.238l4.537%2011.121h-5.418l-3.596-9.585c-5.144%202.084-10.085%205.216-14.217%209.585h-4.786L101.8%2048.312h4.56l5.68%2013.883a44.112%2044.112%200%200%201%207.323-1.774V48.312h9.084c1.703%200%203.156.143%204.061.393%203.453.929%205.727%203.667%205.727%207.323%200%201.917-.738%204.179-2.81%205.691%203.06%201.56%204.501%204.025%204.501%206.93Zm-15.634-8.667a62.664%2062.664%200%200%201%202.06-.036c1.703.012%203.239.131%204.608.37%201.441-.549%202.357-1.727%202.357-3.537%200-1.941-.881-3.144-2.488-3.667-.548-.18-1.358-.286-2.322-.286h-4.215v7.156Zm-16.55%203.905-3.715-9.894-6.394%2016.502c2.833-2.595%206.263-4.858%2010.109-6.608Zm27.254%204.74c0-2.775-3.131-4.347-8.513-4.418-.715%200-1.441.011-2.191.047v8.252h5.918c2.548%200%204.786-1.37%204.786-3.882Z'%20clip-rule='evenodd'/%3e%3c/g%3e%3cdefs%3e%3clinearGradient%20id='b'%20x1='51.47'%20x2='85.916'%20y1='62.946'%20y2='62.946'%20gradientUnits='userSpaceOnUse'%3e%3cstop%20stop-color='%23CD9F28'/%3e%3cstop%20offset='1'%20stop-color='%23ECD80B'/%3e%3c/linearGradient%3e%3cclipPath%20id='a'%3e%3cpath%20fill='%23fff'%20d='M51.47%2045.728h186.104V80.14H51.47z'/%3e%3c/clipPath%3e%3c/defs%3e%3c/svg%3e)


More from Hyster


Explore Other Assets


© 2026 MaintainX. All rights reserved.