


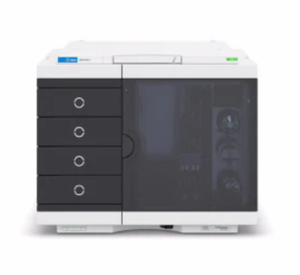
Agilent Multisampler G7137A
Need answers fast?
Explore the manual using AI.

Turn manuals into instant answers
with your AI-powered assistantTurn manuals into instant answers
with your AI-powered assistant
Manual for Agilent Multisampler G7137A
Complete asset maintenance, one click away
Get instant access to all the maintenance information you need. Empower technicians to perform preventive maintenance with asset packages, ready to use right out of the box.

Documents & Manuals
Find all the essential guides in one place.
 Tensioning Guide
- Belt-diagram
- C-120 pulleys
+ 13 more

Work Order Templates
Pre-built workflows to keep your asset running smoothly.
- Daily Electrical System Inspection
- Replace Roller and Pulley
- Install Engine B-120
+ 29 more

Procedures
Integrate maintenance plans directly into your work orders.
- Motion Industries
- Applied Industrial Technologies
- Electrical Brothers
+ 5 more

Parts
Access the parts list for your equipment in MaintainX.
- Drive Motor
- B2 Rollers
- Tensioning System
+ 40 more
Agilent Multisampler G7137A
Create an account to install this asset package.
Maintenance Plans for Agilent Multisampler Model G7137A
Integrate maintenance plans directly into your work orders in MaintainX.
Flush Head Seal Replacement
Warning: For bio-inert modules use bio-inert parts only!
When: The flush head is leaking.
Prerequesites: Cleaning tissue, Appropriate solvent like isopropanol or methanol
In the Local Controller start the maintenance mode and select Service Position.
In the Agilent Lab Advisor software select Service & Diagnostics in the system screen (Tools) > Maintenance Positions > Change Metering Device , click start and wait until the metering device is in maintenance position.
Open the front door.
Remove capillaries and valves from the flush head.
Press and turn the Flush Head a quarter left (bayonet fitting) and detach the metering device from the actuator.
Pull the flush head away from the hydraulic box

Injection Valve Replacement
For bio-inert modules use bio-inert parts only! For biocompatible modules use bio / biocompatible parts only! Do not mix with bio-inert parts.
Prerequesites: Switch off the power of the Multisampler
NOTE: Please bear in mind that depending on which valve you have installed the images may slightly differ from the actual item.
Disconnect the capillaries.
Turn the spanner nut counter clockwise until the injection valve head detaches from the hydraulic box (Do not use wrenches on the spanner nut).
Remove the spanner nut from the injection valve head.
Take the replacement injection valve head and insert it into the open actuator slot of the hydraulic box. Rotate until the unions at the base of the replacement injection valve head and the valve actuator engage.
If the outside pin does not fit into the outside groove, you have to turn the valve head until you feel that the two pins snap into the grooves. Now you should feel additional resistance from the valve drive while continue turning the valve head until the pin fits into the groove.
NOTE Check the orientation of the rear side. Verify the correct position of the Valve TAG.
Module Firmware Replacement
Warning: This procedure requires technical knowledge and should be performed by trained personnel only.
Choose the type of firmware installation
Upload the required module firmware
Upload the latest FW Update Tool
Upload the documentation
Enter the source of the downloaded files
Was the firmware successfully loaded into the module?
Sign off on the firmware replacement
1 Yearly Peristaltic Pump Cartridge Replacement
WARNING: When opening capillary or tube fittings solvents may leak out. The handling of toxic and hazardous solvents and reagents can hold health risks.
NOTE: The peristaltic pump cartridge is a replaceable unit. The tubing inside the pump is not replaceable.
Open the front door.
Press the two clips on the front of the peristaltic pump cartridge.
Pull the cartridge forward off the motor shaft.
Disconnect the tubing coupler leading to the wash port and the tubing coupler coming from the solvent bottle.
Push the new cartridge onto the motor shaft until the clips click into place.
Connect the wash port tubing to the upper tubing of the new cartridge (use sand paper to get a good grip on the tubing).
Connect the inlet filter of the solvent bottle again. Use the syringe to draw enough solvent for completely filling of the peristaltic pump tubing before continuing to prime the peristaltic pump.
Sample Thermostat Replacement
WARNING: Flammable refrigerant. Formation of flammable gas-air mixtures inside the Sample Thermostat and laboratory.
WARNING: Flammable refrigerant used. When handling, installing and operating the Sample Thermostat, care should be taken to avoid damage to the refrigerant tubing or any part of the Sample Thermostat.
WARNING: In the event of a damage. Keep open fire or sources of ignition away from the device. Ventilate the room for several minutes. Do not use the Sample Thermostat any more.
WARNING: Heavy weight. The module is heavy. Carry the module at least with 2 people. Avoid back strain or injury by following all precautions for lifting heavy objects.
CAUTION: Routing of the condensation tubing. Proper routing of the condensation tubing is critical for correct condensate drainage.
CAUTION: Condensate inside the module. Damage to the electronics of the module. After installation of the Sample Thermostat, wait at least 30 min before switching on the module.
Ensure that the on/off switch on the front of the module is OFF (switch stands out).
Disconnect the power cable from the sampler.
Ensure that no condensate remains inside the thermostat before proceeding forward.
Parts for Agilent Multisampler G7137A
Access the parts list for your equipment in MaintainX.
2 Ml Vials With Barcode
5182-0716-ID
40-Vial-Rack Sample Id
5431-0068
Palette Sample Id
G7167-60205
Torx Screwdriver T10
5182-3466
Torx Key Set
5023-3089
2 Ml Vials With Barcode
5182-0716-ID
40-Vial-Rack Sample Id
5431-0068
Palette Sample Id
G7167-60205
Torx Screwdriver T10
5182-3466
Torx Key Set
5023-3089
2 Ml Vials With Barcode
5182-0716-ID
40-Vial-Rack Sample Id
5431-0068
Palette Sample Id
G7167-60205
Torx Screwdriver T10
5182-3466
Torx Key Set
5023-3089
Unlock efficiency
with MaintainX CoPilot
MaintainX CoPilot is your expert colleague, on call 24/7, helping your team find the answers they need to keep equipment running.
Reduce Unplanned Downtime
Ensure your team follows consistent procedures to minimize equipment failures and costly delays.
Maximize Asset Availability
Keep your assets running longer and more reliably, with standardized maintenance workflows from OEM manuals.
Lower Maintenance Costs
Turn any technician into an expert to streamline operations, maintain more assets, and reduce overall costs.
Thousands of companies manage their assets with MaintainX

'%3e%3cpath%20fill='url(%23b)'%20d='M66.008%2080.068c-5.084-.786-9.763-3.834-12.442-8.68a16.942%2016.942%200%200%201-1.87-5.18c1.096.19%202.203.476%203.298.87%206.525%202.333%2010.836%207.68%2011.014%2012.99ZM51.47%2061.576c.488-5.524%203.62-10.716%208.847-13.597a17.132%2017.132%200%200%201%2011.335-1.882c-.798%208.145-7.43%2014.848-16.038%2015.599-1.417.119-2.799.07-4.144-.12Zm28.564-11.478a17.513%2017.513%200%200%201%203.727%204.62c4.608%208.335%201.584%2018.813-6.75%2023.409a16.988%2016.988%200%200%201-4.359%201.679%2019.624%2019.624%200%200%201-3.977-12.776c.346-7.561%204.942-13.931%2011.36-16.932Z'/%3e%3cpath%20fill='%23110F0D'%20fill-rule='evenodd'%20d='M142.831%2048.324h4.977V77.03h-4.977V48.324Zm27.278%2013.002c.322%201.048.453%202.263.453%203.62v12.073h-4.787V66.208c0-.75-.047-1.572-.154-2.143-.453-2.382-1.822-3.572-4.215-3.572-2.31%200-3.882%201.274-4.43%203.476-.143.596-.226%201.405-.226%202.25v10.8h-4.787V56.623h4.477v2.989c1.536-2.5%203.906-3.43%206.371-3.43%203.488%200%206.263%201.68%207.298%205.144Zm24.636%207.323c0%203.882-2.358%206.525-5.763%207.727-1.298.453-2.632.643-4.62.643h-10.169V48.324h9.085c1.691%200%203.156.143%204.049.38%203.465.93%205.727%203.68%205.727%207.335%200%202.441-.81%204.156-2.762%205.644%202.905%201.417%204.453%203.727%204.453%206.966Zm-15.634-8.656h4.584c1.024%200%201.917-.143%202.536-.417%201.215-.548%201.905-1.608%201.905-3.167%200-1.548-.643-2.572-1.845-3.132-.691-.31-1.762-.452-2.763-.452h-4.417v7.168Zm10.716%208.465c0-1.536-.893-3.37-3.227-3.893-.428-.095-1.036-.143-1.571-.143h-5.918v8.085h5.501c.56%200%201.429-.048%201.953-.167%201.94-.453%203.262-1.846%203.262-3.882Zm47.747-11.847-8.097%2020.408h-4.429l-8.109-20.408h5.191l5.192%2014.574%205.108-14.574h5.144Zm-20.218%2010.002c0%20.69-.036%201.262-.155%201.94h-15.943c.631%202.87%202.714%204.728%205.882%204.728%202.131%200%203.607-.882%204.703-2.525h4.87c-1.762%204.144-5.204%206.692-9.657%206.692-6.084%200-10.537-4.858-10.537-10.49%200-6.108%204.524-10.776%2010.335-10.776%206.239%200%2010.442%204.954%2010.502%2010.43Zm-4.763-1.405c-.333-2.846-2.643-4.858-5.691-4.858-2.894%200-5.287%201.929-5.621%204.858h11.312Zm-72.667%203.44c0%204.787-3.287%208.371-9.419%208.371H119.363V64.66c-1.917.274-3.87.69-5.811%201.238l4.537%2011.121h-5.418l-3.596-9.585c-5.144%202.084-10.085%205.216-14.217%209.585h-4.786L101.8%2048.312h4.56l5.68%2013.883a44.112%2044.112%200%200%201%207.323-1.774V48.312h9.084c1.703%200%203.156.143%204.061.393%203.453.929%205.727%203.667%205.727%207.323%200%201.917-.738%204.179-2.81%205.691%203.06%201.56%204.501%204.025%204.501%206.93Zm-15.634-8.667a62.664%2062.664%200%200%201%202.06-.036c1.703.012%203.239.131%204.608.37%201.441-.549%202.357-1.727%202.357-3.537%200-1.941-.881-3.144-2.488-3.667-.548-.18-1.358-.286-2.322-.286h-4.215v7.156Zm-16.55%203.905-3.715-9.894-6.394%2016.502c2.833-2.595%206.263-4.858%2010.109-6.608Zm27.254%204.74c0-2.775-3.131-4.347-8.513-4.418-.715%200-1.441.011-2.191.047v8.252h5.918c2.548%200%204.786-1.37%204.786-3.882Z'%20clip-rule='evenodd'/%3e%3c/g%3e%3cdefs%3e%3clinearGradient%20id='b'%20x1='51.47'%20x2='85.916'%20y1='62.946'%20y2='62.946'%20gradientUnits='userSpaceOnUse'%3e%3cstop%20stop-color='%23CD9F28'/%3e%3cstop%20offset='1'%20stop-color='%23ECD80B'/%3e%3c/linearGradient%3e%3cclipPath%20id='a'%3e%3cpath%20fill='%23fff'%20d='M51.47%2045.728h186.104V80.14H51.47z'/%3e%3c/clipPath%3e%3c/defs%3e%3c/svg%3e)


More from Agilent

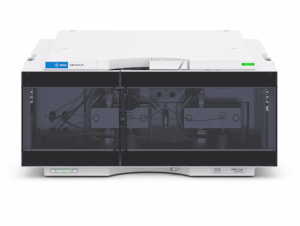

Explore Other Assets


© 2026 MaintainX. All rights reserved.