


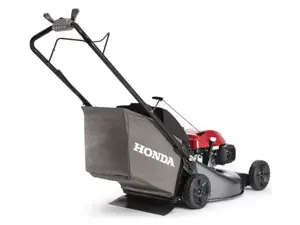
Honda Utility ATV Rancher 420
Need answers fast?
Explore the manual using AI.

Turn manuals into instant answers
with your AI-powered assistantTurn manuals into instant answers
with your AI-powered assistant
Manual for Honda Utility ATV Rancher 420
Complete asset maintenance, one click away
Get instant access to all the maintenance information you need. Empower technicians to perform preventive maintenance with asset packages, ready to use right out of the box.

Documents & Manuals
Find all the essential guides in one place.
 Tensioning Guide
- Belt-diagram
- C-120 pulleys
+ 13 more

Work Order Templates
Pre-built workflows to keep your asset running smoothly.
- Daily Electrical System Inspection
- Replace Roller and Pulley
- Install Engine B-120
+ 29 more

Procedures
Integrate maintenance plans directly into your work orders.
- Motion Industries
- Applied Industrial Technologies
- Electrical Brothers
+ 5 more

Parts
Access the parts list for your equipment in MaintainX.
- Drive Motor
- B2 Rollers
- Tensioning System
+ 40 more
Honda Utility ATV Rancher 420
Create an account to install this asset package.
Maintenance Plans for Honda Utility ATV Model Rancher 420
Integrate maintenance plans directly into your work orders in MaintainX.
Initial 20 Hours / 1 Month Reverse Inhibitor System Maintenance
Should be serviced by your dealer, unless the owner has proper tools and service data and is mechanically qualified. Refer to the official Honda Service Manual (page 274).
Refer to Safety Precautions on page 121.
Turn over the dust cover (1).
Check the reverse assist lever (2) freeplay, measured at the reverse assist lever end near the cable: 1/16 – 3/16 in (2 – 4 mm)
To adjust, slide the rubber sleeve (3), loosen the lock nut (4) and turn the adjusting nut (5) to obtain the correct freeplay. After adjustment, tighten the lock nut securely.
Return the dust cover and rubber sleeve.
Check the reverse assist lever and cable for loose connections or other damage.
If the cable is worn or kinked, have it replaced by your dealer.
Sign off on the maintenance check

Utility ATV Inspection
Engine Oil Level and Leaks
Radiator Coolant Level and Leaks
Fuel Level, Cap Security and Leaks
Tire Air Pressure
Tire Damage or Excessive Wear
Drivetrain Boots Damage
Guards Damage or Looseness
Axle Nuts Tightness
All Accessible Nuts, Bolts, and Fasteners Tightness
Brakes Check
TRX420TM1/FM1/FM2:
• Check that the brake levers, P/R lever, reverse assist lever and brake pedal assemblies are positioned properly and the securing bolts are tight.
• Make sure that the parking brake cable, lock lever, spring, P/R lever, and fasteners are in good condition.
TRX420TE1/FE1/FA2:
• Check that the rear brake lever and brake pedal assemblies are positioned properly and the securing bolts are tight.
• Make sure that the brake cables, brake arm, spring, parking brake lock lever, and fasteners are in good condition.;
100 Hourly / 6 Monthly Brake Light Switch Adjustment
Should be serviced by your dealer, unless the owner has proper tools and service data and is mechanically qualified. Refer to the official Honda Service Manual (page 274).
Refer to Safety Precautions on page 121.
Rear Brake Only:
Check the operation of the rear brake light switch (1) at the right side behind the engine from time to time. Adjustment is done by turning the adjusting nut (2). Turn the nut in direction (A) if the switch operates too late and in direction (B) if the switch operates too soon.;
100 Hourly / 1 Yearly Oil Filter Change
Safety Precautions: Refer to page 121. This procedure requires mechanical skill and professional tools such as a torque wrench as well as a means for disposing of the drained fluid (page 226). If you do not have the skills or the tools, see your dealer.
NOTICE: Using the wrong oil filter may result in leaks or engine damage. Use a new Honda Genuine oil filter specified for your model or a filter of equal quality.
Change the oil with the engine warm to assure complete and rapid draining.
ATV on level ground?
Upload a photo of the removed oil check lid and the oil fill cap/dipstick from the front crankcase.
Engine oil drain bolt and sealing washer removed?
Install a New Engine Oil Filter: Place shop towels under the oil filter cover because oil will flow out.
Upload a photo of the removed seat and tank cover assembly.
Upload a photo of the removed oil filter cover and O-rings.
Unlock efficiency
with MaintainX CoPilot
MaintainX CoPilot is your expert colleague, on call 24/7, helping your team find the answers they need to keep equipment running.
Reduce Unplanned Downtime
Ensure your team follows consistent procedures to minimize equipment failures and costly delays.
Maximize Asset Availability
Keep your assets running longer and more reliably, with standardized maintenance workflows from OEM manuals.
Lower Maintenance Costs
Turn any technician into an expert to streamline operations, maintain more assets, and reduce overall costs.
Thousands of companies manage their assets with MaintainX

'%3e%3cpath%20fill='url(%23b)'%20d='M66.008%2080.068c-5.084-.786-9.763-3.834-12.442-8.68a16.942%2016.942%200%200%201-1.87-5.18c1.096.19%202.203.476%203.298.87%206.525%202.333%2010.836%207.68%2011.014%2012.99ZM51.47%2061.576c.488-5.524%203.62-10.716%208.847-13.597a17.132%2017.132%200%200%201%2011.335-1.882c-.798%208.145-7.43%2014.848-16.038%2015.599-1.417.119-2.799.07-4.144-.12Zm28.564-11.478a17.513%2017.513%200%200%201%203.727%204.62c4.608%208.335%201.584%2018.813-6.75%2023.409a16.988%2016.988%200%200%201-4.359%201.679%2019.624%2019.624%200%200%201-3.977-12.776c.346-7.561%204.942-13.931%2011.36-16.932Z'/%3e%3cpath%20fill='%23110F0D'%20fill-rule='evenodd'%20d='M142.831%2048.324h4.977V77.03h-4.977V48.324Zm27.278%2013.002c.322%201.048.453%202.263.453%203.62v12.073h-4.787V66.208c0-.75-.047-1.572-.154-2.143-.453-2.382-1.822-3.572-4.215-3.572-2.31%200-3.882%201.274-4.43%203.476-.143.596-.226%201.405-.226%202.25v10.8h-4.787V56.623h4.477v2.989c1.536-2.5%203.906-3.43%206.371-3.43%203.488%200%206.263%201.68%207.298%205.144Zm24.636%207.323c0%203.882-2.358%206.525-5.763%207.727-1.298.453-2.632.643-4.62.643h-10.169V48.324h9.085c1.691%200%203.156.143%204.049.38%203.465.93%205.727%203.68%205.727%207.335%200%202.441-.81%204.156-2.762%205.644%202.905%201.417%204.453%203.727%204.453%206.966Zm-15.634-8.656h4.584c1.024%200%201.917-.143%202.536-.417%201.215-.548%201.905-1.608%201.905-3.167%200-1.548-.643-2.572-1.845-3.132-.691-.31-1.762-.452-2.763-.452h-4.417v7.168Zm10.716%208.465c0-1.536-.893-3.37-3.227-3.893-.428-.095-1.036-.143-1.571-.143h-5.918v8.085h5.501c.56%200%201.429-.048%201.953-.167%201.94-.453%203.262-1.846%203.262-3.882Zm47.747-11.847-8.097%2020.408h-4.429l-8.109-20.408h5.191l5.192%2014.574%205.108-14.574h5.144Zm-20.218%2010.002c0%20.69-.036%201.262-.155%201.94h-15.943c.631%202.87%202.714%204.728%205.882%204.728%202.131%200%203.607-.882%204.703-2.525h4.87c-1.762%204.144-5.204%206.692-9.657%206.692-6.084%200-10.537-4.858-10.537-10.49%200-6.108%204.524-10.776%2010.335-10.776%206.239%200%2010.442%204.954%2010.502%2010.43Zm-4.763-1.405c-.333-2.846-2.643-4.858-5.691-4.858-2.894%200-5.287%201.929-5.621%204.858h11.312Zm-72.667%203.44c0%204.787-3.287%208.371-9.419%208.371H119.363V64.66c-1.917.274-3.87.69-5.811%201.238l4.537%2011.121h-5.418l-3.596-9.585c-5.144%202.084-10.085%205.216-14.217%209.585h-4.786L101.8%2048.312h4.56l5.68%2013.883a44.112%2044.112%200%200%201%207.323-1.774V48.312h9.084c1.703%200%203.156.143%204.061.393%203.453.929%205.727%203.667%205.727%207.323%200%201.917-.738%204.179-2.81%205.691%203.06%201.56%204.501%204.025%204.501%206.93Zm-15.634-8.667a62.664%2062.664%200%200%201%202.06-.036c1.703.012%203.239.131%204.608.37%201.441-.549%202.357-1.727%202.357-3.537%200-1.941-.881-3.144-2.488-3.667-.548-.18-1.358-.286-2.322-.286h-4.215v7.156Zm-16.55%203.905-3.715-9.894-6.394%2016.502c2.833-2.595%206.263-4.858%2010.109-6.608Zm27.254%204.74c0-2.775-3.131-4.347-8.513-4.418-.715%200-1.441.011-2.191.047v8.252h5.918c2.548%200%204.786-1.37%204.786-3.882Z'%20clip-rule='evenodd'/%3e%3c/g%3e%3cdefs%3e%3clinearGradient%20id='b'%20x1='51.47'%20x2='85.916'%20y1='62.946'%20y2='62.946'%20gradientUnits='userSpaceOnUse'%3e%3cstop%20stop-color='%23CD9F28'/%3e%3cstop%20offset='1'%20stop-color='%23ECD80B'/%3e%3c/linearGradient%3e%3cclipPath%20id='a'%3e%3cpath%20fill='%23fff'%20d='M51.47%2045.728h186.104V80.14H51.47z'/%3e%3c/clipPath%3e%3c/defs%3e%3c/svg%3e)


More from Honda


Explore Other Assets


© 2026 MaintainX. All rights reserved.