


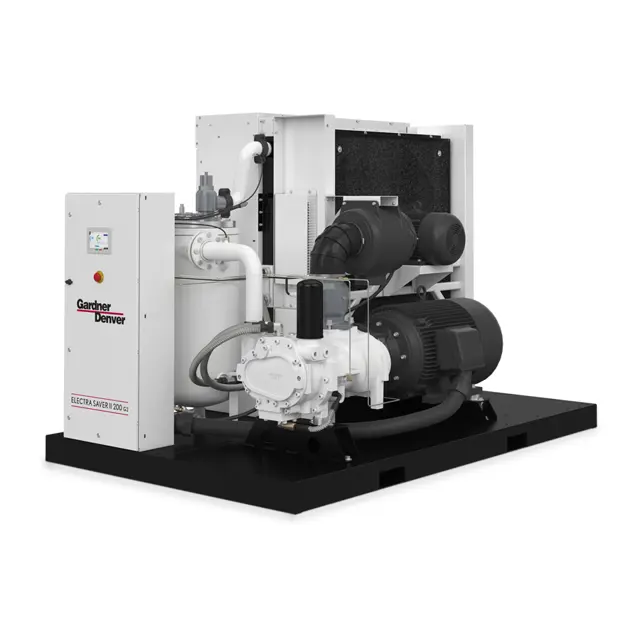
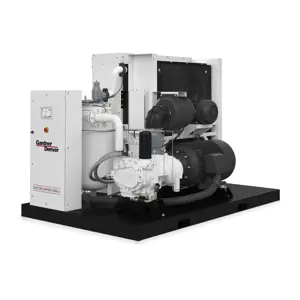
Gardner Denver Compressor EBM99L
Need answers fast?
Explore the manual using AI.
Turn manuals into instant answers
with your AI-powered assistantTurn manuals into instant answers
with your AI-powered assistant
Manual for Gardner Denver Compressor EBM99L
Complete asset maintenance, one click away
Get instant access to all the maintenance information you need. Empower technicians to perform preventive maintenance with asset packages, ready to use right out of the box.

Documents & Manuals
Find all the essential guides in one place.
 Tensioning Guide
- Belt-diagram
- C-120 pulleys
+ 13 more

Work Order Templates
Pre-built workflows to keep your asset running smoothly.
- Daily Electrical System Inspection
- Replace Roller and Pulley
- Install Engine B-120
+ 29 more

Procedures
Integrate maintenance plans directly into your work orders.
- Motion Industries
- Applied Industrial Technologies
- Electrical Brothers
+ 5 more

Parts
Access the parts list for your equipment in MaintainX.
- Drive Motor
- B2 Rollers
- Tensioning System
+ 40 more
Gardner Denver Compressor EBM99L
Create an account to install this asset package.
Maintenance Plans for Gardner Denver Compressor Model EBM99L
Integrate maintenance plans directly into your work orders in MaintainX.
Oil Reservoir Filling
Danger! Air/oil under pressure will cause severe personal injury or death.
Unit is completely off and no air pressure is in the oil reservoir
Power supply to the starter is disconnected, locked out and tagged out
All dirt around the oil filler plug is wiped away
Oil filler plug is removed and oil is added to return the oil level to the center of the green range on the gauge
Oil filler plug is installed and the unit is operated for about a minute allowing oil to fill all areas of the system. Check for leaks.
Unit is shut down, allowing the oil to settle, and all pressure is relieved
Oil is added, if necessary, to bring level to the center of the green range on the gauge
On unloaded operation and after shutdown some oil will drain back into the oil reservoir and the oil level gauge will read “FULL.” DO NOT DRAIN OIL TO CORRECT.

Oil System Draining and Cleaning
DANGER! Air/oil under pressure will cause severe personal injury or death.
Shut down compressor, relieve system of all pressure, disconnect, lockout and tagout power supply to the starter before removing valves, caps, plugs, fittings, bolts and filters.
CAUTION! Compressor, air/oil reservoir, separation chamber and all piping and tubing may be at high temperature during and after operation.
Always drain the complete system. Draining when the oil is hot will help to prevent varnish deposits and carry away impurities.
Choose the method used to drain the system
Was the oil reservoir drained completely?
Was the drained oil and/or the oil filter element contaminated with dirt?
If yes, flush the entire system: reservoir, oil cooler, mixing valve and lines.
Was the oil separator elements inspected for dirt accumulation?
Inlet Tube Inspection
Warning: Ensure to wear safety gloves and goggles before starting the procedure
Inlet screen and tube free from dirt accumulation
Upload a photo of the inlet screen and tube before cleaning
Inlet tube cleaned with a dry cloth
Upload a photo of the cleaned inlet tube
Inside of the filter body wiped to remove any dirt
Select the possible causes of short element life
Sign off on the inlet tube inspection
1000 Hourly Oil Filter Element Replacement
Unit stopped and no air pressure in the oil reservoir
Spin-on element removed
Gasket face of the filter body cleaned
New element gasket coated with clean lubricant used in the unit
New element screwed on the filter body and tightened by hand
Warning: Do not over tighten the element
Unit run and checked for leaks
Sign off on the oil filter element replacement
8000 Hourly Compressor Lubricant Replacement
Change the compressor lubricant.
UNDER ADVERSE CONDITIONS, CHANGE MORE FREQUENTLY. Flush system if required.
LUBRICANT CHANGE PROCEDURE - Following are the primary steps to be completed when upgrading or changing the type of lubricant.
1. Thoroughly drain system:
- Drain oil from air end and cooler while hot.
- Break low point connections and drain oil from pipe runs.
- Dump oil from the filter and reinstall used filter.
2. Fill the system with a 50 percent charge of the new lubricant:
- Start the machine and stay there to observe.
Parts for Gardner Denver Compressor EBM99L
Access the parts list for your equipment in MaintainX.
Check Valve
90J113
Stop Valve
90AR243
Kit
200EAP4013
Control Group
200ECM4002
Check Valve
90J113
Stop Valve
90AR243
Kit
200EAP4013
Control Group
200ECM4002
Check Valve
90J113
Stop Valve
90AR243
Kit
200EAP4013
Control Group
200ECM4002
Unlock efficiency
with MaintainX CoPilot
MaintainX CoPilot is your expert colleague, on call 24/7, helping your team find the answers they need to keep equipment running.
Reduce Unplanned Downtime
Ensure your team follows consistent procedures to minimize equipment failures and costly delays.
Maximize Asset Availability
Keep your assets running longer and more reliably, with standardized maintenance workflows from OEM manuals.
Lower Maintenance Costs
Turn any technician into an expert to streamline operations, maintain more assets, and reduce overall costs.
Thousands of companies manage their assets with MaintainX

'%3e%3cpath%20fill='url(%23b)'%20d='M66.008%2080.068c-5.084-.786-9.763-3.834-12.442-8.68a16.942%2016.942%200%200%201-1.87-5.18c1.096.19%202.203.476%203.298.87%206.525%202.333%2010.836%207.68%2011.014%2012.99ZM51.47%2061.576c.488-5.524%203.62-10.716%208.847-13.597a17.132%2017.132%200%200%201%2011.335-1.882c-.798%208.145-7.43%2014.848-16.038%2015.599-1.417.119-2.799.07-4.144-.12Zm28.564-11.478a17.513%2017.513%200%200%201%203.727%204.62c4.608%208.335%201.584%2018.813-6.75%2023.409a16.988%2016.988%200%200%201-4.359%201.679%2019.624%2019.624%200%200%201-3.977-12.776c.346-7.561%204.942-13.931%2011.36-16.932Z'/%3e%3cpath%20fill='%23110F0D'%20fill-rule='evenodd'%20d='M142.831%2048.324h4.977V77.03h-4.977V48.324Zm27.278%2013.002c.322%201.048.453%202.263.453%203.62v12.073h-4.787V66.208c0-.75-.047-1.572-.154-2.143-.453-2.382-1.822-3.572-4.215-3.572-2.31%200-3.882%201.274-4.43%203.476-.143.596-.226%201.405-.226%202.25v10.8h-4.787V56.623h4.477v2.989c1.536-2.5%203.906-3.43%206.371-3.43%203.488%200%206.263%201.68%207.298%205.144Zm24.636%207.323c0%203.882-2.358%206.525-5.763%207.727-1.298.453-2.632.643-4.62.643h-10.169V48.324h9.085c1.691%200%203.156.143%204.049.38%203.465.93%205.727%203.68%205.727%207.335%200%202.441-.81%204.156-2.762%205.644%202.905%201.417%204.453%203.727%204.453%206.966Zm-15.634-8.656h4.584c1.024%200%201.917-.143%202.536-.417%201.215-.548%201.905-1.608%201.905-3.167%200-1.548-.643-2.572-1.845-3.132-.691-.31-1.762-.452-2.763-.452h-4.417v7.168Zm10.716%208.465c0-1.536-.893-3.37-3.227-3.893-.428-.095-1.036-.143-1.571-.143h-5.918v8.085h5.501c.56%200%201.429-.048%201.953-.167%201.94-.453%203.262-1.846%203.262-3.882Zm47.747-11.847-8.097%2020.408h-4.429l-8.109-20.408h5.191l5.192%2014.574%205.108-14.574h5.144Zm-20.218%2010.002c0%20.69-.036%201.262-.155%201.94h-15.943c.631%202.87%202.714%204.728%205.882%204.728%202.131%200%203.607-.882%204.703-2.525h4.87c-1.762%204.144-5.204%206.692-9.657%206.692-6.084%200-10.537-4.858-10.537-10.49%200-6.108%204.524-10.776%2010.335-10.776%206.239%200%2010.442%204.954%2010.502%2010.43Zm-4.763-1.405c-.333-2.846-2.643-4.858-5.691-4.858-2.894%200-5.287%201.929-5.621%204.858h11.312Zm-72.667%203.44c0%204.787-3.287%208.371-9.419%208.371H119.363V64.66c-1.917.274-3.87.69-5.811%201.238l4.537%2011.121h-5.418l-3.596-9.585c-5.144%202.084-10.085%205.216-14.217%209.585h-4.786L101.8%2048.312h4.56l5.68%2013.883a44.112%2044.112%200%200%201%207.323-1.774V48.312h9.084c1.703%200%203.156.143%204.061.393%203.453.929%205.727%203.667%205.727%207.323%200%201.917-.738%204.179-2.81%205.691%203.06%201.56%204.501%204.025%204.501%206.93Zm-15.634-8.667a62.664%2062.664%200%200%201%202.06-.036c1.703.012%203.239.131%204.608.37%201.441-.549%202.357-1.727%202.357-3.537%200-1.941-.881-3.144-2.488-3.667-.548-.18-1.358-.286-2.322-.286h-4.215v7.156Zm-16.55%203.905-3.715-9.894-6.394%2016.502c2.833-2.595%206.263-4.858%2010.109-6.608Zm27.254%204.74c0-2.775-3.131-4.347-8.513-4.418-.715%200-1.441.011-2.191.047v8.252h5.918c2.548%200%204.786-1.37%204.786-3.882Z'%20clip-rule='evenodd'/%3e%3c/g%3e%3cdefs%3e%3clinearGradient%20id='b'%20x1='51.47'%20x2='85.916'%20y1='62.946'%20y2='62.946'%20gradientUnits='userSpaceOnUse'%3e%3cstop%20stop-color='%23CD9F28'/%3e%3cstop%20offset='1'%20stop-color='%23ECD80B'/%3e%3c/linearGradient%3e%3cclipPath%20id='a'%3e%3cpath%20fill='%23fff'%20d='M51.47%2045.728h186.104V80.14H51.47z'/%3e%3c/clipPath%3e%3c/defs%3e%3c/svg%3e)


More from Gardner Denver


Explore Other Assets


© 2026 MaintainX. All rights reserved.