


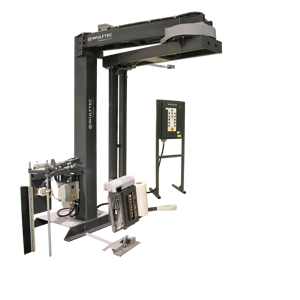
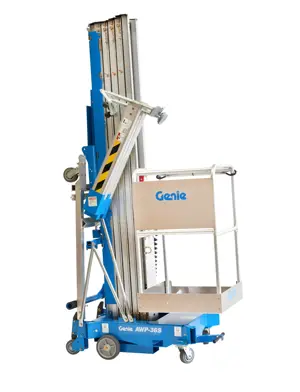
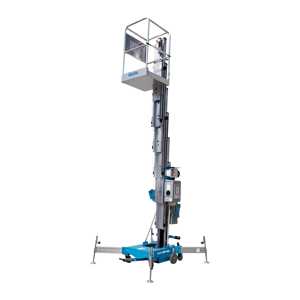
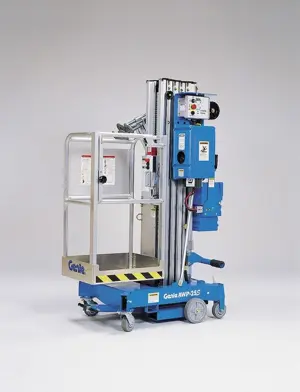
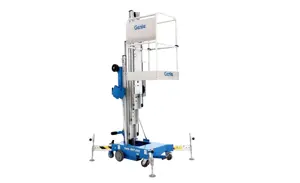
Wulftec Heavy‑Duty High‑Profile Pallet Wrapper WLP-200
Need answers fast?
Explore the manual using AI.

Turn manuals into instant answers
with your AI-powered assistantTurn manuals into instant answers
with your AI-powered assistant
Manual for Wulftec Heavy‑Duty High‑Profile Pallet Wrapper WLP-200
Complete asset maintenance, one click away
Get instant access to all the maintenance information you need. Empower technicians to perform preventive maintenance with asset packages, ready to use right out of the box.

Documents & Manuals
Find all the essential guides in one place.
 Tensioning Guide
- Belt-diagram
- C-120 pulleys
+ 13 more

Work Order Templates
Pre-built workflows to keep your asset running smoothly.
- Daily Electrical System Inspection
- Replace Roller and Pulley
- Install Engine B-120
+ 29 more

Procedures
Integrate maintenance plans directly into your work orders.
- Motion Industries
- Applied Industrial Technologies
- Electrical Brothers
+ 5 more

Parts
Access the parts list for your equipment in MaintainX.
- Drive Motor
- B2 Rollers
- Tensioning System
+ 40 more
Wulftec Heavy‑Duty High‑Profile Pallet Wrapper WLP-200
Create an account to install this asset package.
Maintenance Plans for Wulftec Heavy‑Duty High‑Profile Pallet Wrapper Model WLP-200
Integrate maintenance plans directly into your work orders in MaintainX.
3 Monthly Cam Followers Check
Warning: This procedure requires trained personnel with PPE!
Oil baths filled with EP 80 gear oil?
Number of pallets processed since last check
Upload a photo of the punch mark on the main frame
Enter the oil level in the bath
Cam follower rotates smoothly?
Sign off on the cam followers check

Initial 1 Month Cam Followers Check
Warning: This procedure requires trained personnel with PPE!
Oil baths filled with EP 80 gear oil?
Number of pallets processed since last check
To fill oil baths, position the outer filler plug in line with the punch mark located on the main frame.
Upload a photo of the aligned filler plug and punch mark
Remove the two (2) 1/4\ pipe plugs with a 1/4\" Allen key."
Enter the oil level measured with a dipstick
Oil level between 1-1/4\ and 1-7/8\"?"
After filling the oil baths, replace the pipe plug.
Chain Replacement
Warning: Ensure the machine is powered off before starting the procedure.
Table removed?
Main sprocket rotated until chain link is visible?
Transmission plate loosened and drive chain slack?
Old chain removed?
Upload a photo of the removed chain.
Stiff wire fed through the opening at the back of the machine?
New chain hooked onto the wire and pulled to the back?
New chain looped over the drive sprocket on the transmission?
Proximity Sensor Adjustment
Remove the sensor
Jog the table until the cam is aligned with the hole
Screw the sensor back in the hole until the sensor touches the cam then unscrew it one and a half turn
Tighten the lock nut
Reconnect the sensor
Upload a photo of the reconnected sensor
Sign off on the sensor adjustment
Analog Sensor Adjustment
Activate the Emergency Stop
Remove carriage top cover
Ensure that dancer bar is fully retracted to home position
Install or adjust cam with an angle of 60° approx
Adjust the sensor so it barely touches Cam
Tighten sensor lock bolt
At maximum dancer bar travel, make sure that sensor to cam gap is approx. 8mm (5/16\)"
If necessary repeat step 3, slightly modifying the angle to meet step 7 requirements
Make sure that minimum sensor to cam gap is not more than .005\ -. 010\""
Parts for Wulftec Heavy‑Duty High‑Profile Pallet Wrapper WLP-200
Access the parts list for your equipment in MaintainX.
Tower Assembly Weldment
7 1/2 Ft.
Transmission
BQ175/40/1
Motor (1/2 Hp - 90Vdc)
PS.5-90
#50 Idler Sprocket
WL024
Chain #50 (163")
WTS043
Tower Assembly Weldment
7 1/2 Ft.
Transmission
BQ175/40/1
Motor (1/2 Hp - 90Vdc)
PS.5-90
#50 Idler Sprocket
WL024
Chain #50 (163")
WTS043
Tower Assembly Weldment
7 1/2 Ft.
Transmission
BQ175/40/1
Motor (1/2 Hp - 90Vdc)
PS.5-90
#50 Idler Sprocket
WL024
Chain #50 (163")
WTS043
Unlock efficiency
with MaintainX CoPilot
MaintainX CoPilot is your expert colleague, on call 24/7, helping your team find the answers they need to keep equipment running.
Reduce Unplanned Downtime
Ensure your team follows consistent procedures to minimize equipment failures and costly delays.
Maximize Asset Availability
Keep your assets running longer and more reliably, with standardized maintenance workflows from OEM manuals.
Lower Maintenance Costs
Turn any technician into an expert to streamline operations, maintain more assets, and reduce overall costs.
Thousands of companies manage their assets with MaintainX

'%3e%3cpath%20fill='url(%23b)'%20d='M66.008%2080.068c-5.084-.786-9.763-3.834-12.442-8.68a16.942%2016.942%200%200%201-1.87-5.18c1.096.19%202.203.476%203.298.87%206.525%202.333%2010.836%207.68%2011.014%2012.99ZM51.47%2061.576c.488-5.524%203.62-10.716%208.847-13.597a17.132%2017.132%200%200%201%2011.335-1.882c-.798%208.145-7.43%2014.848-16.038%2015.599-1.417.119-2.799.07-4.144-.12Zm28.564-11.478a17.513%2017.513%200%200%201%203.727%204.62c4.608%208.335%201.584%2018.813-6.75%2023.409a16.988%2016.988%200%200%201-4.359%201.679%2019.624%2019.624%200%200%201-3.977-12.776c.346-7.561%204.942-13.931%2011.36-16.932Z'/%3e%3cpath%20fill='%23110F0D'%20fill-rule='evenodd'%20d='M142.831%2048.324h4.977V77.03h-4.977V48.324Zm27.278%2013.002c.322%201.048.453%202.263.453%203.62v12.073h-4.787V66.208c0-.75-.047-1.572-.154-2.143-.453-2.382-1.822-3.572-4.215-3.572-2.31%200-3.882%201.274-4.43%203.476-.143.596-.226%201.405-.226%202.25v10.8h-4.787V56.623h4.477v2.989c1.536-2.5%203.906-3.43%206.371-3.43%203.488%200%206.263%201.68%207.298%205.144Zm24.636%207.323c0%203.882-2.358%206.525-5.763%207.727-1.298.453-2.632.643-4.62.643h-10.169V48.324h9.085c1.691%200%203.156.143%204.049.38%203.465.93%205.727%203.68%205.727%207.335%200%202.441-.81%204.156-2.762%205.644%202.905%201.417%204.453%203.727%204.453%206.966Zm-15.634-8.656h4.584c1.024%200%201.917-.143%202.536-.417%201.215-.548%201.905-1.608%201.905-3.167%200-1.548-.643-2.572-1.845-3.132-.691-.31-1.762-.452-2.763-.452h-4.417v7.168Zm10.716%208.465c0-1.536-.893-3.37-3.227-3.893-.428-.095-1.036-.143-1.571-.143h-5.918v8.085h5.501c.56%200%201.429-.048%201.953-.167%201.94-.453%203.262-1.846%203.262-3.882Zm47.747-11.847-8.097%2020.408h-4.429l-8.109-20.408h5.191l5.192%2014.574%205.108-14.574h5.144Zm-20.218%2010.002c0%20.69-.036%201.262-.155%201.94h-15.943c.631%202.87%202.714%204.728%205.882%204.728%202.131%200%203.607-.882%204.703-2.525h4.87c-1.762%204.144-5.204%206.692-9.657%206.692-6.084%200-10.537-4.858-10.537-10.49%200-6.108%204.524-10.776%2010.335-10.776%206.239%200%2010.442%204.954%2010.502%2010.43Zm-4.763-1.405c-.333-2.846-2.643-4.858-5.691-4.858-2.894%200-5.287%201.929-5.621%204.858h11.312Zm-72.667%203.44c0%204.787-3.287%208.371-9.419%208.371H119.363V64.66c-1.917.274-3.87.69-5.811%201.238l4.537%2011.121h-5.418l-3.596-9.585c-5.144%202.084-10.085%205.216-14.217%209.585h-4.786L101.8%2048.312h4.56l5.68%2013.883a44.112%2044.112%200%200%201%207.323-1.774V48.312h9.084c1.703%200%203.156.143%204.061.393%203.453.929%205.727%203.667%205.727%207.323%200%201.917-.738%204.179-2.81%205.691%203.06%201.56%204.501%204.025%204.501%206.93Zm-15.634-8.667a62.664%2062.664%200%200%201%202.06-.036c1.703.012%203.239.131%204.608.37%201.441-.549%202.357-1.727%202.357-3.537%200-1.941-.881-3.144-2.488-3.667-.548-.18-1.358-.286-2.322-.286h-4.215v7.156Zm-16.55%203.905-3.715-9.894-6.394%2016.502c2.833-2.595%206.263-4.858%2010.109-6.608Zm27.254%204.74c0-2.775-3.131-4.347-8.513-4.418-.715%200-1.441.011-2.191.047v8.252h5.918c2.548%200%204.786-1.37%204.786-3.882Z'%20clip-rule='evenodd'/%3e%3c/g%3e%3cdefs%3e%3clinearGradient%20id='b'%20x1='51.47'%20x2='85.916'%20y1='62.946'%20y2='62.946'%20gradientUnits='userSpaceOnUse'%3e%3cstop%20stop-color='%23CD9F28'/%3e%3cstop%20offset='1'%20stop-color='%23ECD80B'/%3e%3c/linearGradient%3e%3cclipPath%20id='a'%3e%3cpath%20fill='%23fff'%20d='M51.47%2045.728h186.104V80.14H51.47z'/%3e%3c/clipPath%3e%3c/defs%3e%3c/svg%3e)


More from Wulftec


Explore Other Assets


© 2026 MaintainX. All rights reserved.