


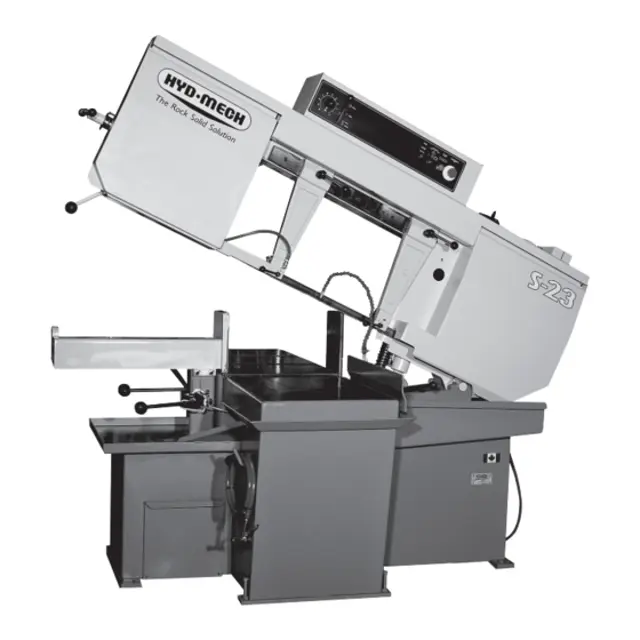
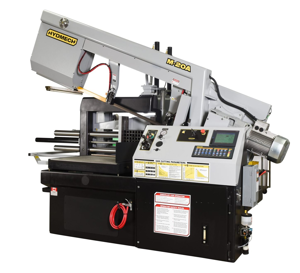
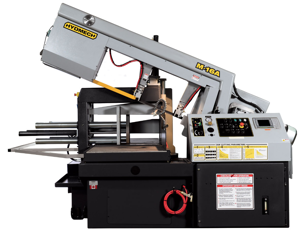
Hyd‑Mech Group Bandsaw S23
Need answers fast?
Explore the manual using AI.
Turn manuals into instant answers
with your AI-powered assistantTurn manuals into instant answers
with your AI-powered assistant
Manual for Hyd‑Mech Group Bandsaw S23
Complete asset maintenance, one click away
Get instant access to all the maintenance information you need. Empower technicians to perform preventive maintenance with asset packages, ready to use right out of the box.

Documents & Manuals
Find all the essential guides in one place.
 Tensioning Guide
- Belt-diagram
- C-120 pulleys
+ 13 more

Work Order Templates
Pre-built workflows to keep your asset running smoothly.
- Daily Electrical System Inspection
- Replace Roller and Pulley
- Install Engine B-120
+ 29 more

Procedures
Integrate maintenance plans directly into your work orders.
- Motion Industries
- Applied Industrial Technologies
- Electrical Brothers
+ 5 more

Parts
Access the parts list for your equipment in MaintainX.
- Drive Motor
- B2 Rollers
- Tensioning System
+ 40 more
Hyd‑Mech Group Bandsaw S23
Create an account to install this asset package.
Maintenance Plans for Hyd‑Mech Group Bandsaw Model S23
Integrate maintenance plans directly into your work orders in MaintainX.
1 Yearly / 2000 Hourly Oil Replacement
OIL LEVEL & REPLACEMENT
The oil level should be maintained in the upper half of the level gauge. Normally the rate of oil consumption will be very low and it should be unnecessary to add oil more often than at filter changes. Add oil only to the top line on the gauge.
In general, if the oil level is maintained and the filter is changed as recommended, there is no need to change the oil unless there are visible signs of degradation such as: Rapid darkening of oil. Milky or hazy oil colour. Varnish or sludge formation. Burnt smell from the oil.
However, if the machine is exposed to extreme temperature variation and high humidity, then the oil should be changed every 2000 operating hours or at least once a year.
To change the oil, it is necessary to drain the tank (a drain plug is found on the bottom of the tank) and fill it to 1/3 full level with the new oil, operate through several fully automatic cycles with the index set to full stroke and the head to full rise. Drain the tank again, and finally fill the tank with the new oil. Hydraulic tank capacity is approximately 8 US gallons.
Enter the current operating hours of the machine
Check for visible signs of oil degradation
Is the machine exposed to extreme temperature variation and high humidity?
Drain the tank and fill it to 1/3 full level with the new oil

Blade Replacement
NOTE: Wear gloves for protection from the sharp blade.
Open the Idler Wheel and Drive Wheel doors and swing the head to 45 degrees
Loosen the Blade Tensioner by turning counter clockwise
Loosen the carbide tension handles by turning counter clockwise 1/4 turn
Remove the old blade from the protective channel and guides
Measure the new blade width including the teeth
Uncoil the new blade while wearing gloves
Place the new blade in the carbide guides and over the wheels
Set the blade tension correctly by turning the tensioner handle clockwise
Angle Brake Maintenance
ANGLE BRAKE ADJUSTMENT
The clamping force on the swivel brake can be adjusted to ensure that the Head is held securely and does not move during cutting. The brake handle should be adjusted so that it does not 'bottom out' or hit it's movement limit, yet holds the head securely.
ANGLE BRAKE ADJUSTMENT PROCEDURE
Loosen locking cap screws 'B' with a 1/4 allen key.
Tighten all 4 set screws 'A' until snug with a 5/32' allen key.
Back out the 'A' screws 1/4 of a turn.
Tighten the locking cap screws 'B'.
Swing the head to 45o and back to ensure that the head moves freely and does not bind on the pivot surfaces.
Adjust the clamping force bolt 'C' with a 3/4' wrench. If not tightened enough, the locking handle will 'bottom out' and not hold the head firmly.
Blade Brush Adjustment
Warning: This procedure requires trained personnel with PPE!
Is the blade brush in contact with the blade at the bottom of the blade gullets?
Is the plastic drive wheel held against the blade face with minimum force?
As the blade brush wears, it is necessary to periodically adjust it closer to the blade.
Are there two springs on socket head screws holding the brush assembly against the blade?
Is there an adjusting socket set screw with a hex nut on it?
Loosen the hex nut with a 9/16\ wrench and turn the set screw counter clockwise with a 3/16\" allen key."
Did you adjust the set screw so that the brush cleans to the bottom of the blade gullets?
Did you tighten the hex nut?
Bandsaw Cleaning
Warning: Ensure the machine is turned off and unplugged before cleaning
Control console free of dirt and grease
Door charts free of dirt and grease
Wheel boxes free of chips
Blade guides free of chips
Outfeed table free of chips
No large chip build-up in the base of the saw
NOTE: All parts must be cleaned before any repair service can be performed on them
Sign off on the bandsaw cleaning
Parts for Hyd‑Mech Group Bandsaw S23
Access the parts list for your equipment in MaintainX.
1Pb – Emergency Stop Push Button Red Mushroom Head, Spring Return Push Button Telemecanique
ZB2 BC4
1Pb – Emergency Stop Push Button Mounting Base With 1 N/C Contact Block Telemecanique
ZB2 BZ102
2Pb – Hydraulic Start Push Button Green, Illuminated, Flush Head Push Button Telemecanique
ZB2 BW33
2Pb – Hydraulic Start Push Button Light Module With 1 N/O Contact Block Plus 130V (Ba9S) Light Bulb Telemecanique
ZB2 BW061
2Pb – Hydraulic Start Push Button Light Bulb (130V Ba9S) Spectro
SP105
Unlock efficiency
with MaintainX CoPilot
MaintainX CoPilot is your expert colleague, on call 24/7, helping your team find the answers they need to keep equipment running.
Reduce Unplanned Downtime
Ensure your team follows consistent procedures to minimize equipment failures and costly delays.
Maximize Asset Availability
Keep your assets running longer and more reliably, with standardized maintenance workflows from OEM manuals.
Lower Maintenance Costs
Turn any technician into an expert to streamline operations, maintain more assets, and reduce overall costs.
Thousands of companies manage their assets with MaintainX

'%3e%3cpath%20fill='url(%23b)'%20d='M66.008%2080.068c-5.084-.786-9.763-3.834-12.442-8.68a16.942%2016.942%200%200%201-1.87-5.18c1.096.19%202.203.476%203.298.87%206.525%202.333%2010.836%207.68%2011.014%2012.99ZM51.47%2061.576c.488-5.524%203.62-10.716%208.847-13.597a17.132%2017.132%200%200%201%2011.335-1.882c-.798%208.145-7.43%2014.848-16.038%2015.599-1.417.119-2.799.07-4.144-.12Zm28.564-11.478a17.513%2017.513%200%200%201%203.727%204.62c4.608%208.335%201.584%2018.813-6.75%2023.409a16.988%2016.988%200%200%201-4.359%201.679%2019.624%2019.624%200%200%201-3.977-12.776c.346-7.561%204.942-13.931%2011.36-16.932Z'/%3e%3cpath%20fill='%23110F0D'%20fill-rule='evenodd'%20d='M142.831%2048.324h4.977V77.03h-4.977V48.324Zm27.278%2013.002c.322%201.048.453%202.263.453%203.62v12.073h-4.787V66.208c0-.75-.047-1.572-.154-2.143-.453-2.382-1.822-3.572-4.215-3.572-2.31%200-3.882%201.274-4.43%203.476-.143.596-.226%201.405-.226%202.25v10.8h-4.787V56.623h4.477v2.989c1.536-2.5%203.906-3.43%206.371-3.43%203.488%200%206.263%201.68%207.298%205.144Zm24.636%207.323c0%203.882-2.358%206.525-5.763%207.727-1.298.453-2.632.643-4.62.643h-10.169V48.324h9.085c1.691%200%203.156.143%204.049.38%203.465.93%205.727%203.68%205.727%207.335%200%202.441-.81%204.156-2.762%205.644%202.905%201.417%204.453%203.727%204.453%206.966Zm-15.634-8.656h4.584c1.024%200%201.917-.143%202.536-.417%201.215-.548%201.905-1.608%201.905-3.167%200-1.548-.643-2.572-1.845-3.132-.691-.31-1.762-.452-2.763-.452h-4.417v7.168Zm10.716%208.465c0-1.536-.893-3.37-3.227-3.893-.428-.095-1.036-.143-1.571-.143h-5.918v8.085h5.501c.56%200%201.429-.048%201.953-.167%201.94-.453%203.262-1.846%203.262-3.882Zm47.747-11.847-8.097%2020.408h-4.429l-8.109-20.408h5.191l5.192%2014.574%205.108-14.574h5.144Zm-20.218%2010.002c0%20.69-.036%201.262-.155%201.94h-15.943c.631%202.87%202.714%204.728%205.882%204.728%202.131%200%203.607-.882%204.703-2.525h4.87c-1.762%204.144-5.204%206.692-9.657%206.692-6.084%200-10.537-4.858-10.537-10.49%200-6.108%204.524-10.776%2010.335-10.776%206.239%200%2010.442%204.954%2010.502%2010.43Zm-4.763-1.405c-.333-2.846-2.643-4.858-5.691-4.858-2.894%200-5.287%201.929-5.621%204.858h11.312Zm-72.667%203.44c0%204.787-3.287%208.371-9.419%208.371H119.363V64.66c-1.917.274-3.87.69-5.811%201.238l4.537%2011.121h-5.418l-3.596-9.585c-5.144%202.084-10.085%205.216-14.217%209.585h-4.786L101.8%2048.312h4.56l5.68%2013.883a44.112%2044.112%200%200%201%207.323-1.774V48.312h9.084c1.703%200%203.156.143%204.061.393%203.453.929%205.727%203.667%205.727%207.323%200%201.917-.738%204.179-2.81%205.691%203.06%201.56%204.501%204.025%204.501%206.93Zm-15.634-8.667a62.664%2062.664%200%200%201%202.06-.036c1.703.012%203.239.131%204.608.37%201.441-.549%202.357-1.727%202.357-3.537%200-1.941-.881-3.144-2.488-3.667-.548-.18-1.358-.286-2.322-.286h-4.215v7.156Zm-16.55%203.905-3.715-9.894-6.394%2016.502c2.833-2.595%206.263-4.858%2010.109-6.608Zm27.254%204.74c0-2.775-3.131-4.347-8.513-4.418-.715%200-1.441.011-2.191.047v8.252h5.918c2.548%200%204.786-1.37%204.786-3.882Z'%20clip-rule='evenodd'/%3e%3c/g%3e%3cdefs%3e%3clinearGradient%20id='b'%20x1='51.47'%20x2='85.916'%20y1='62.946'%20y2='62.946'%20gradientUnits='userSpaceOnUse'%3e%3cstop%20stop-color='%23CD9F28'/%3e%3cstop%20offset='1'%20stop-color='%23ECD80B'/%3e%3c/linearGradient%3e%3cclipPath%20id='a'%3e%3cpath%20fill='%23fff'%20d='M51.47%2045.728h186.104V80.14H51.47z'/%3e%3c/clipPath%3e%3c/defs%3e%3c/svg%3e)


More from Hyd‑Mech Group


Explore Other Assets


© 2026 MaintainX. All rights reserved.