


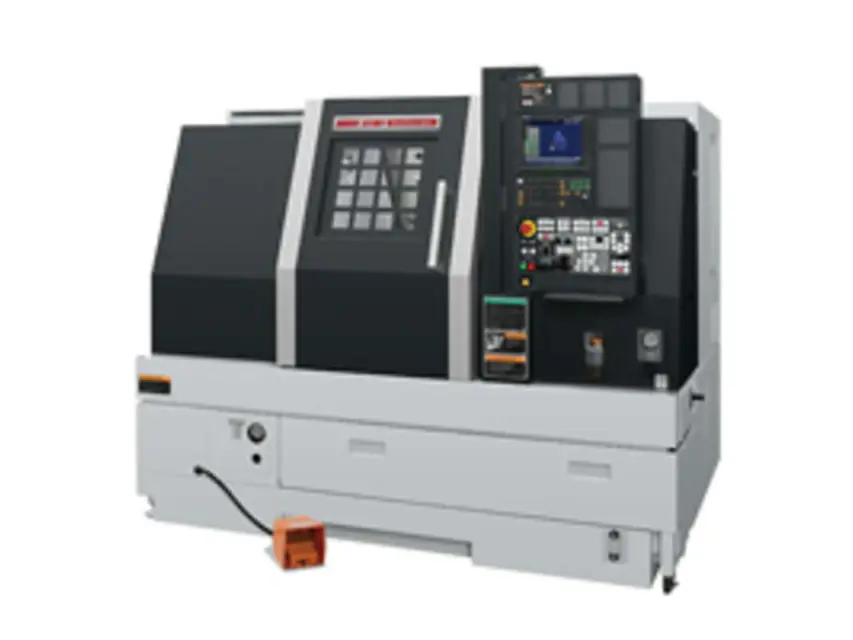
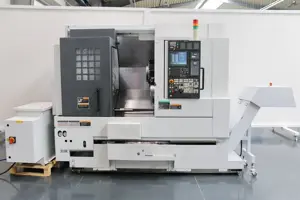
Mori Seiki CNC Lathe DuraTurn 1530
Need answers fast?
Explore the manual using AI.
Turn manuals into instant answers
with your AI-powered assistantTurn manuals into instant answers
with your AI-powered assistant
Manual for Mori Seiki CNC Lathe DuraTurn 1530
Complete asset maintenance, one click away
Get instant access to all the maintenance information you need. Empower technicians to perform preventive maintenance with asset packages, ready to use right out of the box.

Documents & Manuals
Find all the essential guides in one place.
 Tensioning Guide
- Belt-diagram
- C-120 pulleys
+ 13 more

Work Order Templates
Pre-built workflows to keep your asset running smoothly.
- Daily Electrical System Inspection
- Replace Roller and Pulley
- Install Engine B-120
+ 29 more

Procedures
Integrate maintenance plans directly into your work orders.
- Motion Industries
- Applied Industrial Technologies
- Electrical Brothers
+ 5 more

Parts
Access the parts list for your equipment in MaintainX.
- Drive Motor
- B2 Rollers
- Tensioning System
+ 40 more
Mori Seiki CNC Lathe DuraTurn 1530
Create an account to install this asset package.
Maintenance Plans for Mori Seiki CNC Lathe Model DuraTurn 1530
Integrate maintenance plans directly into your work orders in MaintainX.
1000 Hourly Suction Strainer and Tank Cleaning
1) Turn OFF the main power
2) Drain oil in the tank
NOTE! Refer to the steps 3) - 5) in "Replacing Oil" (page 2-346)
3) Remove the bolts beneath the tank and pull the hydraulic unit out from the base
4) Loosen the hose band
5) Disconnect the piping
6) Remove the tank upper plate
7) Clean the suction strainer using the following procedure
a) Remove the suction strainer

Hydraulic Oil Level Check/Hydraulic Oil Replenishing
CAUTION! If the oil level decreases rapidly, the pump unit or the machine may be malfunctioning. Contact Mori Seiki Service Department for assistance
Maintain oil at the correct level to prevent air being suctioned through the pump unit
Keep oil free from contamination
If foreign matter accumulates in the tank, oil cannot be kept free from contamination, causing pump damage
Clogged radiator causes oil pressure to be raised
Clogged suction strainer causes pumps and piping damage
If the oil pressure setting is incorrect, hydraulic unit malfunction and damage may result
NOTE! For oil types, refer to 'Oils' (page 2-324)
Is the main power turned OFF?
500 Hourly Coolant Tank and Filter Cleaning
- Machine without External Chip Conveyor!
DANGER! Turn OFF the main power
1) Removing the coolant tank
a) Turn OFF the main power
b) Wait until the coolant level is stabilized after the coolant inside machine is returned to the coolant tank
c) Loosen the two jack bolts undernearth the tank after removing the hose and cables
d) Unlock the casters and pull the chip bucket outward
e) Remove the coolant filter
2) Cleaning the coolant tank
5 Yearly Chamber Observation Window Replacement
DANGER! Turn OFF the main power and disconnect the plant-side power supply (breaker)
WARNING!
1. Replace the window at regular intervals (once every 5 years). Regardless of the replacement interval, stop using the machine and replace the window immediately in any of the following cases
• When damaged. [Workpiece, chips or coolant ejection/ Serious injury.]
• When cracked. (even it is slight) Because of its high degree of hardness, even an impact of a small chip may damage the entire window depending on its speed. Coolant may penetrate the window from the crack and accelerate the window degradation
• A very small initial fracture may spread across the window. This is the nature of the tempered grass, not a defect
• When hit with a strong impact. (EX. a workpiece disengaged from the chuck crashes into the window)
• Strength decreases extremely after having been subject to a strong impact even the appearance looks normal. Note that its safety can no longer guaranteed
• When visibility of the window cannot be secured and became difficult to grasp the conditions in the machining chamber. [Serious injury/Machine damage]
1 Yearly Chip Conveyor Belt Adjustment
WARNING! Do not operate the chip conveyor or perform maintenance and inspections without reading and obtaining a thorough understanding of the contents of the chip conveyor instruction manual published separately. Keep the chip conveyor instruction manual on hand to enable immediate reference. Do not place hands or feet inside the chip conveyor during operation. [Entanglement of fingers and hands/Death or serious injury]
CAUTION! Do not operate the chip conveyor intermittently. [Malfunction such as tripping of the motor breaker (thermal relay)]. The chip conveyor cannot carry materials larger than cutting chips. [Chip conveyor damage]
Front door closed before operating the chip conveyor
No foreign matter on the chip conveyor belt
No excessive chip accumulation on the chip conveyor belt
No abnormal noise during operation
The chip conveyor cannot discharge all types of chips. Carefully consider appropriate cutting conditions to generate chips which can be removed from the machining chamber.
Sign off on the chip conveyor belt adjustment
Parts for Mori Seiki CNC Lathe DuraTurn 1530
Access the parts list for your equipment in MaintainX.
Machining Chamber Observation Window
W14611
Lithium Battery
A02B-0309-K102
192 MB ATA Flash Memory Card
E77102
640 MB ATA Flash Memory Card
E77103
28 MB CF Card
E77101
Machining Chamber Observation Window
W14611
Lithium Battery
A02B-0309-K102
192 MB ATA Flash Memory Card
E77102
640 MB ATA Flash Memory Card
E77103
28 MB CF Card
E77101
Machining Chamber Observation Window
W14611
Lithium Battery
A02B-0309-K102
192 MB ATA Flash Memory Card
E77102
640 MB ATA Flash Memory Card
E77103
28 MB CF Card
E77101
Unlock efficiency
with MaintainX CoPilot
MaintainX CoPilot is your expert colleague, on call 24/7, helping your team find the answers they need to keep equipment running.
Reduce Unplanned Downtime
Ensure your team follows consistent procedures to minimize equipment failures and costly delays.
Maximize Asset Availability
Keep your assets running longer and more reliably, with standardized maintenance workflows from OEM manuals.
Lower Maintenance Costs
Turn any technician into an expert to streamline operations, maintain more assets, and reduce overall costs.
Thousands of companies manage their assets with MaintainX

'%3e%3cpath%20fill='url(%23b)'%20d='M66.008%2080.068c-5.084-.786-9.763-3.834-12.442-8.68a16.942%2016.942%200%200%201-1.87-5.18c1.096.19%202.203.476%203.298.87%206.525%202.333%2010.836%207.68%2011.014%2012.99ZM51.47%2061.576c.488-5.524%203.62-10.716%208.847-13.597a17.132%2017.132%200%200%201%2011.335-1.882c-.798%208.145-7.43%2014.848-16.038%2015.599-1.417.119-2.799.07-4.144-.12Zm28.564-11.478a17.513%2017.513%200%200%201%203.727%204.62c4.608%208.335%201.584%2018.813-6.75%2023.409a16.988%2016.988%200%200%201-4.359%201.679%2019.624%2019.624%200%200%201-3.977-12.776c.346-7.561%204.942-13.931%2011.36-16.932Z'/%3e%3cpath%20fill='%23110F0D'%20fill-rule='evenodd'%20d='M142.831%2048.324h4.977V77.03h-4.977V48.324Zm27.278%2013.002c.322%201.048.453%202.263.453%203.62v12.073h-4.787V66.208c0-.75-.047-1.572-.154-2.143-.453-2.382-1.822-3.572-4.215-3.572-2.31%200-3.882%201.274-4.43%203.476-.143.596-.226%201.405-.226%202.25v10.8h-4.787V56.623h4.477v2.989c1.536-2.5%203.906-3.43%206.371-3.43%203.488%200%206.263%201.68%207.298%205.144Zm24.636%207.323c0%203.882-2.358%206.525-5.763%207.727-1.298.453-2.632.643-4.62.643h-10.169V48.324h9.085c1.691%200%203.156.143%204.049.38%203.465.93%205.727%203.68%205.727%207.335%200%202.441-.81%204.156-2.762%205.644%202.905%201.417%204.453%203.727%204.453%206.966Zm-15.634-8.656h4.584c1.024%200%201.917-.143%202.536-.417%201.215-.548%201.905-1.608%201.905-3.167%200-1.548-.643-2.572-1.845-3.132-.691-.31-1.762-.452-2.763-.452h-4.417v7.168Zm10.716%208.465c0-1.536-.893-3.37-3.227-3.893-.428-.095-1.036-.143-1.571-.143h-5.918v8.085h5.501c.56%200%201.429-.048%201.953-.167%201.94-.453%203.262-1.846%203.262-3.882Zm47.747-11.847-8.097%2020.408h-4.429l-8.109-20.408h5.191l5.192%2014.574%205.108-14.574h5.144Zm-20.218%2010.002c0%20.69-.036%201.262-.155%201.94h-15.943c.631%202.87%202.714%204.728%205.882%204.728%202.131%200%203.607-.882%204.703-2.525h4.87c-1.762%204.144-5.204%206.692-9.657%206.692-6.084%200-10.537-4.858-10.537-10.49%200-6.108%204.524-10.776%2010.335-10.776%206.239%200%2010.442%204.954%2010.502%2010.43Zm-4.763-1.405c-.333-2.846-2.643-4.858-5.691-4.858-2.894%200-5.287%201.929-5.621%204.858h11.312Zm-72.667%203.44c0%204.787-3.287%208.371-9.419%208.371H119.363V64.66c-1.917.274-3.87.69-5.811%201.238l4.537%2011.121h-5.418l-3.596-9.585c-5.144%202.084-10.085%205.216-14.217%209.585h-4.786L101.8%2048.312h4.56l5.68%2013.883a44.112%2044.112%200%200%201%207.323-1.774V48.312h9.084c1.703%200%203.156.143%204.061.393%203.453.929%205.727%203.667%205.727%207.323%200%201.917-.738%204.179-2.81%205.691%203.06%201.56%204.501%204.025%204.501%206.93Zm-15.634-8.667a62.664%2062.664%200%200%201%202.06-.036c1.703.012%203.239.131%204.608.37%201.441-.549%202.357-1.727%202.357-3.537%200-1.941-.881-3.144-2.488-3.667-.548-.18-1.358-.286-2.322-.286h-4.215v7.156Zm-16.55%203.905-3.715-9.894-6.394%2016.502c2.833-2.595%206.263-4.858%2010.109-6.608Zm27.254%204.74c0-2.775-3.131-4.347-8.513-4.418-.715%200-1.441.011-2.191.047v8.252h5.918c2.548%200%204.786-1.37%204.786-3.882Z'%20clip-rule='evenodd'/%3e%3c/g%3e%3cdefs%3e%3clinearGradient%20id='b'%20x1='51.47'%20x2='85.916'%20y1='62.946'%20y2='62.946'%20gradientUnits='userSpaceOnUse'%3e%3cstop%20stop-color='%23CD9F28'/%3e%3cstop%20offset='1'%20stop-color='%23ECD80B'/%3e%3c/linearGradient%3e%3cclipPath%20id='a'%3e%3cpath%20fill='%23fff'%20d='M51.47%2045.728h186.104V80.14H51.47z'/%3e%3c/clipPath%3e%3c/defs%3e%3c/svg%3e)


More from Mori Seiki


Explore Other Assets


© 2026 MaintainX. All rights reserved.