


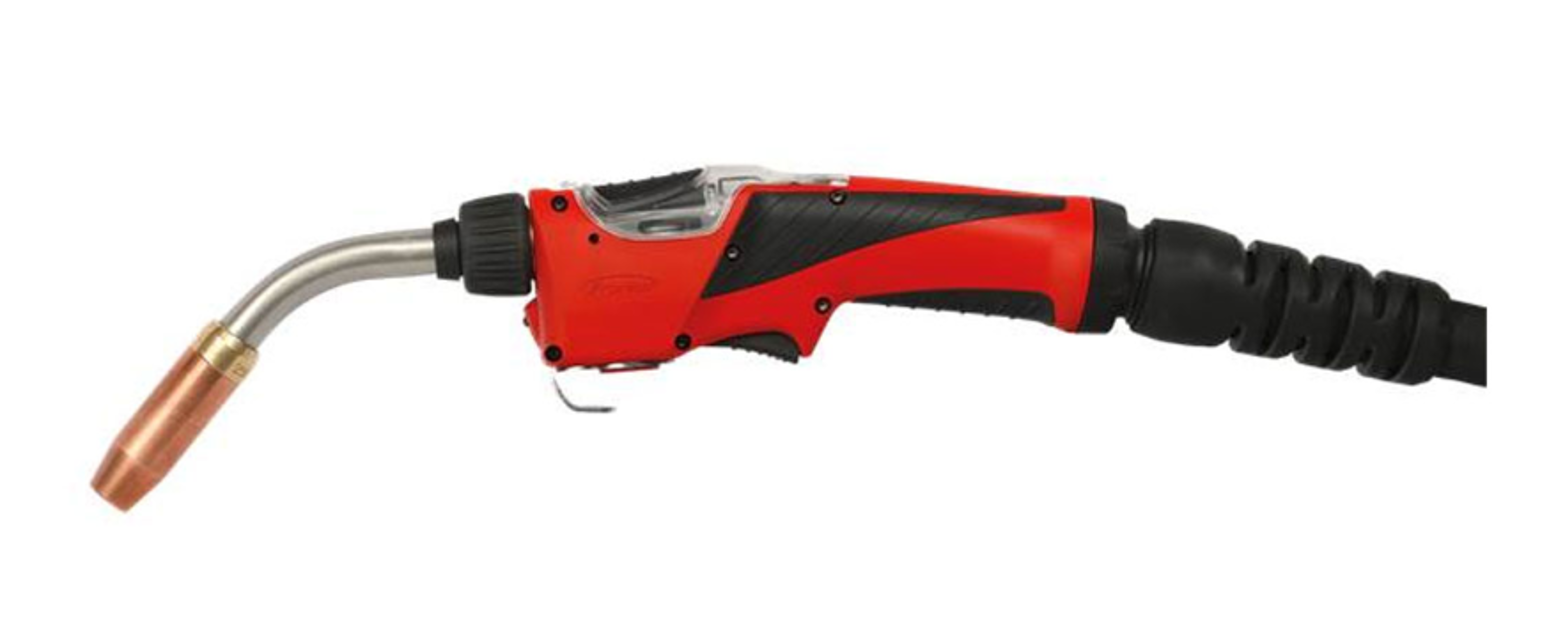
FRONIUS Welding Torch MHP 320i W PM
Need answers fast?
Explore the manual using AI.
Turn manuals into instant answers
with your AI-powered assistantTurn manuals into instant answers
with your AI-powered assistant
Manual for FRONIUS Welding Torch MHP 320i W PM
Complete asset maintenance, one click away
Get instant access to all the maintenance information you need. Empower technicians to perform preventive maintenance with asset packages, ready to use right out of the box.

Documents & Manuals
Find all the essential guides in one place.
 Tensioning Guide
- Belt-diagram
- C-120 pulleys
+ 13 more

Work Order Templates
Pre-built workflows to keep your asset running smoothly.
- Daily Electrical System Inspection
- Replace Roller and Pulley
- Install Engine B-120
+ 29 more

Procedures
Integrate maintenance plans directly into your work orders.
- Motion Industries
- Applied Industrial Technologies
- Electrical Brothers
+ 5 more

Parts
Access the parts list for your equipment in MaintainX.
- Drive Motor
- B2 Rollers
- Tensioning System
+ 40 more
FRONIUS Welding Torch MHP 320i W PM
Create an account to install this asset package.
Maintenance Plans for FRONIUS Welding Torch Model MHP 320i W PM
Integrate maintenance plans directly into your work orders in MaintainX.
Welding Torch Maintenance
Maintenance at every start-up:
- Check wearing parts
- replace faulty wearing parts
- Remove welding spatter from gas nozzle
* Check the gas nozzle, spatter guard and insulation for damage and replace any damaged components.
- Also at every start-up when using water-cooled welding torches:
- check all coolant connections for tightness (no leaks)
- check that the coolant can flow unhindered
Every time the wirespool/basket-type spool is changed:

Feed Rollers Change
NOTE: Always change feed rollers in pairs.
Only use feed rollers that match the wire diameter used and the wire alloy.
An overview of available feed rollers can be found in the Spare Parts Lists.
NOTE: To tighten the new feed rollers, use the screws supplied with the new rollers.
Turn the feed roller onto the drive until the splines on the feed roller engage in the grooves on the drive.
Sign off on the feed rollers change
Infeed Nozzle Change
Warning: Ensure the machine is turned off and cooled down before starting the procedure.
Wire electrode removed from the hosepack
Infeed nozzle pushed in as far as it will go
Inner liner inserted as far as it will go into the infeed nozzle
Cap screwed onto the inner liner as far as it will go
NOTE: Steel inner liners with an outer diameter of less than 1 mm (0.039 in.) cannot be screwed into the welding torch - the specified tightening torque therefore does not apply to these liners.
All other inner liners screwed into the welding torch and tightened to the specified tightening torque
Sign off on the infeed nozzle change
Clamping Nipple Check
Warning: Check the clamping nipple before commissioning and whenever the inner liner is changed.
Visual inspection of brass clamping nipple with seal ring
Visual inspection of silver clamping nipple with see-through bushing
NOTE: Incorrect or defective clamping nipple in push applications causes gas loss and poor weld properties.
Check that the seal ring is intact
NOTE: Incorrect clamping nipple in push-pull applications causes tangled wire and increased abrasion in the inner liner when using a clamping nipple with seal ring.
Sign off on the clamping nipple check
Torch Body Change
CAUTION: Risk of burns from hot coolant and hot torch body.
Before carrying out any work, allow the coolant and torch body to cool to room temperature (+25 °C, +77 °F).
NOTE: Some coolant will always remain in the torch body.
Only remove the torch body with the gas nozzle pointing downwards.
NOTE: Before fitting a torch body, ensure that the interface between the torch body and the hosepack is clean and undamaged.
NOTE: The torch body is in the 0° position when the dowel pin (1) on the hosepack engages in the locating hole (2) in the torch body.
Ensure that the union nut is tightened as far as it will go.
Sign off on the torch body change
Unlock efficiency
with MaintainX CoPilot
MaintainX CoPilot is your expert colleague, on call 24/7, helping your team find the answers they need to keep equipment running.
Reduce Unplanned Downtime
Ensure your team follows consistent procedures to minimize equipment failures and costly delays.
Maximize Asset Availability
Keep your assets running longer and more reliably, with standardized maintenance workflows from OEM manuals.
Lower Maintenance Costs
Turn any technician into an expert to streamline operations, maintain more assets, and reduce overall costs.
Thousands of companies manage their assets with MaintainX

'%3e%3cpath%20fill='url(%23b)'%20d='M66.008%2080.068c-5.084-.786-9.763-3.834-12.442-8.68a16.942%2016.942%200%200%201-1.87-5.18c1.096.19%202.203.476%203.298.87%206.525%202.333%2010.836%207.68%2011.014%2012.99ZM51.47%2061.576c.488-5.524%203.62-10.716%208.847-13.597a17.132%2017.132%200%200%201%2011.335-1.882c-.798%208.145-7.43%2014.848-16.038%2015.599-1.417.119-2.799.07-4.144-.12Zm28.564-11.478a17.513%2017.513%200%200%201%203.727%204.62c4.608%208.335%201.584%2018.813-6.75%2023.409a16.988%2016.988%200%200%201-4.359%201.679%2019.624%2019.624%200%200%201-3.977-12.776c.346-7.561%204.942-13.931%2011.36-16.932Z'/%3e%3cpath%20fill='%23110F0D'%20fill-rule='evenodd'%20d='M142.831%2048.324h4.977V77.03h-4.977V48.324Zm27.278%2013.002c.322%201.048.453%202.263.453%203.62v12.073h-4.787V66.208c0-.75-.047-1.572-.154-2.143-.453-2.382-1.822-3.572-4.215-3.572-2.31%200-3.882%201.274-4.43%203.476-.143.596-.226%201.405-.226%202.25v10.8h-4.787V56.623h4.477v2.989c1.536-2.5%203.906-3.43%206.371-3.43%203.488%200%206.263%201.68%207.298%205.144Zm24.636%207.323c0%203.882-2.358%206.525-5.763%207.727-1.298.453-2.632.643-4.62.643h-10.169V48.324h9.085c1.691%200%203.156.143%204.049.38%203.465.93%205.727%203.68%205.727%207.335%200%202.441-.81%204.156-2.762%205.644%202.905%201.417%204.453%203.727%204.453%206.966Zm-15.634-8.656h4.584c1.024%200%201.917-.143%202.536-.417%201.215-.548%201.905-1.608%201.905-3.167%200-1.548-.643-2.572-1.845-3.132-.691-.31-1.762-.452-2.763-.452h-4.417v7.168Zm10.716%208.465c0-1.536-.893-3.37-3.227-3.893-.428-.095-1.036-.143-1.571-.143h-5.918v8.085h5.501c.56%200%201.429-.048%201.953-.167%201.94-.453%203.262-1.846%203.262-3.882Zm47.747-11.847-8.097%2020.408h-4.429l-8.109-20.408h5.191l5.192%2014.574%205.108-14.574h5.144Zm-20.218%2010.002c0%20.69-.036%201.262-.155%201.94h-15.943c.631%202.87%202.714%204.728%205.882%204.728%202.131%200%203.607-.882%204.703-2.525h4.87c-1.762%204.144-5.204%206.692-9.657%206.692-6.084%200-10.537-4.858-10.537-10.49%200-6.108%204.524-10.776%2010.335-10.776%206.239%200%2010.442%204.954%2010.502%2010.43Zm-4.763-1.405c-.333-2.846-2.643-4.858-5.691-4.858-2.894%200-5.287%201.929-5.621%204.858h11.312Zm-72.667%203.44c0%204.787-3.287%208.371-9.419%208.371H119.363V64.66c-1.917.274-3.87.69-5.811%201.238l4.537%2011.121h-5.418l-3.596-9.585c-5.144%202.084-10.085%205.216-14.217%209.585h-4.786L101.8%2048.312h4.56l5.68%2013.883a44.112%2044.112%200%200%201%207.323-1.774V48.312h9.084c1.703%200%203.156.143%204.061.393%203.453.929%205.727%203.667%205.727%207.323%200%201.917-.738%204.179-2.81%205.691%203.06%201.56%204.501%204.025%204.501%206.93Zm-15.634-8.667a62.664%2062.664%200%200%201%202.06-.036c1.703.012%203.239.131%204.608.37%201.441-.549%202.357-1.727%202.357-3.537%200-1.941-.881-3.144-2.488-3.667-.548-.18-1.358-.286-2.322-.286h-4.215v7.156Zm-16.55%203.905-3.715-9.894-6.394%2016.502c2.833-2.595%206.263-4.858%2010.109-6.608Zm27.254%204.74c0-2.775-3.131-4.347-8.513-4.418-.715%200-1.441.011-2.191.047v8.252h5.918c2.548%200%204.786-1.37%204.786-3.882Z'%20clip-rule='evenodd'/%3e%3c/g%3e%3cdefs%3e%3clinearGradient%20id='b'%20x1='51.47'%20x2='85.916'%20y1='62.946'%20y2='62.946'%20gradientUnits='userSpaceOnUse'%3e%3cstop%20stop-color='%23CD9F28'/%3e%3cstop%20offset='1'%20stop-color='%23ECD80B'/%3e%3c/linearGradient%3e%3cclipPath%20id='a'%3e%3cpath%20fill='%23fff'%20d='M51.47%2045.728h186.104V80.14H51.47z'/%3e%3c/clipPath%3e%3c/defs%3e%3c/svg%3e)


More from FRONIUS

Explore Other Assets


© 2026 MaintainX. All rights reserved.