


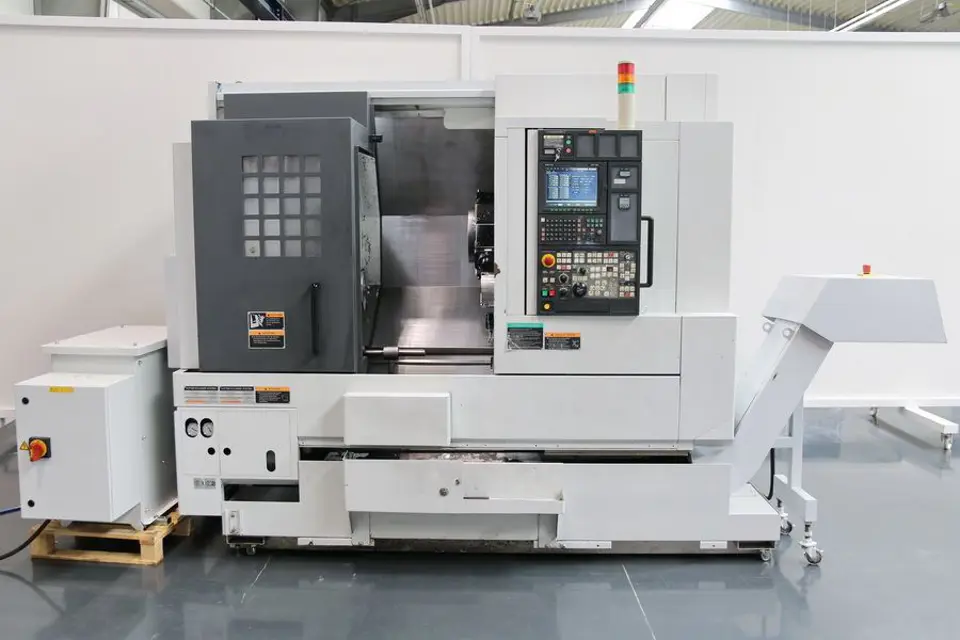
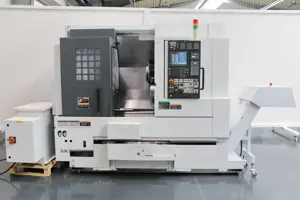
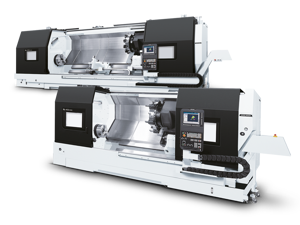
Mori Seiki CNC Turning Center NL3000MC/1250
Need answers fast?
Explore the manual using AI.
Turn manuals into instant answers
with your AI-powered assistantTurn manuals into instant answers
with your AI-powered assistant
Manual for Mori Seiki CNC Turning Center NL3000MC/1250
Complete asset maintenance, one click away
Get instant access to all the maintenance information you need. Empower technicians to perform preventive maintenance with asset packages, ready to use right out of the box.

Documents & Manuals
Find all the essential guides in one place.
 Tensioning Guide
- Belt-diagram
- C-120 pulleys
+ 13 more

Work Order Templates
Pre-built workflows to keep your asset running smoothly.
- Daily Electrical System Inspection
- Replace Roller and Pulley
- Install Engine B-120
+ 29 more

Procedures
Integrate maintenance plans directly into your work orders.
- Motion Industries
- Applied Industrial Technologies
- Electrical Brothers
+ 5 more

Parts
Access the parts list for your equipment in MaintainX.
- Drive Motor
- B2 Rollers
- Tensioning System
+ 40 more
Mori Seiki CNC Turning Center NL3000MC/1250
Create an account to install this asset package.
Maintenance Plans for Mori Seiki CNC Turning Center Model NL3000MC/1250
Integrate maintenance plans directly into your work orders in MaintainX.
Oil Level Check / Oil Replenishing
DANGER: Turn OFF the main power before performing maintenance work
CAUTION: If the oil level decreases rapidly, the pump unit or the machine may be malfunctioning. Contact the Mori Seiki Service Department for assistance.
CAUTION: Maintain oil at the correct level to prevent air being suctioned through the pump unit.
CAUTION: Keep oil free from contamination.
CAUTION: If foreign matter accumulates in the tank, oil cannot be kept free from contamination, causing pump damage.
CAUTION: Clogged radiator causes oil pressure to be raised.
CAUTION: Clogged suction strainer causes pumps and piping damage.
CAUTION: If the oil pressure setting is incorrect, hydraulic unit malfunction and damage may result.
For oil types, refer to “OILS” (page 59).

2000 Hourly Cooling Oil Replacement
WARNING: Ensure that the power is turned OFF when performing maintenance.
Main power turned OFF
Maintenance cover removed
Oil pan placed beneath the drain plug
Drain plug removed and all oil drained from the tank
Sealing tape wrapped around the threaded part of the plug
Drain plug replaced
Fill port cap removed
Enter the oil level
1 Daily Machining Chamber Cleaning
7 MACHINING CHAMBER
7-2 Cleaning Inside Machine
DANGER: Turn OFF the main power and disconnect the plant-side power supply (breaker).
CAUTION: 1. Do not use compressed air. [Machine failure due to chips and coolant entry]
2. To maintain machining accuracy, clean the machining chamber after completion of machining operations.
3. Do not touch chips without protective gloves. [Injuries]
Cleaning Slideway (Ball Screw) Protective Covers and Operator Door Rail
Clean off chips that have accumulated on the protective covers, e.g. with a broom.
Cleaning Cylinder Rear Section (Hollow Chuck Specifications)
800 Hourly High Pressure Pump Oil Replacement
WARNING: Do not operate the high pressure coolant unit or perform maintenance and inspections without reading and obtaining a thorough understanding of the contents of the operation manual provided with the high pressure coolant unit.
Keep the high pressure coolant unit operation manual on hand to enable immediate reference.
After the completion of the maintenance and inspections, remount all covers before running the machine.
Main power turned OFF before removing the rear cover?
Rear cover removed?
V-belt checked for wear, damage and looseness?
V-belt tension adjusted if necessary?
Drain tube placed in a drain pan?
Oil in the tank drained by slowly opening the drain plug?
1000 Hourly Electrical Cabinet Fan Cleaning
DANGER: Prior to opening the electrical cabinet door, take care to ensure the plant-side power supply (circuit breaker) is turned OFF. Even when the main switch on the electrical cabinet is turned OFF, parts in the cabinet may still hold residual current resulting in an electric shock if touched accidentally.
CAUTION: If foreign matter adheres to the fan, it impairs cooling performance. Clean the fan periodically.
Turn OFF the main power
Disconnect the plant-side power supply (breaker)
Open the electrical cabinet door
Remove the screws A and remove the fan body with the securing board
NOTE: Do not remove the screws B first. Otherwise, the fan body will fall.
Remove the power connector
Remove the screws B and remove the fan guard
Parts for Mori Seiki CNC Turning Center NL3000MC/1250
Access the parts list for your equipment in MaintainX.
Oil Tank 10 L
U00531A
Manifold BT-202-50-S, UK4619
U00536A
Manifold BT-102-50-S, UK4273-1
U00532A
Manifold BT-202-50-S, UK4276-1
U00533A
Pipe
R82684A
Oil Tank 10 L
U00531A
Manifold BT-202-50-S, UK4619
U00536A
Manifold BT-102-50-S, UK4273-1
U00532A
Manifold BT-202-50-S, UK4276-1
U00533A
Pipe
R82684A
Oil Tank 10 L
U00531A
Manifold BT-202-50-S, UK4619
U00536A
Manifold BT-102-50-S, UK4273-1
U00532A
Manifold BT-202-50-S, UK4276-1
U00533A
Pipe
R82684A
Unlock efficiency
with MaintainX CoPilot
MaintainX CoPilot is your expert colleague, on call 24/7, helping your team find the answers they need to keep equipment running.
Reduce Unplanned Downtime
Ensure your team follows consistent procedures to minimize equipment failures and costly delays.
Maximize Asset Availability
Keep your assets running longer and more reliably, with standardized maintenance workflows from OEM manuals.
Lower Maintenance Costs
Turn any technician into an expert to streamline operations, maintain more assets, and reduce overall costs.
Thousands of companies manage their assets with MaintainX

'%3e%3cpath%20fill='url(%23b)'%20d='M66.008%2080.068c-5.084-.786-9.763-3.834-12.442-8.68a16.942%2016.942%200%200%201-1.87-5.18c1.096.19%202.203.476%203.298.87%206.525%202.333%2010.836%207.68%2011.014%2012.99ZM51.47%2061.576c.488-5.524%203.62-10.716%208.847-13.597a17.132%2017.132%200%200%201%2011.335-1.882c-.798%208.145-7.43%2014.848-16.038%2015.599-1.417.119-2.799.07-4.144-.12Zm28.564-11.478a17.513%2017.513%200%200%201%203.727%204.62c4.608%208.335%201.584%2018.813-6.75%2023.409a16.988%2016.988%200%200%201-4.359%201.679%2019.624%2019.624%200%200%201-3.977-12.776c.346-7.561%204.942-13.931%2011.36-16.932Z'/%3e%3cpath%20fill='%23110F0D'%20fill-rule='evenodd'%20d='M142.831%2048.324h4.977V77.03h-4.977V48.324Zm27.278%2013.002c.322%201.048.453%202.263.453%203.62v12.073h-4.787V66.208c0-.75-.047-1.572-.154-2.143-.453-2.382-1.822-3.572-4.215-3.572-2.31%200-3.882%201.274-4.43%203.476-.143.596-.226%201.405-.226%202.25v10.8h-4.787V56.623h4.477v2.989c1.536-2.5%203.906-3.43%206.371-3.43%203.488%200%206.263%201.68%207.298%205.144Zm24.636%207.323c0%203.882-2.358%206.525-5.763%207.727-1.298.453-2.632.643-4.62.643h-10.169V48.324h9.085c1.691%200%203.156.143%204.049.38%203.465.93%205.727%203.68%205.727%207.335%200%202.441-.81%204.156-2.762%205.644%202.905%201.417%204.453%203.727%204.453%206.966Zm-15.634-8.656h4.584c1.024%200%201.917-.143%202.536-.417%201.215-.548%201.905-1.608%201.905-3.167%200-1.548-.643-2.572-1.845-3.132-.691-.31-1.762-.452-2.763-.452h-4.417v7.168Zm10.716%208.465c0-1.536-.893-3.37-3.227-3.893-.428-.095-1.036-.143-1.571-.143h-5.918v8.085h5.501c.56%200%201.429-.048%201.953-.167%201.94-.453%203.262-1.846%203.262-3.882Zm47.747-11.847-8.097%2020.408h-4.429l-8.109-20.408h5.191l5.192%2014.574%205.108-14.574h5.144Zm-20.218%2010.002c0%20.69-.036%201.262-.155%201.94h-15.943c.631%202.87%202.714%204.728%205.882%204.728%202.131%200%203.607-.882%204.703-2.525h4.87c-1.762%204.144-5.204%206.692-9.657%206.692-6.084%200-10.537-4.858-10.537-10.49%200-6.108%204.524-10.776%2010.335-10.776%206.239%200%2010.442%204.954%2010.502%2010.43Zm-4.763-1.405c-.333-2.846-2.643-4.858-5.691-4.858-2.894%200-5.287%201.929-5.621%204.858h11.312Zm-72.667%203.44c0%204.787-3.287%208.371-9.419%208.371H119.363V64.66c-1.917.274-3.87.69-5.811%201.238l4.537%2011.121h-5.418l-3.596-9.585c-5.144%202.084-10.085%205.216-14.217%209.585h-4.786L101.8%2048.312h4.56l5.68%2013.883a44.112%2044.112%200%200%201%207.323-1.774V48.312h9.084c1.703%200%203.156.143%204.061.393%203.453.929%205.727%203.667%205.727%207.323%200%201.917-.738%204.179-2.81%205.691%203.06%201.56%204.501%204.025%204.501%206.93Zm-15.634-8.667a62.664%2062.664%200%200%201%202.06-.036c1.703.012%203.239.131%204.608.37%201.441-.549%202.357-1.727%202.357-3.537%200-1.941-.881-3.144-2.488-3.667-.548-.18-1.358-.286-2.322-.286h-4.215v7.156Zm-16.55%203.905-3.715-9.894-6.394%2016.502c2.833-2.595%206.263-4.858%2010.109-6.608Zm27.254%204.74c0-2.775-3.131-4.347-8.513-4.418-.715%200-1.441.011-2.191.047v8.252h5.918c2.548%200%204.786-1.37%204.786-3.882Z'%20clip-rule='evenodd'/%3e%3c/g%3e%3cdefs%3e%3clinearGradient%20id='b'%20x1='51.47'%20x2='85.916'%20y1='62.946'%20y2='62.946'%20gradientUnits='userSpaceOnUse'%3e%3cstop%20stop-color='%23CD9F28'/%3e%3cstop%20offset='1'%20stop-color='%23ECD80B'/%3e%3c/linearGradient%3e%3cclipPath%20id='a'%3e%3cpath%20fill='%23fff'%20d='M51.47%2045.728h186.104V80.14H51.47z'/%3e%3c/clipPath%3e%3c/defs%3e%3c/svg%3e)


More from Mori Seiki


Explore Other Assets


© 2026 MaintainX. All rights reserved.