


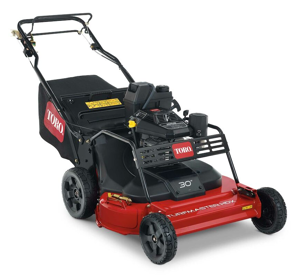
Toro Utility Machine 07299TC
Need answers fast?
Explore the manual using AI.

Turn manuals into instant answers
with your AI-powered assistantTurn manuals into instant answers
with your AI-powered assistant
Manual for Toro Utility Machine 07299TC
Complete asset maintenance, one click away
Get instant access to all the maintenance information you need. Empower technicians to perform preventive maintenance with asset packages, ready to use right out of the box.

Documents & Manuals
Find all the essential guides in one place.
 Tensioning Guide
- Belt-diagram
- C-120 pulleys
+ 13 more

Work Order Templates
Pre-built workflows to keep your asset running smoothly.
- Daily Electrical System Inspection
- Replace Roller and Pulley
- Install Engine B-120
+ 29 more

Procedures
Integrate maintenance plans directly into your work orders.
- Motion Industries
- Applied Industrial Technologies
- Electrical Brothers
+ 5 more

Parts
Access the parts list for your equipment in MaintainX.
- Drive Motor
- B2 Rollers
- Tensioning System
+ 40 more
Toro Utility Machine 07299TC
Create an account to install this asset package.
Maintenance Plans for Toro Utility Machine Model 07299TC
Integrate maintenance plans directly into your work orders in MaintainX.
25 Hourly Battery Cleaning
• Clean the batteries.
WARNING
Battery terminals or metal tools could short against metal components causing sparks. Sparks can cause the battery gasses to explode, resulting in personal injury.
• When removing or installing the battery, do not allow the battery terminals to touch any metal parts of the machine.
• Do not allow metal tools to short between the battery terminals and metal parts of the machine.
• Always keep the battery retainers in place to protect and secure the batteries.
Cleaning the Batteries
Service Interval: Every 25 hours
1. Ensure that all of the battery caps are tight.

1 Daily Battery Charging
• Charge the batteries.
A charger is supplied with the machine. Always keep the charger in a dry location. For maximum battery life, charge the batteries whenever you are not using the machine.
Depending on how discharged the batteries are, it may take up to 16 hours to charge the batteries to full capacity.
Important: Lead-acid batteries do not develop a charge memory and do not need to be fully discharged before charging them. Fully discharging the batteries may damage them. Charge the batteries any time the machine is not in use.
WARNING
Charging the battery produces gasses that can explode.
Never smoke near the batteries and keep sparks and flames away from them.
1. Position the machine in a well-ventilated area near a suitable power outlet.
2. Connect the charger cord to the charging receptacle on the machine (located on the panel between the seats).
1 Daily Utility Machine Maintenance
Check the tire pressure
Check the brake-fluid level
Park the machine on a level surface, set the parking brake, turn the On/Off switch to Off, and remove the key
Remove the rubber plug in the center and on top of the dash to gain access to the master brake cylinder and reservoir
Ensure that the fluid level is above the Minimum line
If the fluid level is low, clean the area around the cap, remove the cap, and fill the reservoir to above the Minimum line. Do not overfill
Check the brake and parking brake and adjust as needed
Check unusual operating noises
Check the tire pressure
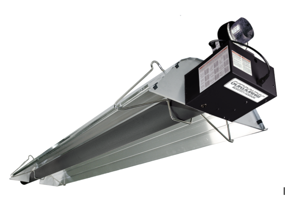
Headlights Replacement
Before performing any maintenance set the parking brake, turn the On/Off switch to Off, and remove the key.
Release the retaining straps on the hood and raise the hood to access the headlights.
Replacing the Bulbs
CAUTION
The halogen bulbs become extremely hot when in operation. Handling a hot bulb can cause severe burns and personal injury.
Always allow enough time to for the bulbs to cool before replacing them. Use care whenever handling the bulb.
CAUTION
Any surface contamination can damage the headlight bulb and leading to its failure or explosion creating a serious safety hazard.
Head light lamps should be handled without touching the clear quartz, either by using a clean paper towel or carefully holding the base.
800 Hourly Transaxle Oil Replacement
Change the transaxle oil.
Oil type
Oil capacity
Align a drain pan under the drain plug.
Remove the fill plug and the seal.
Note: Retain the fill plug and seal for installation in step 6.
Remove the drain plug and the seal, and allow the oil to drain completely.
Note: Retain the drain plug and seal for installation in step 4.
Install the drain plug and seal, and torque it to 20 to 27 N-m (15 to 20 ft-lb).
Unlock efficiency
with MaintainX CoPilot
MaintainX CoPilot is your expert colleague, on call 24/7, helping your team find the answers they need to keep equipment running.
Reduce Unplanned Downtime
Ensure your team follows consistent procedures to minimize equipment failures and costly delays.
Maximize Asset Availability
Keep your assets running longer and more reliably, with standardized maintenance workflows from OEM manuals.
Lower Maintenance Costs
Turn any technician into an expert to streamline operations, maintain more assets, and reduce overall costs.
Thousands of companies manage their assets with MaintainX

'%3e%3cpath%20fill='url(%23b)'%20d='M66.008%2080.068c-5.084-.786-9.763-3.834-12.442-8.68a16.942%2016.942%200%200%201-1.87-5.18c1.096.19%202.203.476%203.298.87%206.525%202.333%2010.836%207.68%2011.014%2012.99ZM51.47%2061.576c.488-5.524%203.62-10.716%208.847-13.597a17.132%2017.132%200%200%201%2011.335-1.882c-.798%208.145-7.43%2014.848-16.038%2015.599-1.417.119-2.799.07-4.144-.12Zm28.564-11.478a17.513%2017.513%200%200%201%203.727%204.62c4.608%208.335%201.584%2018.813-6.75%2023.409a16.988%2016.988%200%200%201-4.359%201.679%2019.624%2019.624%200%200%201-3.977-12.776c.346-7.561%204.942-13.931%2011.36-16.932Z'/%3e%3cpath%20fill='%23110F0D'%20fill-rule='evenodd'%20d='M142.831%2048.324h4.977V77.03h-4.977V48.324Zm27.278%2013.002c.322%201.048.453%202.263.453%203.62v12.073h-4.787V66.208c0-.75-.047-1.572-.154-2.143-.453-2.382-1.822-3.572-4.215-3.572-2.31%200-3.882%201.274-4.43%203.476-.143.596-.226%201.405-.226%202.25v10.8h-4.787V56.623h4.477v2.989c1.536-2.5%203.906-3.43%206.371-3.43%203.488%200%206.263%201.68%207.298%205.144Zm24.636%207.323c0%203.882-2.358%206.525-5.763%207.727-1.298.453-2.632.643-4.62.643h-10.169V48.324h9.085c1.691%200%203.156.143%204.049.38%203.465.93%205.727%203.68%205.727%207.335%200%202.441-.81%204.156-2.762%205.644%202.905%201.417%204.453%203.727%204.453%206.966Zm-15.634-8.656h4.584c1.024%200%201.917-.143%202.536-.417%201.215-.548%201.905-1.608%201.905-3.167%200-1.548-.643-2.572-1.845-3.132-.691-.31-1.762-.452-2.763-.452h-4.417v7.168Zm10.716%208.465c0-1.536-.893-3.37-3.227-3.893-.428-.095-1.036-.143-1.571-.143h-5.918v8.085h5.501c.56%200%201.429-.048%201.953-.167%201.94-.453%203.262-1.846%203.262-3.882Zm47.747-11.847-8.097%2020.408h-4.429l-8.109-20.408h5.191l5.192%2014.574%205.108-14.574h5.144Zm-20.218%2010.002c0%20.69-.036%201.262-.155%201.94h-15.943c.631%202.87%202.714%204.728%205.882%204.728%202.131%200%203.607-.882%204.703-2.525h4.87c-1.762%204.144-5.204%206.692-9.657%206.692-6.084%200-10.537-4.858-10.537-10.49%200-6.108%204.524-10.776%2010.335-10.776%206.239%200%2010.442%204.954%2010.502%2010.43Zm-4.763-1.405c-.333-2.846-2.643-4.858-5.691-4.858-2.894%200-5.287%201.929-5.621%204.858h11.312Zm-72.667%203.44c0%204.787-3.287%208.371-9.419%208.371H119.363V64.66c-1.917.274-3.87.69-5.811%201.238l4.537%2011.121h-5.418l-3.596-9.585c-5.144%202.084-10.085%205.216-14.217%209.585h-4.786L101.8%2048.312h4.56l5.68%2013.883a44.112%2044.112%200%200%201%207.323-1.774V48.312h9.084c1.703%200%203.156.143%204.061.393%203.453.929%205.727%203.667%205.727%207.323%200%201.917-.738%204.179-2.81%205.691%203.06%201.56%204.501%204.025%204.501%206.93Zm-15.634-8.667a62.664%2062.664%200%200%201%202.06-.036c1.703.012%203.239.131%204.608.37%201.441-.549%202.357-1.727%202.357-3.537%200-1.941-.881-3.144-2.488-3.667-.548-.18-1.358-.286-2.322-.286h-4.215v7.156Zm-16.55%203.905-3.715-9.894-6.394%2016.502c2.833-2.595%206.263-4.858%2010.109-6.608Zm27.254%204.74c0-2.775-3.131-4.347-8.513-4.418-.715%200-1.441.011-2.191.047v8.252h5.918c2.548%200%204.786-1.37%204.786-3.882Z'%20clip-rule='evenodd'/%3e%3c/g%3e%3cdefs%3e%3clinearGradient%20id='b'%20x1='51.47'%20x2='85.916'%20y1='62.946'%20y2='62.946'%20gradientUnits='userSpaceOnUse'%3e%3cstop%20stop-color='%23CD9F28'/%3e%3cstop%20offset='1'%20stop-color='%23ECD80B'/%3e%3c/linearGradient%3e%3cclipPath%20id='a'%3e%3cpath%20fill='%23fff'%20d='M51.47%2045.728h186.104V80.14H51.47z'/%3e%3c/clipPath%3e%3c/defs%3e%3c/svg%3e)


More from Toro


Explore Other Assets


© 2026 MaintainX. All rights reserved.