


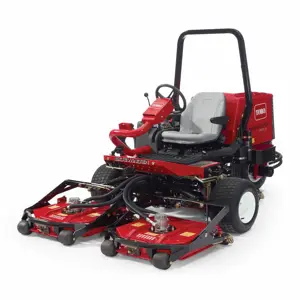
Toro Snowthrower 38754
Need answers fast?
Explore the manual using AI.

Turn manuals into instant answers
with your AI-powered assistantTurn manuals into instant answers
with your AI-powered assistant
Manual for Toro Snowthrower 38754
Complete asset maintenance, one click away
Get instant access to all the maintenance information you need. Empower technicians to perform preventive maintenance with asset packages, ready to use right out of the box.

Documents & Manuals
Find all the essential guides in one place.
 Tensioning Guide
- Belt-diagram
- C-120 pulleys
+ 13 more

Work Order Templates
Pre-built workflows to keep your asset running smoothly.
- Daily Electrical System Inspection
- Replace Roller and Pulley
- Install Engine B-120
+ 29 more

Procedures
Integrate maintenance plans directly into your work orders.
- Motion Industries
- Applied Industrial Technologies
- Electrical Brothers
+ 5 more

Parts
Access the parts list for your equipment in MaintainX.
- Drive Motor
- B2 Rollers
- Tensioning System
+ 40 more
Toro Snowthrower 38754
Create an account to install this asset package.
Maintenance Plans for Toro Snowthrower Model 38754
Integrate maintenance plans directly into your work orders in MaintainX.
Initial 2 Hours Engine Oil Replacement
Warning: Warm oil flows better and carries more contaminants.
There is residual oil in the crankcase after you drain the oil. Do not pour the entire capacity of oil into the crankcase.
Siphon the fuel from the fuel tank into an approved fuel container, or run the engine until it shuts off.
Move the machine to a level surface.
Place an oil-drain pan under the oil-drain plug, remove the plug, and tip the machine backward and drain the used oil in the pan.
After draining the used oil, return the machine to the operating position.
Install the oil-drain plug and tighten it securely.
Clean around the oil fill/dipstick.
Unscrew the dipstick and remove it.

Drive Belt Replacement
If the drive belt becomes worn, oil-soaked, excessively cracked, frayed, or otherwise damaged, replace the belt.
1. Remove the drive-belt cover by removing the 3 bolts.
2. Unhook the brake spring from the idler arm to release the belt tension.
3. Remove the screw and curved washer that holds the rotor pulley.
4. Remove the rotor pulley and the drive belt.
5. Install the new drive belt, routing it.
Note: Route the new drive belt first around the engine pulley, then the idler pulley, and finally around the loose rotor pulley positioned just above the rotor shaft.
6. Install the rotor pulley onto the rotor shaft.
7. Install the curved washer and the rotor-pulley bolt and tighten them securely.
100 Hourly Spark Plugs Replacement
WARNING: Replacing the spark plug while the engine is hot can result in burns. Wait until the engine is cool to replace the spark plug.
Type of spark plug used
Boot removed
Area around the base of the spark plug cleaned
Old spark plug removed and discarded
Note: You will need a ratchet wrench extension to remove the spark plug.
Gap between the electrodes on a new spark plug
Sign off on the spark plug replacement
1 Yearly Snowthrower Maintenance
Check the control cable and adjust it if necessary.
Inspect the rotor blades and have an Authorized Service Dealer replace the rotor blades and scraper if necessary.
Before each session, inspect the rotor blades for wear. When a rotor-blade edge has worn down to the wear-indicator hole, have an Authorized Service Dealer replace the rotor blades and the scraper.
Change the engine oil.
Initial 1 Hour Cables Check
Warning: This procedure requires trained personnel with PPE!
Check the control cable and adjust it if necessary.
Move the control bar back toward the handle to remove the slack in the control cable.
Ensure that a 2 to 3 mm (1/16 to 1/8 inch) gap exists between the control bar and the handle.
The control cable must contain some slack when you disengage the control bar for the rotor blades to stop properly.
Slide up the spring cover and unhook the spring from the adjuster link.
Move the Z-fitting to a higher or lower hole on the adjuster link as needed to obtain the 2 to 3 mm (1/16 to 1/8 inch) gap between the control bar and the handle.
Hook the spring to the adjuster link and slide the spring cover over the adjuster link.
Check the adjustment.
Unlock efficiency
with MaintainX CoPilot
MaintainX CoPilot is your expert colleague, on call 24/7, helping your team find the answers they need to keep equipment running.
Reduce Unplanned Downtime
Ensure your team follows consistent procedures to minimize equipment failures and costly delays.
Maximize Asset Availability
Keep your assets running longer and more reliably, with standardized maintenance workflows from OEM manuals.
Lower Maintenance Costs
Turn any technician into an expert to streamline operations, maintain more assets, and reduce overall costs.
Thousands of companies manage their assets with MaintainX

'%3e%3cpath%20fill='url(%23b)'%20d='M66.008%2080.068c-5.084-.786-9.763-3.834-12.442-8.68a16.942%2016.942%200%200%201-1.87-5.18c1.096.19%202.203.476%203.298.87%206.525%202.333%2010.836%207.68%2011.014%2012.99ZM51.47%2061.576c.488-5.524%203.62-10.716%208.847-13.597a17.132%2017.132%200%200%201%2011.335-1.882c-.798%208.145-7.43%2014.848-16.038%2015.599-1.417.119-2.799.07-4.144-.12Zm28.564-11.478a17.513%2017.513%200%200%201%203.727%204.62c4.608%208.335%201.584%2018.813-6.75%2023.409a16.988%2016.988%200%200%201-4.359%201.679%2019.624%2019.624%200%200%201-3.977-12.776c.346-7.561%204.942-13.931%2011.36-16.932Z'/%3e%3cpath%20fill='%23110F0D'%20fill-rule='evenodd'%20d='M142.831%2048.324h4.977V77.03h-4.977V48.324Zm27.278%2013.002c.322%201.048.453%202.263.453%203.62v12.073h-4.787V66.208c0-.75-.047-1.572-.154-2.143-.453-2.382-1.822-3.572-4.215-3.572-2.31%200-3.882%201.274-4.43%203.476-.143.596-.226%201.405-.226%202.25v10.8h-4.787V56.623h4.477v2.989c1.536-2.5%203.906-3.43%206.371-3.43%203.488%200%206.263%201.68%207.298%205.144Zm24.636%207.323c0%203.882-2.358%206.525-5.763%207.727-1.298.453-2.632.643-4.62.643h-10.169V48.324h9.085c1.691%200%203.156.143%204.049.38%203.465.93%205.727%203.68%205.727%207.335%200%202.441-.81%204.156-2.762%205.644%202.905%201.417%204.453%203.727%204.453%206.966Zm-15.634-8.656h4.584c1.024%200%201.917-.143%202.536-.417%201.215-.548%201.905-1.608%201.905-3.167%200-1.548-.643-2.572-1.845-3.132-.691-.31-1.762-.452-2.763-.452h-4.417v7.168Zm10.716%208.465c0-1.536-.893-3.37-3.227-3.893-.428-.095-1.036-.143-1.571-.143h-5.918v8.085h5.501c.56%200%201.429-.048%201.953-.167%201.94-.453%203.262-1.846%203.262-3.882Zm47.747-11.847-8.097%2020.408h-4.429l-8.109-20.408h5.191l5.192%2014.574%205.108-14.574h5.144Zm-20.218%2010.002c0%20.69-.036%201.262-.155%201.94h-15.943c.631%202.87%202.714%204.728%205.882%204.728%202.131%200%203.607-.882%204.703-2.525h4.87c-1.762%204.144-5.204%206.692-9.657%206.692-6.084%200-10.537-4.858-10.537-10.49%200-6.108%204.524-10.776%2010.335-10.776%206.239%200%2010.442%204.954%2010.502%2010.43Zm-4.763-1.405c-.333-2.846-2.643-4.858-5.691-4.858-2.894%200-5.287%201.929-5.621%204.858h11.312Zm-72.667%203.44c0%204.787-3.287%208.371-9.419%208.371H119.363V64.66c-1.917.274-3.87.69-5.811%201.238l4.537%2011.121h-5.418l-3.596-9.585c-5.144%202.084-10.085%205.216-14.217%209.585h-4.786L101.8%2048.312h4.56l5.68%2013.883a44.112%2044.112%200%200%201%207.323-1.774V48.312h9.084c1.703%200%203.156.143%204.061.393%203.453.929%205.727%203.667%205.727%207.323%200%201.917-.738%204.179-2.81%205.691%203.06%201.56%204.501%204.025%204.501%206.93Zm-15.634-8.667a62.664%2062.664%200%200%201%202.06-.036c1.703.012%203.239.131%204.608.37%201.441-.549%202.357-1.727%202.357-3.537%200-1.941-.881-3.144-2.488-3.667-.548-.18-1.358-.286-2.322-.286h-4.215v7.156Zm-16.55%203.905-3.715-9.894-6.394%2016.502c2.833-2.595%206.263-4.858%2010.109-6.608Zm27.254%204.74c0-2.775-3.131-4.347-8.513-4.418-.715%200-1.441.011-2.191.047v8.252h5.918c2.548%200%204.786-1.37%204.786-3.882Z'%20clip-rule='evenodd'/%3e%3c/g%3e%3cdefs%3e%3clinearGradient%20id='b'%20x1='51.47'%20x2='85.916'%20y1='62.946'%20y2='62.946'%20gradientUnits='userSpaceOnUse'%3e%3cstop%20stop-color='%23CD9F28'/%3e%3cstop%20offset='1'%20stop-color='%23ECD80B'/%3e%3c/linearGradient%3e%3cclipPath%20id='a'%3e%3cpath%20fill='%23fff'%20d='M51.47%2045.728h186.104V80.14H51.47z'/%3e%3c/clipPath%3e%3c/defs%3e%3c/svg%3e)


More from Toro


Explore Other Assets


© 2026 MaintainX. All rights reserved.