


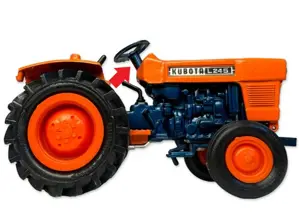
Kubota Utility Vehicle RTV-X1140
Need answers fast?
Explore the manual using AI.
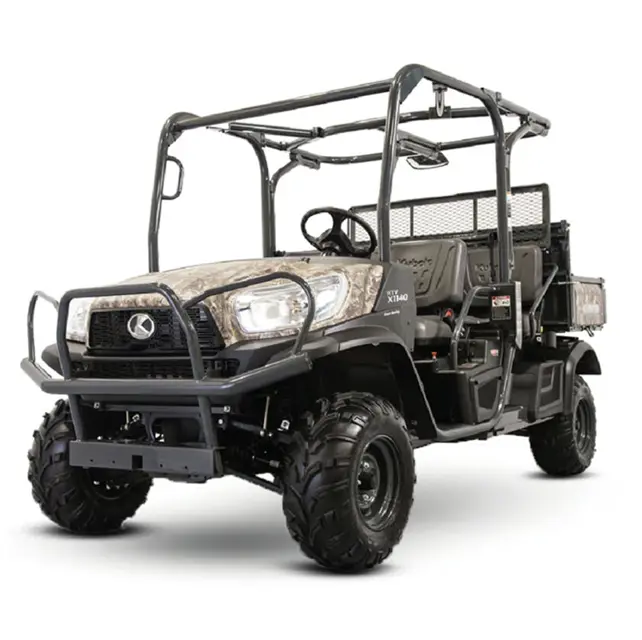
The Kubota Utility Vehicle RTV-X1140 is a versatile and robust model designed for various industrial applications. Known for its durability and performance, this utility vehicle excels in transporting materials and personnel across challenging terrains, making it an essential asset for any operation.
Turn manuals into instant answers
with your AI-powered assistantTurn manuals into instant answers
with your AI-powered assistant
Complete asset maintenance, one click away
Get instant access to all the maintenance information you need. Empower technicians to perform preventive maintenance with asset packages, ready to use right out of the box.

Documents & Manuals
Find all the essential guides in one place.
 Tensioning Guide
- Belt-diagram
- C-120 pulleys
+ 13 more

Work Order Templates
Pre-built workflows to keep your asset running smoothly.
- Daily Electrical System Inspection
- Replace Roller and Pulley
- Install Engine B-120
+ 29 more

Procedures
Integrate maintenance plans directly into your work orders.
- Motion Industries
- Applied Industrial Technologies
- Electrical Brothers
+ 5 more

Parts
Access the parts list for your equipment in MaintainX.
- Drive Motor
- B2 Rollers
- Tensioning System
+ 40 more
Kubota Utility Vehicle RTV-X1140
Create an account to install this asset package.
Maintenance Plans for Kubota Utility Vehicle Model RTV-X1140
Integrate maintenance plans directly into your work orders in MaintainX.
4 Yearly Maintennance
Remove the reservoir (3) from master cylinder body (1)
Pushing in the piston (4), remove the internal snap ring (2)
Remove the piston from master cylinder body
Pushing in the secondary piston (8), remove the stop pin (6)
Remove the secondary piston from master cylinder body
NOTE: Keep the disassembled parts in order and prevent them from being contaminated with dust or dirt. (When reassembling)
Wash the disassembled parts with the brake fluid and clean each port with the compressed air
Install the new grommet in the reservoir tank
Apply the brake fluid to the piston cup (11) and (12)

200 Hourly Replacement
Replacing Transmission Oil Filter (VHT)
• Be sure to stop the engine before changing the oil filter.
• Allow engine to cool down sufficiently, oil can be hot and can burn.
1. Park the vehicle on a flat surface.
2. Remove the rear guard.
3. Remove the oil filter.
4. Put a film of clean transmission oil on the rubber seal of the new filter.
5. Quickly tighten the filter by hand until it contacts the mounting surface, then, with a filter wrench, tighten it an additional 1/2 turn only.
6. After the new filter has been replaced, fill the transmission oil up to the upper notch on the dipstick.
100 Hourly Maintenance
Checking VHT Neutral Spring
1. Park the vehicle on a flat place.
2. Set the parking brake.
3. Shift the range gear shift lever to the NEUTRAL position.
4. Lock the hydraulic lift cylinder lever to the NEUTRAL position with restricting plate.
5. Start the engine.
6. Make sure that the rotation speed of the engine returns to the idling rotation immediately when taking the foot off the pedal, after depressing the speed control pedal several times.
7. If does not operate normally check the linkage.
Checking VHT Pressure Release
Replacing Fuse
Warning: Disconnect the negative cable of the battery before starting the procedure.
Maintenance cover under the left side of the rear seat turned over
Fuse box cover removed
Blown fuse pulled out using FUSE PULLER in the fuse box
New fuse inserted into the fuse box
Fuse box cover and the maintenance cover installed
Negative battery cable connected
Sign off on the fuse replacement
400 Hourly Replacement
Warning: Stop the engine before changing the oil. Allow engine to cool down sufficiently, oil can be hot and can burn.
Vehicle parked on a level surface
Cargo bed raised and safety support mounted
Drain plug at the bottom of the transmission case removed
Upload a photo of the drained oil
Drain plug reinstalled after draining
Amount of KUBOTA SUPER UDT fluid filled
Engine run for a few minutes and oil level checked again
Important: Do not operate the vehicle immediately after changing the transmission fluid. Run the engine at medium speed for a few minutes to prevent damage to the transmission.
Parts for Kubota Utility Vehicle RTV-X1140
Access the parts list for your equipment in MaintainX.
Adaptor
RCT-2A-30S
Relief Valve Pressure Tester
07916-50045
Diesel Engine Compression Tester (Glow Plug)
07909-39081
Red Check
07909-31371
Adaptor
07916-52391
Adaptor
RCT-2A-30S
Relief Valve Pressure Tester
07916-50045
Diesel Engine Compression Tester (Glow Plug)
07909-39081
Red Check
07909-31371
Adaptor
07916-52391
Adaptor
RCT-2A-30S
Relief Valve Pressure Tester
07916-50045
Diesel Engine Compression Tester (Glow Plug)
07909-39081
Red Check
07909-31371
Adaptor
07916-52391
Unlock efficiency
with MaintainX CoPilot
MaintainX CoPilot is your expert colleague, on call 24/7, helping your team find the answers they need to keep equipment running.
Reduce Unplanned Downtime
Ensure your team follows consistent procedures to minimize equipment failures and costly delays.
Maximize Asset Availability
Keep your assets running longer and more reliably, with standardized maintenance workflows from OEM manuals.
Lower Maintenance Costs
Turn any technician into an expert to streamline operations, maintain more assets, and reduce overall costs.
Thousands of companies manage their assets with MaintainX

'%3e%3cpath%20fill='url(%23b)'%20d='M66.008%2080.068c-5.084-.786-9.763-3.834-12.442-8.68a16.942%2016.942%200%200%201-1.87-5.18c1.096.19%202.203.476%203.298.87%206.525%202.333%2010.836%207.68%2011.014%2012.99ZM51.47%2061.576c.488-5.524%203.62-10.716%208.847-13.597a17.132%2017.132%200%200%201%2011.335-1.882c-.798%208.145-7.43%2014.848-16.038%2015.599-1.417.119-2.799.07-4.144-.12Zm28.564-11.478a17.513%2017.513%200%200%201%203.727%204.62c4.608%208.335%201.584%2018.813-6.75%2023.409a16.988%2016.988%200%200%201-4.359%201.679%2019.624%2019.624%200%200%201-3.977-12.776c.346-7.561%204.942-13.931%2011.36-16.932Z'/%3e%3cpath%20fill='%23110F0D'%20fill-rule='evenodd'%20d='M142.831%2048.324h4.977V77.03h-4.977V48.324Zm27.278%2013.002c.322%201.048.453%202.263.453%203.62v12.073h-4.787V66.208c0-.75-.047-1.572-.154-2.143-.453-2.382-1.822-3.572-4.215-3.572-2.31%200-3.882%201.274-4.43%203.476-.143.596-.226%201.405-.226%202.25v10.8h-4.787V56.623h4.477v2.989c1.536-2.5%203.906-3.43%206.371-3.43%203.488%200%206.263%201.68%207.298%205.144Zm24.636%207.323c0%203.882-2.358%206.525-5.763%207.727-1.298.453-2.632.643-4.62.643h-10.169V48.324h9.085c1.691%200%203.156.143%204.049.38%203.465.93%205.727%203.68%205.727%207.335%200%202.441-.81%204.156-2.762%205.644%202.905%201.417%204.453%203.727%204.453%206.966Zm-15.634-8.656h4.584c1.024%200%201.917-.143%202.536-.417%201.215-.548%201.905-1.608%201.905-3.167%200-1.548-.643-2.572-1.845-3.132-.691-.31-1.762-.452-2.763-.452h-4.417v7.168Zm10.716%208.465c0-1.536-.893-3.37-3.227-3.893-.428-.095-1.036-.143-1.571-.143h-5.918v8.085h5.501c.56%200%201.429-.048%201.953-.167%201.94-.453%203.262-1.846%203.262-3.882Zm47.747-11.847-8.097%2020.408h-4.429l-8.109-20.408h5.191l5.192%2014.574%205.108-14.574h5.144Zm-20.218%2010.002c0%20.69-.036%201.262-.155%201.94h-15.943c.631%202.87%202.714%204.728%205.882%204.728%202.131%200%203.607-.882%204.703-2.525h4.87c-1.762%204.144-5.204%206.692-9.657%206.692-6.084%200-10.537-4.858-10.537-10.49%200-6.108%204.524-10.776%2010.335-10.776%206.239%200%2010.442%204.954%2010.502%2010.43Zm-4.763-1.405c-.333-2.846-2.643-4.858-5.691-4.858-2.894%200-5.287%201.929-5.621%204.858h11.312Zm-72.667%203.44c0%204.787-3.287%208.371-9.419%208.371H119.363V64.66c-1.917.274-3.87.69-5.811%201.238l4.537%2011.121h-5.418l-3.596-9.585c-5.144%202.084-10.085%205.216-14.217%209.585h-4.786L101.8%2048.312h4.56l5.68%2013.883a44.112%2044.112%200%200%201%207.323-1.774V48.312h9.084c1.703%200%203.156.143%204.061.393%203.453.929%205.727%203.667%205.727%207.323%200%201.917-.738%204.179-2.81%205.691%203.06%201.56%204.501%204.025%204.501%206.93Zm-15.634-8.667a62.664%2062.664%200%200%201%202.06-.036c1.703.012%203.239.131%204.608.37%201.441-.549%202.357-1.727%202.357-3.537%200-1.941-.881-3.144-2.488-3.667-.548-.18-1.358-.286-2.322-.286h-4.215v7.156Zm-16.55%203.905-3.715-9.894-6.394%2016.502c2.833-2.595%206.263-4.858%2010.109-6.608Zm27.254%204.74c0-2.775-3.131-4.347-8.513-4.418-.715%200-1.441.011-2.191.047v8.252h5.918c2.548%200%204.786-1.37%204.786-3.882Z'%20clip-rule='evenodd'/%3e%3c/g%3e%3cdefs%3e%3clinearGradient%20id='b'%20x1='51.47'%20x2='85.916'%20y1='62.946'%20y2='62.946'%20gradientUnits='userSpaceOnUse'%3e%3cstop%20stop-color='%23CD9F28'/%3e%3cstop%20offset='1'%20stop-color='%23ECD80B'/%3e%3c/linearGradient%3e%3cclipPath%20id='a'%3e%3cpath%20fill='%23fff'%20d='M51.47%2045.728h186.104V80.14H51.47z'/%3e%3c/clipPath%3e%3c/defs%3e%3c/svg%3e)


More from Kubota


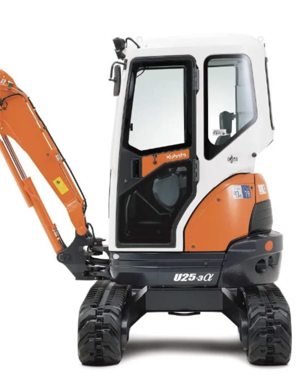
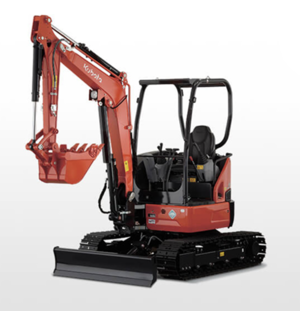
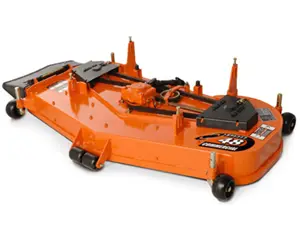


Explore Other Assets


© 2026 MaintainX. All rights reserved.