


Kubota Zero Turn Mower ZD1211
Need answers fast?
Explore the manual using AI.

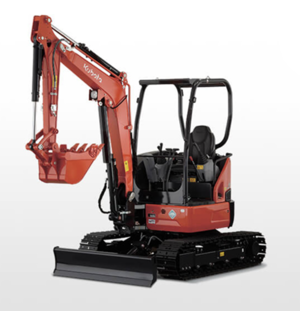
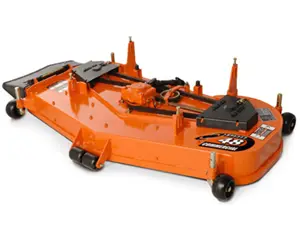
The Kubota Zero Turn Mower ZD1211 is a high-performance commercial-grade mower designed for efficiency and precision. With its powerful engine and advanced features, it delivers exceptional cutting performance, making it ideal for professional landscapers and homeowners alike.
Turn manuals into instant answers
with your AI-powered assistantTurn manuals into instant answers
with your AI-powered assistant
Manual for Kubota Zero Turn Mower ZD1211
Complete asset maintenance, one click away
Get instant access to all the maintenance information you need. Empower technicians to perform preventive maintenance with asset packages, ready to use right out of the box.

Documents & Manuals
Find all the essential guides in one place.
 Tensioning Guide
- Belt-diagram
- C-120 pulleys
+ 13 more

Work Order Templates
Pre-built workflows to keep your asset running smoothly.
- Daily Electrical System Inspection
- Replace Roller and Pulley
- Install Engine B-120
+ 29 more

Procedures
Integrate maintenance plans directly into your work orders.
- Motion Industries
- Applied Industrial Technologies
- Electrical Brothers
+ 5 more

Parts
Access the parts list for your equipment in MaintainX.
- Drive Motor
- B2 Rollers
- Tensioning System
+ 40 more
Kubota Zero Turn Mower ZD1211
Create an account to install this asset package.
Maintenance Plans for Kubota Zero Turn Mower Model ZD1211
Integrate maintenance plans directly into your work orders in MaintainX.
100 Hourly Zero Turn Mower Lubrication
⚠ WARNING
To avoid serious injury or death:
• Be sure to stop the engine and remove the key before greasing
Grease the following location
If you operated the machine in extremely wet and muddy conditions, lubricate grease fittings more often
Greasing Locations:
1 Front mower link bushing (2 places)
2 Rear mower link bushing (4 places)
3 Front mower link

100 Hourly Fuel Filter Check
⚠ WARNING: To avoid serious injury or death, be sure to stop the engine and remove the key when attempting to make the following checks and changes. Never fail to check the fuel lines periodically. The fuel lines are subject to wear and aging. Fuel may leak out onto the running engine, causing a fire.
Open the step and hood
Close the fuel valves below the fuel tanks LH and RH
The fuel line is made of rubber and ages regardless of service period.
If the fuel line and clamps are found damaged or deteriorated, replace them
Check the fuel filter, if it is clogged by debris or contaminated with water, replace it
IMPORTANT: When the fuel line is disconnected for maintenance or repair, close both ends of the fuel line with a piece of clean cloth or paper to prevent dust and dirt from entering. In addition, particular care must be taken not to admit dust and dirt into the fuel pump. Entrance of even a small amount of dust or dirt can cause premature wear and malfunction of the fuel pump and injector components.
Sign off on the fuel filter check
400 Hourly Transmission Fluid and Rear Axle Gear Case Oil Replacement
⚠ WARNING
To avoid serious injury or death:
• Be sure to stop the engine and remove the key before changing or checking the oil
• Allow transmission case to cool down sufficiently; oil can be hot and may cause burns
Transmission Fluid and Rear Axle Gear Case Oil Change Procedure:
1 To drain the transmission oil, place an oil pan underneath the transmission case and the rear axle gear case (RH & LH), and remove the drain plug at the bottom of the transmission case and the rear axle gear case (RH & LH)
2 After draining, reinstall the drain plugs
3 Fill with UDT or SUPER UDT hydrostatic transmission fluid or its equivalent up to the upper line of the gauge
IMPORTANT:
200 Hourly Front Axle Pivot Adjustment
Warning: Ensure the machine is securely blocked before starting the procedure
Machine securely blocked?
Measure the clearance (L) between the front axle (4) and front axle support (3)
Is the measurement within the allowable limit?
If the measurement exceeds the allowable limit, adjust the nut (1)
Is the front axle oscillating smoothly by hand after adjustment?
Sign off on the front axle pivot adjustment
50 Hourly Gear Box Oil Level Check
⚠ WARNING: To avoid serious injury or death, always stop the engine and remove the key before checking oil
Machine parked on a flat surface and mower lowered to the ground
Oil inlet plug with gauge loosened, wiped clean, reinstalled and loosened again
Oil level between the notch and tip
Is the oil level too low?
If the level is too low, add new oil to the prescribed level at the oil inlet (See 'LUBRICANTS, FUEL AND COOLANT' in 'PERIODIC SERVICE' section)
Oil inlet plug with gauge securely reinstalled after checking
Parts for Kubota Zero Turn Mower ZD1211
Access the parts list for your equipment in MaintainX.
Perdiodic Service Chart Label (Spanish)
K3441-6553-2
Perdiodic Service Chart Label (English)
K3441-6552-3
Perdiodic Service Chart Label (Spanish)
K3441-6553-2
Perdiodic Service Chart Label (English)
K3441-6552-3
Perdiodic Service Chart Label (Spanish)
K3441-6553-2
Perdiodic Service Chart Label (English)
K3441-6552-3
Unlock efficiency
with MaintainX CoPilot
MaintainX CoPilot is your expert colleague, on call 24/7, helping your team find the answers they need to keep equipment running.
Reduce Unplanned Downtime
Ensure your team follows consistent procedures to minimize equipment failures and costly delays.
Maximize Asset Availability
Keep your assets running longer and more reliably, with standardized maintenance workflows from OEM manuals.
Lower Maintenance Costs
Turn any technician into an expert to streamline operations, maintain more assets, and reduce overall costs.
Thousands of companies manage their assets with MaintainX

'%3e%3cpath%20fill='url(%23b)'%20d='M66.008%2080.068c-5.084-.786-9.763-3.834-12.442-8.68a16.942%2016.942%200%200%201-1.87-5.18c1.096.19%202.203.476%203.298.87%206.525%202.333%2010.836%207.68%2011.014%2012.99ZM51.47%2061.576c.488-5.524%203.62-10.716%208.847-13.597a17.132%2017.132%200%200%201%2011.335-1.882c-.798%208.145-7.43%2014.848-16.038%2015.599-1.417.119-2.799.07-4.144-.12Zm28.564-11.478a17.513%2017.513%200%200%201%203.727%204.62c4.608%208.335%201.584%2018.813-6.75%2023.409a16.988%2016.988%200%200%201-4.359%201.679%2019.624%2019.624%200%200%201-3.977-12.776c.346-7.561%204.942-13.931%2011.36-16.932Z'/%3e%3cpath%20fill='%23110F0D'%20fill-rule='evenodd'%20d='M142.831%2048.324h4.977V77.03h-4.977V48.324Zm27.278%2013.002c.322%201.048.453%202.263.453%203.62v12.073h-4.787V66.208c0-.75-.047-1.572-.154-2.143-.453-2.382-1.822-3.572-4.215-3.572-2.31%200-3.882%201.274-4.43%203.476-.143.596-.226%201.405-.226%202.25v10.8h-4.787V56.623h4.477v2.989c1.536-2.5%203.906-3.43%206.371-3.43%203.488%200%206.263%201.68%207.298%205.144Zm24.636%207.323c0%203.882-2.358%206.525-5.763%207.727-1.298.453-2.632.643-4.62.643h-10.169V48.324h9.085c1.691%200%203.156.143%204.049.38%203.465.93%205.727%203.68%205.727%207.335%200%202.441-.81%204.156-2.762%205.644%202.905%201.417%204.453%203.727%204.453%206.966Zm-15.634-8.656h4.584c1.024%200%201.917-.143%202.536-.417%201.215-.548%201.905-1.608%201.905-3.167%200-1.548-.643-2.572-1.845-3.132-.691-.31-1.762-.452-2.763-.452h-4.417v7.168Zm10.716%208.465c0-1.536-.893-3.37-3.227-3.893-.428-.095-1.036-.143-1.571-.143h-5.918v8.085h5.501c.56%200%201.429-.048%201.953-.167%201.94-.453%203.262-1.846%203.262-3.882Zm47.747-11.847-8.097%2020.408h-4.429l-8.109-20.408h5.191l5.192%2014.574%205.108-14.574h5.144Zm-20.218%2010.002c0%20.69-.036%201.262-.155%201.94h-15.943c.631%202.87%202.714%204.728%205.882%204.728%202.131%200%203.607-.882%204.703-2.525h4.87c-1.762%204.144-5.204%206.692-9.657%206.692-6.084%200-10.537-4.858-10.537-10.49%200-6.108%204.524-10.776%2010.335-10.776%206.239%200%2010.442%204.954%2010.502%2010.43Zm-4.763-1.405c-.333-2.846-2.643-4.858-5.691-4.858-2.894%200-5.287%201.929-5.621%204.858h11.312Zm-72.667%203.44c0%204.787-3.287%208.371-9.419%208.371H119.363V64.66c-1.917.274-3.87.69-5.811%201.238l4.537%2011.121h-5.418l-3.596-9.585c-5.144%202.084-10.085%205.216-14.217%209.585h-4.786L101.8%2048.312h4.56l5.68%2013.883a44.112%2044.112%200%200%201%207.323-1.774V48.312h9.084c1.703%200%203.156.143%204.061.393%203.453.929%205.727%203.667%205.727%207.323%200%201.917-.738%204.179-2.81%205.691%203.06%201.56%204.501%204.025%204.501%206.93Zm-15.634-8.667a62.664%2062.664%200%200%201%202.06-.036c1.703.012%203.239.131%204.608.37%201.441-.549%202.357-1.727%202.357-3.537%200-1.941-.881-3.144-2.488-3.667-.548-.18-1.358-.286-2.322-.286h-4.215v7.156Zm-16.55%203.905-3.715-9.894-6.394%2016.502c2.833-2.595%206.263-4.858%2010.109-6.608Zm27.254%204.74c0-2.775-3.131-4.347-8.513-4.418-.715%200-1.441.011-2.191.047v8.252h5.918c2.548%200%204.786-1.37%204.786-3.882Z'%20clip-rule='evenodd'/%3e%3c/g%3e%3cdefs%3e%3clinearGradient%20id='b'%20x1='51.47'%20x2='85.916'%20y1='62.946'%20y2='62.946'%20gradientUnits='userSpaceOnUse'%3e%3cstop%20stop-color='%23CD9F28'/%3e%3cstop%20offset='1'%20stop-color='%23ECD80B'/%3e%3c/linearGradient%3e%3cclipPath%20id='a'%3e%3cpath%20fill='%23fff'%20d='M51.47%2045.728h186.104V80.14H51.47z'/%3e%3c/clipPath%3e%3c/defs%3e%3c/svg%3e)


More from Kubota


Explore Other Assets


© 2026 MaintainX. All rights reserved.