


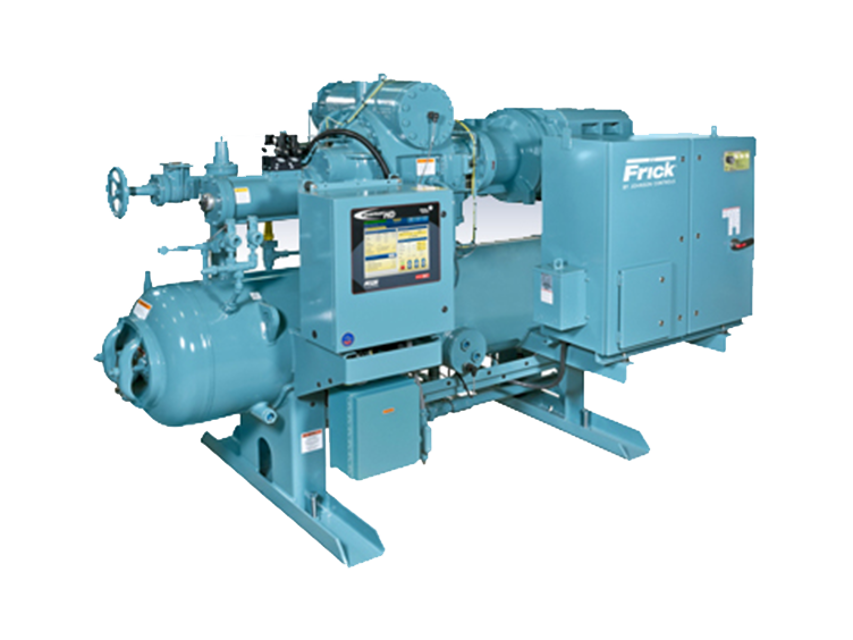
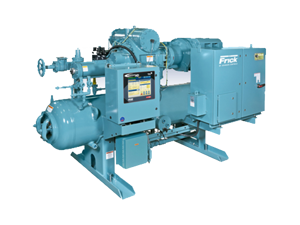
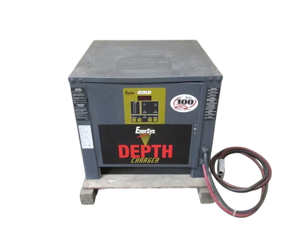
Frick Rotary Screw Compressor RWF II 480
Need answers fast?
Explore the manual using AI.
Turn manuals into instant answers
with your AI-powered assistantTurn manuals into instant answers
with your AI-powered assistant
Manual for Frick Rotary Screw Compressor RWF II 480
Complete asset maintenance, one click away
Get instant access to all the maintenance information you need. Empower technicians to perform preventive maintenance with asset packages, ready to use right out of the box.

Documents & Manuals
Find all the essential guides in one place.
 Tensioning Guide
- Belt-diagram
- C-120 pulleys
+ 13 more

Work Order Templates
Pre-built workflows to keep your asset running smoothly.
- Daily Electrical System Inspection
- Replace Roller and Pulley
- Install Engine B-120
+ 29 more

Procedures
Integrate maintenance plans directly into your work orders.
- Motion Industries
- Applied Industrial Technologies
- Electrical Brothers
+ 5 more

Parts
Access the parts list for your equipment in MaintainX.
- Drive Motor
- B2 Rollers
- Tensioning System
+ 40 more
Frick Rotary Screw Compressor RWF II 480
Create an account to install this asset package.
Maintenance Plans for Frick Rotary Screw Compressor Model RWF II 480
Integrate maintenance plans directly into your work orders in MaintainX.
Pressure Transducer Replacement
Warning: Follow all safety guidelines and procedures when replacing the pressure transducer.
Control power shut off
Applicable transducer isolation valve closed
To change the discharge pressure transducer (PE-3), it will be necessary to depressurize the entire compressor package. Follow 'General Instructions For Replacing Compressor Unit Components' before going to step 3.
Wiring harness connectors identified
Wiring harness connector disconnected from transducer
Transducer unscrewed using a wrench on the metal hex at the base of the transducer
New transducer installed
Wiring harness reconnected to the transducer

200 Hourly Rotary Screw Compressor Check
Check coupling (a)
a. Check bolts, shim packs, center inserts, keys, and all bolt torques.
Check alignment (h)
h. Refer to 070.210-IB for foot mounting alignment.
Suction and discharge flange bolts (d)
d. Verify tightness of bolts on suction and discharge flanges. See Table 13 for torque requirements.
Check electrical connections (b)
b. Check and torque all terminals in the processor and starter panel per the specification posted in the enclosure.
Check sensor calibration (c)
Capacity Linear Transmitter Replacement
Warning: This procedure requires trained personnel with PPE!
Control power shut off
DIN connector plug removed from transmitter
Cap screws loosened
Transmitter unit removed
New transmitter unit installed
Cap screws tightened
DIN connector plug applied to transmitter
Control power turned on
30000 Hourly Coalescers Filter Element Change
Coalescer filter element
When changing the coalescer filter element(s) it is recommended that the oil be changed, cartridge(s) in oil filters OF-1 and OF-2 if applicable be changed and the following applicable strainer elements be removed and cleaned.
NOTICE
Use of filter elements other than Frick may cause warranty claim to be denied.
1. See Changing oil, Steps 1 through 8.
2. Loosen manway cover retainer bolts, remove retainers, manway cover and cover gasket. Discard cover gasket.
3. Remove and retain nut securing coalescer filter retainer.
4. Remove retainer, coalescer filter element and 2 O-rings. Discard filter elements.' 5. Install new coalescer filter element(s).
NOTICE
Volume Ratio Control Transmitter Replacement
Warning: For trained personnel only
Control power shut off?
DIN connector plug removed from transmitter?
Set screws loosened?
Transmitter unit removed?
New transmitter unit installed?
Set screws tightened?
DIN connector plug applied to transmitter?
Control power turned on?
Parts for Frick Rotary Screw Compressor RWF II 480
Access the parts list for your equipment in MaintainX.
Rotary Screw Compressor
US2430129999900010
Frick Optical Isolation Kits
639C0133G01
Oil Analysis Kit
333Q0001853
O-Ring 1 1⁄16-12 UN-2B
980A0012K66
O-Ring 9/16-18 UNF-2B
980A0012K60
Rotary Screw Compressor
US2430129999900010
Frick Optical Isolation Kits
639C0133G01
Oil Analysis Kit
333Q0001853
O-Ring 1 1⁄16-12 UN-2B
980A0012K66
O-Ring 9/16-18 UNF-2B
980A0012K60
Rotary Screw Compressor
US2430129999900010
Frick Optical Isolation Kits
639C0133G01
Oil Analysis Kit
333Q0001853
O-Ring 1 1⁄16-12 UN-2B
980A0012K66
O-Ring 9/16-18 UNF-2B
980A0012K60
Unlock efficiency
with MaintainX CoPilot
MaintainX CoPilot is your expert colleague, on call 24/7, helping your team find the answers they need to keep equipment running.
Reduce Unplanned Downtime
Ensure your team follows consistent procedures to minimize equipment failures and costly delays.
Maximize Asset Availability
Keep your assets running longer and more reliably, with standardized maintenance workflows from OEM manuals.
Lower Maintenance Costs
Turn any technician into an expert to streamline operations, maintain more assets, and reduce overall costs.
Thousands of companies manage their assets with MaintainX

'%3e%3cpath%20fill='url(%23b)'%20d='M66.008%2080.068c-5.084-.786-9.763-3.834-12.442-8.68a16.942%2016.942%200%200%201-1.87-5.18c1.096.19%202.203.476%203.298.87%206.525%202.333%2010.836%207.68%2011.014%2012.99ZM51.47%2061.576c.488-5.524%203.62-10.716%208.847-13.597a17.132%2017.132%200%200%201%2011.335-1.882c-.798%208.145-7.43%2014.848-16.038%2015.599-1.417.119-2.799.07-4.144-.12Zm28.564-11.478a17.513%2017.513%200%200%201%203.727%204.62c4.608%208.335%201.584%2018.813-6.75%2023.409a16.988%2016.988%200%200%201-4.359%201.679%2019.624%2019.624%200%200%201-3.977-12.776c.346-7.561%204.942-13.931%2011.36-16.932Z'/%3e%3cpath%20fill='%23110F0D'%20fill-rule='evenodd'%20d='M142.831%2048.324h4.977V77.03h-4.977V48.324Zm27.278%2013.002c.322%201.048.453%202.263.453%203.62v12.073h-4.787V66.208c0-.75-.047-1.572-.154-2.143-.453-2.382-1.822-3.572-4.215-3.572-2.31%200-3.882%201.274-4.43%203.476-.143.596-.226%201.405-.226%202.25v10.8h-4.787V56.623h4.477v2.989c1.536-2.5%203.906-3.43%206.371-3.43%203.488%200%206.263%201.68%207.298%205.144Zm24.636%207.323c0%203.882-2.358%206.525-5.763%207.727-1.298.453-2.632.643-4.62.643h-10.169V48.324h9.085c1.691%200%203.156.143%204.049.38%203.465.93%205.727%203.68%205.727%207.335%200%202.441-.81%204.156-2.762%205.644%202.905%201.417%204.453%203.727%204.453%206.966Zm-15.634-8.656h4.584c1.024%200%201.917-.143%202.536-.417%201.215-.548%201.905-1.608%201.905-3.167%200-1.548-.643-2.572-1.845-3.132-.691-.31-1.762-.452-2.763-.452h-4.417v7.168Zm10.716%208.465c0-1.536-.893-3.37-3.227-3.893-.428-.095-1.036-.143-1.571-.143h-5.918v8.085h5.501c.56%200%201.429-.048%201.953-.167%201.94-.453%203.262-1.846%203.262-3.882Zm47.747-11.847-8.097%2020.408h-4.429l-8.109-20.408h5.191l5.192%2014.574%205.108-14.574h5.144Zm-20.218%2010.002c0%20.69-.036%201.262-.155%201.94h-15.943c.631%202.87%202.714%204.728%205.882%204.728%202.131%200%203.607-.882%204.703-2.525h4.87c-1.762%204.144-5.204%206.692-9.657%206.692-6.084%200-10.537-4.858-10.537-10.49%200-6.108%204.524-10.776%2010.335-10.776%206.239%200%2010.442%204.954%2010.502%2010.43Zm-4.763-1.405c-.333-2.846-2.643-4.858-5.691-4.858-2.894%200-5.287%201.929-5.621%204.858h11.312Zm-72.667%203.44c0%204.787-3.287%208.371-9.419%208.371H119.363V64.66c-1.917.274-3.87.69-5.811%201.238l4.537%2011.121h-5.418l-3.596-9.585c-5.144%202.084-10.085%205.216-14.217%209.585h-4.786L101.8%2048.312h4.56l5.68%2013.883a44.112%2044.112%200%200%201%207.323-1.774V48.312h9.084c1.703%200%203.156.143%204.061.393%203.453.929%205.727%203.667%205.727%207.323%200%201.917-.738%204.179-2.81%205.691%203.06%201.56%204.501%204.025%204.501%206.93Zm-15.634-8.667a62.664%2062.664%200%200%201%202.06-.036c1.703.012%203.239.131%204.608.37%201.441-.549%202.357-1.727%202.357-3.537%200-1.941-.881-3.144-2.488-3.667-.548-.18-1.358-.286-2.322-.286h-4.215v7.156Zm-16.55%203.905-3.715-9.894-6.394%2016.502c2.833-2.595%206.263-4.858%2010.109-6.608Zm27.254%204.74c0-2.775-3.131-4.347-8.513-4.418-.715%200-1.441.011-2.191.047v8.252h5.918c2.548%200%204.786-1.37%204.786-3.882Z'%20clip-rule='evenodd'/%3e%3c/g%3e%3cdefs%3e%3clinearGradient%20id='b'%20x1='51.47'%20x2='85.916'%20y1='62.946'%20y2='62.946'%20gradientUnits='userSpaceOnUse'%3e%3cstop%20stop-color='%23CD9F28'/%3e%3cstop%20offset='1'%20stop-color='%23ECD80B'/%3e%3c/linearGradient%3e%3cclipPath%20id='a'%3e%3cpath%20fill='%23fff'%20d='M51.47%2045.728h186.104V80.14H51.47z'/%3e%3c/clipPath%3e%3c/defs%3e%3c/svg%3e)


More from Frick


Explore Other Assets


© 2026 MaintainX. All rights reserved.