


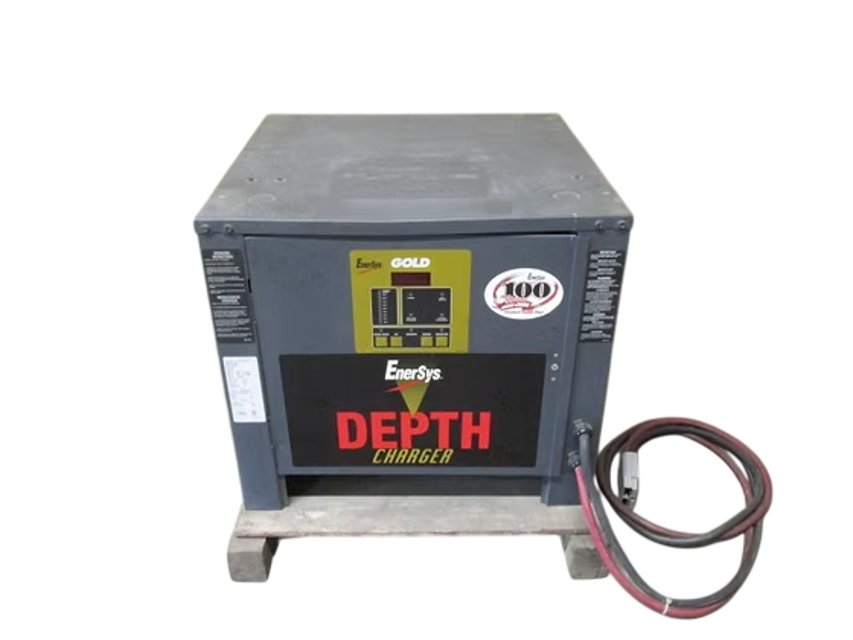
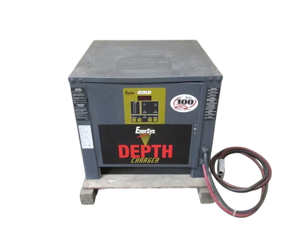
ENERSYS SCR Transformer Type Battery Charger D3G
Need answers fast?
Explore the manual using AI.
Turn manuals into instant answers
with your AI-powered assistantTurn manuals into instant answers
with your AI-powered assistant
Manual for ENERSYS SCR Transformer Type Battery Charger D3G
Complete asset maintenance, one click away
Get instant access to all the maintenance information you need. Empower technicians to perform preventive maintenance with asset packages, ready to use right out of the box.

Documents & Manuals
Find all the essential guides in one place.
 Tensioning Guide
- Belt-diagram
- C-120 pulleys
+ 13 more

Work Order Templates
Pre-built workflows to keep your asset running smoothly.
- Daily Electrical System Inspection
- Replace Roller and Pulley
- Install Engine B-120
+ 29 more

Procedures
Integrate maintenance plans directly into your work orders.
- Motion Industries
- Applied Industrial Technologies
- Electrical Brothers
+ 5 more

Parts
Access the parts list for your equipment in MaintainX.
- Drive Motor
- B2 Rollers
- Tensioning System
+ 40 more
ENERSYS SCR Transformer Type Battery Charger D3G
Create an account to install this asset package.
Maintenance Plans for ENERSYS SCR Transformer Type Battery Charger Model D3G
Integrate maintenance plans directly into your work orders in MaintainX.
SCR Transformer Type Battery Charger Maintenance
Warning: Ensure that both the AC lines and the battery are disconnected before cleaning.
Connections and terminals are clean and tight
No excessive dirt build up on components
Any adjustments bumped or moved during cleaning?
Frequency of maintenance depending on the environment
Sign off on the maintenance

SCR / Diode Block Test
WARNING: Faulty SCR/Diode Blocks may cause voltage to be present at the DC cables.
Physical Test
Start the charger, and run it for 5 minutes with a battery connected.
Turn off the charger and disconnect the battery.
Temperature of the SCR/Diode Blocks
WARNING: Heatsink and SCR/Diode Blocks may be very warm. Please exercise caution.
First SCR/Diode Block Test
Disconnect the battery.
Disconnect the AC power.
EPROM Replacement
Warning: Ensure your hands are clean and you are grounded to avoid static discharge before touching a PC board.
AC power disconnected
Battery unplugged
Static discharged by touching a ground
EPROM removed without bending the legs
Removed EPROM placed in anti-static bag
New EPROM's notch aligned with socket's notch
New EPROM inserted without bending the legs
New EPROM's legs inserted into the proper holes
Control Transformer Replacement
Introduction
Return all replaced components to your service center.
The following sections explain how to replace each component. After replacing a component, be sure to:
1. Reconnect all leads exactly as they were removed,
2. Replace any heat-shrink tubing if any old tubing was removed,
3. Retighten all connections
4. Replace covers.
Preparation
Please follow these steps before removing or replacing any component:
Main Transformer Replacement
Return all replaced components to your service center.
Reconnect all leads exactly as they were removed.
Replace any heat-shrink tubing if any old tubing was removed.
Retighten all connections.
Replace covers.
Disconnect the battery.
Disconnect the AC power.
Use the wiring diagrams in the back of this manual to help identify wires connected to the transformer.
Remove the AC input wires from the 3 terminal input blocks.
Parts for ENERSYS SCR Transformer Type Battery Charger D3G
Access the parts list for your equipment in MaintainX.
6' of #10AWG AC Cord with 30 AMP Plug.
X225-77-2
6' of #10AWG AC Cord with 30 AMP Plug and 30AMP Receptacle
X225-77-1
Stacking Hardware Kit
X225-99-0-2
Wall Mounting Brackets
X225-99-0-1
Anti-Static Wrist Strap
174-2-1
6' of #10AWG AC Cord with 30 AMP Plug.
X225-77-2
6' of #10AWG AC Cord with 30 AMP Plug and 30AMP Receptacle
X225-77-1
Stacking Hardware Kit
X225-99-0-2
Wall Mounting Brackets
X225-99-0-1
Anti-Static Wrist Strap
174-2-1
6' of #10AWG AC Cord with 30 AMP Plug.
X225-77-2
6' of #10AWG AC Cord with 30 AMP Plug and 30AMP Receptacle
X225-77-1
Stacking Hardware Kit
X225-99-0-2
Wall Mounting Brackets
X225-99-0-1
Anti-Static Wrist Strap
174-2-1
Unlock efficiency
with MaintainX CoPilot
MaintainX CoPilot is your expert colleague, on call 24/7, helping your team find the answers they need to keep equipment running.
Reduce Unplanned Downtime
Ensure your team follows consistent procedures to minimize equipment failures and costly delays.
Maximize Asset Availability
Keep your assets running longer and more reliably, with standardized maintenance workflows from OEM manuals.
Lower Maintenance Costs
Turn any technician into an expert to streamline operations, maintain more assets, and reduce overall costs.
Thousands of companies manage their assets with MaintainX

'%3e%3cpath%20fill='url(%23b)'%20d='M66.008%2080.068c-5.084-.786-9.763-3.834-12.442-8.68a16.942%2016.942%200%200%201-1.87-5.18c1.096.19%202.203.476%203.298.87%206.525%202.333%2010.836%207.68%2011.014%2012.99ZM51.47%2061.576c.488-5.524%203.62-10.716%208.847-13.597a17.132%2017.132%200%200%201%2011.335-1.882c-.798%208.145-7.43%2014.848-16.038%2015.599-1.417.119-2.799.07-4.144-.12Zm28.564-11.478a17.513%2017.513%200%200%201%203.727%204.62c4.608%208.335%201.584%2018.813-6.75%2023.409a16.988%2016.988%200%200%201-4.359%201.679%2019.624%2019.624%200%200%201-3.977-12.776c.346-7.561%204.942-13.931%2011.36-16.932Z'/%3e%3cpath%20fill='%23110F0D'%20fill-rule='evenodd'%20d='M142.831%2048.324h4.977V77.03h-4.977V48.324Zm27.278%2013.002c.322%201.048.453%202.263.453%203.62v12.073h-4.787V66.208c0-.75-.047-1.572-.154-2.143-.453-2.382-1.822-3.572-4.215-3.572-2.31%200-3.882%201.274-4.43%203.476-.143.596-.226%201.405-.226%202.25v10.8h-4.787V56.623h4.477v2.989c1.536-2.5%203.906-3.43%206.371-3.43%203.488%200%206.263%201.68%207.298%205.144Zm24.636%207.323c0%203.882-2.358%206.525-5.763%207.727-1.298.453-2.632.643-4.62.643h-10.169V48.324h9.085c1.691%200%203.156.143%204.049.38%203.465.93%205.727%203.68%205.727%207.335%200%202.441-.81%204.156-2.762%205.644%202.905%201.417%204.453%203.727%204.453%206.966Zm-15.634-8.656h4.584c1.024%200%201.917-.143%202.536-.417%201.215-.548%201.905-1.608%201.905-3.167%200-1.548-.643-2.572-1.845-3.132-.691-.31-1.762-.452-2.763-.452h-4.417v7.168Zm10.716%208.465c0-1.536-.893-3.37-3.227-3.893-.428-.095-1.036-.143-1.571-.143h-5.918v8.085h5.501c.56%200%201.429-.048%201.953-.167%201.94-.453%203.262-1.846%203.262-3.882Zm47.747-11.847-8.097%2020.408h-4.429l-8.109-20.408h5.191l5.192%2014.574%205.108-14.574h5.144Zm-20.218%2010.002c0%20.69-.036%201.262-.155%201.94h-15.943c.631%202.87%202.714%204.728%205.882%204.728%202.131%200%203.607-.882%204.703-2.525h4.87c-1.762%204.144-5.204%206.692-9.657%206.692-6.084%200-10.537-4.858-10.537-10.49%200-6.108%204.524-10.776%2010.335-10.776%206.239%200%2010.442%204.954%2010.502%2010.43Zm-4.763-1.405c-.333-2.846-2.643-4.858-5.691-4.858-2.894%200-5.287%201.929-5.621%204.858h11.312Zm-72.667%203.44c0%204.787-3.287%208.371-9.419%208.371H119.363V64.66c-1.917.274-3.87.69-5.811%201.238l4.537%2011.121h-5.418l-3.596-9.585c-5.144%202.084-10.085%205.216-14.217%209.585h-4.786L101.8%2048.312h4.56l5.68%2013.883a44.112%2044.112%200%200%201%207.323-1.774V48.312h9.084c1.703%200%203.156.143%204.061.393%203.453.929%205.727%203.667%205.727%207.323%200%201.917-.738%204.179-2.81%205.691%203.06%201.56%204.501%204.025%204.501%206.93Zm-15.634-8.667a62.664%2062.664%200%200%201%202.06-.036c1.703.012%203.239.131%204.608.37%201.441-.549%202.357-1.727%202.357-3.537%200-1.941-.881-3.144-2.488-3.667-.548-.18-1.358-.286-2.322-.286h-4.215v7.156Zm-16.55%203.905-3.715-9.894-6.394%2016.502c2.833-2.595%206.263-4.858%2010.109-6.608Zm27.254%204.74c0-2.775-3.131-4.347-8.513-4.418-.715%200-1.441.011-2.191.047v8.252h5.918c2.548%200%204.786-1.37%204.786-3.882Z'%20clip-rule='evenodd'/%3e%3c/g%3e%3cdefs%3e%3clinearGradient%20id='b'%20x1='51.47'%20x2='85.916'%20y1='62.946'%20y2='62.946'%20gradientUnits='userSpaceOnUse'%3e%3cstop%20stop-color='%23CD9F28'/%3e%3cstop%20offset='1'%20stop-color='%23ECD80B'/%3e%3c/linearGradient%3e%3cclipPath%20id='a'%3e%3cpath%20fill='%23fff'%20d='M51.47%2045.728h186.104V80.14H51.47z'/%3e%3c/clipPath%3e%3c/defs%3e%3c/svg%3e)


More from ENERSYS


Explore Other Assets


© 2026 MaintainX. All rights reserved.