


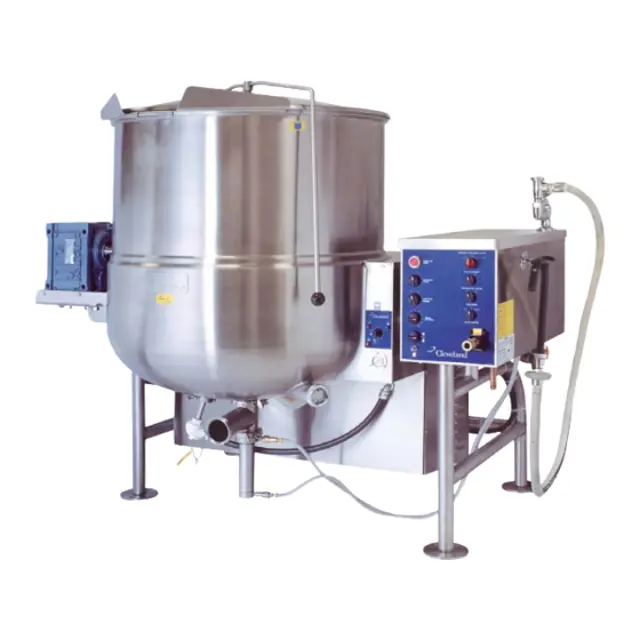
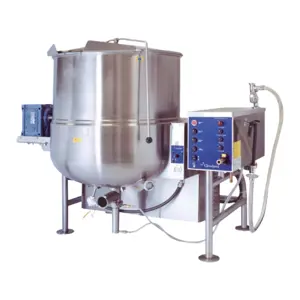
Cleveland Gas Mixing Kettle Horizontal Agitator HA-MKGL-60-T
Need answers fast?
Explore the manual using AI.
Turn manuals into instant answers
with your AI-powered assistantTurn manuals into instant answers
with your AI-powered assistant
Manual for Cleveland Gas Mixing Kettle Horizontal Agitator HA-MKGL-60-T
Complete asset maintenance, one click away
Get instant access to all the maintenance information you need. Empower technicians to perform preventive maintenance with asset packages, ready to use right out of the box.

Documents & Manuals
Find all the essential guides in one place.
 Tensioning Guide
- Belt-diagram
- C-120 pulleys
+ 13 more

Work Order Templates
Pre-built workflows to keep your asset running smoothly.
- Daily Electrical System Inspection
- Replace Roller and Pulley
- Install Engine B-120
+ 29 more

Procedures
Integrate maintenance plans directly into your work orders.
- Motion Industries
- Applied Industrial Technologies
- Electrical Brothers
+ 5 more

Parts
Access the parts list for your equipment in MaintainX.
- Drive Motor
- B2 Rollers
- Tensioning System
+ 40 more
Cleveland Gas Mixing Kettle Horizontal Agitator HA-MKGL-60-T
Create an account to install this asset package.
Maintenance Plans for Cleveland Gas Mixing Kettle Horizontal Agitator Model HA-MKGL-60-T
Integrate maintenance plans directly into your work orders in MaintainX.
Flush Piston Valve O Rings Replacement
FLUSH PISTON VALVE
Replacing "O" rings
(Used prior to 2003.)
1. Disassemble valve as per daily cleaning instructions.
2. Holding lower valve body (6), unscrew valve bottom (7).
3. Pull lower valve body out from cylinder body.
4. Replace "O" rings (8), as required.
5. Coat cylinder body and "O" rings with cooking oil or food-safe grease.
6. Reassemble.

1 Daily Kettle Cleaning
CAUTION SURFACES MAY BE EXTREMELY HOT!
CARE AND CLEANING
Cooking equipment must be cleaned regularty to maintain its fast, efficient cooking performance and to ensure its continued safe, reliable operation. The best time to clean is shortly after each use (allow unit to cool to a sate temperature).
WARNINGS
Do not use detergents or cleansers that are chloride based or contain quaternary salt.
Do not use a metal bristle brush or scraper.
Steel wool should never be used for cleaning the stainless steel.
Unit should never be cleaned with a high pressure spray hose.
Do not leave water sitting in unit when not in use.
Stainless Steel Cleaning
Warning: This cleaning procedure requires trained personnel with PPE!
Stainless steels are susceptible to rusting. Corrosion on metals is everywhere. It is recognized quickly on iron and steel as unsightly yellow/orange rust.
Stainless steels are passive metals because they contain other metals, like chromium, nickel and manganese that stabilize the atoms.
With 12-30 percent chromium, an invisible passive film covers the steel's surface acting as a shield against corrosion.
Enemies of Stainless Steel: Mechanical abrasion, Deposits and water, Chlorides
Here are a few steps that can help prevent stainless steel rust.
Use the proper tools. When cleaning stainless steel products, use non-abrasive tools.
Clean with the polish lines. Some stainless steel comes with visible polishing lines or 'grain.'
Use alkaline, alkaline chlorinated or non-chloride containing cleaners.
Quad Ring Cleaning
QUAD RING (Used prior to June 1999)
Remove retaining knobs
Slide shaft seal retainer plate and quad ring away from kettle body
Clean quad ring, shaft, and seal retainer plate with clean cloth
Rinse with fresh water
Apply light coat of food safe grease to both sides of the quad ring
Slide quad ring back into original position, making sure it does not twist
Slide retainer plate back toward kettle, replacing retaining knobs
Tighten with hand pressure only
1 Monthly Quad Ring Check
Quad Ring Replacement Procedure (Used prior to June 1999, after June 1999 see Seal Retainer Plate Replacement Procedure)
Remove agitator as per cleaning instructions
Remove hole cap, retaining bolt and retaining washer
Snap retaining ring out from seating inside motor
Remove retaining knobs
Slide seal retainer plate away from kettle
Slide shaft away from kettle body to allow clearance for removing quad ring
Remove quad ring
Slide new quad ring back into original position, making sure it does not twist
Parts for Cleveland Gas Mixing Kettle Horizontal Agitator HA-MKGL-60-T
Access the parts list for your equipment in MaintainX.
Scraper Blade
KE54602
Spring
KE54608
Retaining Knobs
KE01911
O Ring
FA05002-8
Pin
KE54594
Scraper Blade
KE54602
Spring
KE54608
Retaining Knobs
KE01911
O Ring
FA05002-8
Pin
KE54594
Scraper Blade
KE54602
Spring
KE54608
Retaining Knobs
KE01911
O Ring
FA05002-8
Pin
KE54594
Unlock efficiency
with MaintainX CoPilot
MaintainX CoPilot is your expert colleague, on call 24/7, helping your team find the answers they need to keep equipment running.
Reduce Unplanned Downtime
Ensure your team follows consistent procedures to minimize equipment failures and costly delays.
Maximize Asset Availability
Keep your assets running longer and more reliably, with standardized maintenance workflows from OEM manuals.
Lower Maintenance Costs
Turn any technician into an expert to streamline operations, maintain more assets, and reduce overall costs.
Thousands of companies manage their assets with MaintainX

'%3e%3cpath%20fill='url(%23b)'%20d='M66.008%2080.068c-5.084-.786-9.763-3.834-12.442-8.68a16.942%2016.942%200%200%201-1.87-5.18c1.096.19%202.203.476%203.298.87%206.525%202.333%2010.836%207.68%2011.014%2012.99ZM51.47%2061.576c.488-5.524%203.62-10.716%208.847-13.597a17.132%2017.132%200%200%201%2011.335-1.882c-.798%208.145-7.43%2014.848-16.038%2015.599-1.417.119-2.799.07-4.144-.12Zm28.564-11.478a17.513%2017.513%200%200%201%203.727%204.62c4.608%208.335%201.584%2018.813-6.75%2023.409a16.988%2016.988%200%200%201-4.359%201.679%2019.624%2019.624%200%200%201-3.977-12.776c.346-7.561%204.942-13.931%2011.36-16.932Z'/%3e%3cpath%20fill='%23110F0D'%20fill-rule='evenodd'%20d='M142.831%2048.324h4.977V77.03h-4.977V48.324Zm27.278%2013.002c.322%201.048.453%202.263.453%203.62v12.073h-4.787V66.208c0-.75-.047-1.572-.154-2.143-.453-2.382-1.822-3.572-4.215-3.572-2.31%200-3.882%201.274-4.43%203.476-.143.596-.226%201.405-.226%202.25v10.8h-4.787V56.623h4.477v2.989c1.536-2.5%203.906-3.43%206.371-3.43%203.488%200%206.263%201.68%207.298%205.144Zm24.636%207.323c0%203.882-2.358%206.525-5.763%207.727-1.298.453-2.632.643-4.62.643h-10.169V48.324h9.085c1.691%200%203.156.143%204.049.38%203.465.93%205.727%203.68%205.727%207.335%200%202.441-.81%204.156-2.762%205.644%202.905%201.417%204.453%203.727%204.453%206.966Zm-15.634-8.656h4.584c1.024%200%201.917-.143%202.536-.417%201.215-.548%201.905-1.608%201.905-3.167%200-1.548-.643-2.572-1.845-3.132-.691-.31-1.762-.452-2.763-.452h-4.417v7.168Zm10.716%208.465c0-1.536-.893-3.37-3.227-3.893-.428-.095-1.036-.143-1.571-.143h-5.918v8.085h5.501c.56%200%201.429-.048%201.953-.167%201.94-.453%203.262-1.846%203.262-3.882Zm47.747-11.847-8.097%2020.408h-4.429l-8.109-20.408h5.191l5.192%2014.574%205.108-14.574h5.144Zm-20.218%2010.002c0%20.69-.036%201.262-.155%201.94h-15.943c.631%202.87%202.714%204.728%205.882%204.728%202.131%200%203.607-.882%204.703-2.525h4.87c-1.762%204.144-5.204%206.692-9.657%206.692-6.084%200-10.537-4.858-10.537-10.49%200-6.108%204.524-10.776%2010.335-10.776%206.239%200%2010.442%204.954%2010.502%2010.43Zm-4.763-1.405c-.333-2.846-2.643-4.858-5.691-4.858-2.894%200-5.287%201.929-5.621%204.858h11.312Zm-72.667%203.44c0%204.787-3.287%208.371-9.419%208.371H119.363V64.66c-1.917.274-3.87.69-5.811%201.238l4.537%2011.121h-5.418l-3.596-9.585c-5.144%202.084-10.085%205.216-14.217%209.585h-4.786L101.8%2048.312h4.56l5.68%2013.883a44.112%2044.112%200%200%201%207.323-1.774V48.312h9.084c1.703%200%203.156.143%204.061.393%203.453.929%205.727%203.667%205.727%207.323%200%201.917-.738%204.179-2.81%205.691%203.06%201.56%204.501%204.025%204.501%206.93Zm-15.634-8.667a62.664%2062.664%200%200%201%202.06-.036c1.703.012%203.239.131%204.608.37%201.441-.549%202.357-1.727%202.357-3.537%200-1.941-.881-3.144-2.488-3.667-.548-.18-1.358-.286-2.322-.286h-4.215v7.156Zm-16.55%203.905-3.715-9.894-6.394%2016.502c2.833-2.595%206.263-4.858%2010.109-6.608Zm27.254%204.74c0-2.775-3.131-4.347-8.513-4.418-.715%200-1.441.011-2.191.047v8.252h5.918c2.548%200%204.786-1.37%204.786-3.882Z'%20clip-rule='evenodd'/%3e%3c/g%3e%3cdefs%3e%3clinearGradient%20id='b'%20x1='51.47'%20x2='85.916'%20y1='62.946'%20y2='62.946'%20gradientUnits='userSpaceOnUse'%3e%3cstop%20stop-color='%23CD9F28'/%3e%3cstop%20offset='1'%20stop-color='%23ECD80B'/%3e%3c/linearGradient%3e%3cclipPath%20id='a'%3e%3cpath%20fill='%23fff'%20d='M51.47%2045.728h186.104V80.14H51.47z'/%3e%3c/clipPath%3e%3c/defs%3e%3c/svg%3e)


More from Cleveland


Explore Other Assets


© 2026 MaintainX. All rights reserved.