


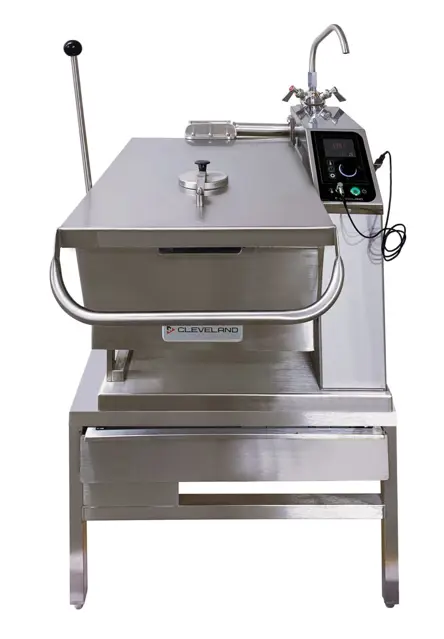
Cleveland Tablet Counter CT-600
Need answers fast?
Explore the manual using AI.
Turn manuals into instant answers
with your AI-powered assistantTurn manuals into instant answers
with your AI-powered assistant
Manual for Cleveland Tablet Counter CT-600
Complete asset maintenance, one click away
Get instant access to all the maintenance information you need. Empower technicians to perform preventive maintenance with asset packages, ready to use right out of the box.

Documents & Manuals
Find all the essential guides in one place.
 Tensioning Guide
- Belt-diagram
- C-120 pulleys
+ 13 more

Work Order Templates
Pre-built workflows to keep your asset running smoothly.
- Daily Electrical System Inspection
- Replace Roller and Pulley
- Install Engine B-120
+ 29 more

Procedures
Integrate maintenance plans directly into your work orders.
- Motion Industries
- Applied Industrial Technologies
- Electrical Brothers
+ 5 more

Parts
Access the parts list for your equipment in MaintainX.
- Drive Motor
- B2 Rollers
- Tensioning System
+ 40 more
Cleveland Tablet Counter CT-600
Create an account to install this asset package.
Maintenance Plans for Cleveland Tablet Counter Model CT-600
Integrate maintenance plans directly into your work orders in MaintainX.
Solenoid Valve Maintenance
NOTE: It is not necessary to remove the valve from the pipeline for repairs.
WARNING: Turn off electrical power supply and depressurize valve before making repairs.
Cleaning:
All solenoid valves should be cleaned periodically.
The time between cleanings will vary depending on the medium and service conditions. In general, if the voltage to the coil is correct, sluggish valve operation, excessive noise or leakage will indicate that cleaning is required. Clean valve strainer or filter when cleaning the valve.
Preventive Maintenance:
1. Keep the medium flowing through the valve as free from dirt and foreign material as possible.
2. While in service, the valve should be operated at least once a month to insure proper opening and closing.
3. Depending on the medium and service conditions, periodic inspection of internal valve parts for damage or excessive wear is recommended. Thoroughly clean all parts.

Motor Replacement
CAUTION: Do not scratch. Extremely delicate surface.
Swing screen to access impeller assembly.
Dissassemble impeller assembly by removing bolt and set screw.
Remove motor by unscrewing four bolts from motor/fan housing.
Punch out taper pin and remove shaft extension from old motor.
Push shaft extension firmly onto new motor shaft.
Drill completely through shaft extension and new motor shaft using a 11/64\ bit."
NOTE: Secure end of shaft with vice grips to prevent left or right rotation.
Ream to a depth of 1\ through shaft extension and new motor shaft using a #1 reamer."
Hinge Adjustment
Hinge Adjustment Instructions
Insert 3/8\ Allen wrench"
Turn clockwise to relieve tension on spring
While tension is released remove one of the two slotted screws
Insert a pin (approximately 1/8\) in the hole where the first slotted screw was removed from"
Remove second slotted screw
While holding Allen wrench remove pin
Turn Allen wrench clockwise to tighten or counter-clockwise to loosen tension to produce desired effect
Re-insert pin in one of the two holes
Chart Recorder Maintenance
Warning: This unit is a precision instrument and can be damaged by rough or careless handling.
Daily cleaning performed
Recalibration
Is the chart recorder part of the recalibration program?
Last recalibration date
Sign off on the chart recorder maintenance
Cook Tank Cleaning
- The cook tank must be cleaned regularly to maintain its efficient cooking performance, and to ensure its' continued safe reliable operation.
WARNING: Do not use chloride based cleaners.
1. Prepare a warm solution of water and mild detergent.
2. Using a nylon brush, clean the inside and outside of the tank.
3. Insure you have removed any grease or dirt build-up from the two probes inside the tank.
One probe is located in the recess at the top right rear of the tank. The other two are located behind the agitator fan.
4. Clean the baskets and dividers using the same mild detergent
NOTE: For more difficult cleaning applications one of the following can be used: alcohol, baking soda, vinegar, or a solution of ammonia in water.
Avoid the use of chloride cleansers, which may damage the Cook Tank's stainless steel surface.
Parts for Cleveland Tablet Counter CT-600
Access the parts list for your equipment in MaintainX.
Green Pilot Light Lens
KE53191-2
Red Pilot Light Lens
KE53191
Blue Pilot Light Lens
KE53191-3
Transformer, C/W Bulb
KE53192
Bulb
SE50440
Green Pilot Light Lens
KE53191-2
Red Pilot Light Lens
KE53191
Blue Pilot Light Lens
KE53191-3
Transformer, C/W Bulb
KE53192
Bulb
SE50440
Green Pilot Light Lens
KE53191-2
Red Pilot Light Lens
KE53191
Blue Pilot Light Lens
KE53191-3
Transformer, C/W Bulb
KE53192
Bulb
SE50440
Unlock efficiency
with MaintainX CoPilot
MaintainX CoPilot is your expert colleague, on call 24/7, helping your team find the answers they need to keep equipment running.
Reduce Unplanned Downtime
Ensure your team follows consistent procedures to minimize equipment failures and costly delays.
Maximize Asset Availability
Keep your assets running longer and more reliably, with standardized maintenance workflows from OEM manuals.
Lower Maintenance Costs
Turn any technician into an expert to streamline operations, maintain more assets, and reduce overall costs.
Thousands of companies manage their assets with MaintainX

'%3e%3cpath%20fill='url(%23b)'%20d='M66.008%2080.068c-5.084-.786-9.763-3.834-12.442-8.68a16.942%2016.942%200%200%201-1.87-5.18c1.096.19%202.203.476%203.298.87%206.525%202.333%2010.836%207.68%2011.014%2012.99ZM51.47%2061.576c.488-5.524%203.62-10.716%208.847-13.597a17.132%2017.132%200%200%201%2011.335-1.882c-.798%208.145-7.43%2014.848-16.038%2015.599-1.417.119-2.799.07-4.144-.12Zm28.564-11.478a17.513%2017.513%200%200%201%203.727%204.62c4.608%208.335%201.584%2018.813-6.75%2023.409a16.988%2016.988%200%200%201-4.359%201.679%2019.624%2019.624%200%200%201-3.977-12.776c.346-7.561%204.942-13.931%2011.36-16.932Z'/%3e%3cpath%20fill='%23110F0D'%20fill-rule='evenodd'%20d='M142.831%2048.324h4.977V77.03h-4.977V48.324Zm27.278%2013.002c.322%201.048.453%202.263.453%203.62v12.073h-4.787V66.208c0-.75-.047-1.572-.154-2.143-.453-2.382-1.822-3.572-4.215-3.572-2.31%200-3.882%201.274-4.43%203.476-.143.596-.226%201.405-.226%202.25v10.8h-4.787V56.623h4.477v2.989c1.536-2.5%203.906-3.43%206.371-3.43%203.488%200%206.263%201.68%207.298%205.144Zm24.636%207.323c0%203.882-2.358%206.525-5.763%207.727-1.298.453-2.632.643-4.62.643h-10.169V48.324h9.085c1.691%200%203.156.143%204.049.38%203.465.93%205.727%203.68%205.727%207.335%200%202.441-.81%204.156-2.762%205.644%202.905%201.417%204.453%203.727%204.453%206.966Zm-15.634-8.656h4.584c1.024%200%201.917-.143%202.536-.417%201.215-.548%201.905-1.608%201.905-3.167%200-1.548-.643-2.572-1.845-3.132-.691-.31-1.762-.452-2.763-.452h-4.417v7.168Zm10.716%208.465c0-1.536-.893-3.37-3.227-3.893-.428-.095-1.036-.143-1.571-.143h-5.918v8.085h5.501c.56%200%201.429-.048%201.953-.167%201.94-.453%203.262-1.846%203.262-3.882Zm47.747-11.847-8.097%2020.408h-4.429l-8.109-20.408h5.191l5.192%2014.574%205.108-14.574h5.144Zm-20.218%2010.002c0%20.69-.036%201.262-.155%201.94h-15.943c.631%202.87%202.714%204.728%205.882%204.728%202.131%200%203.607-.882%204.703-2.525h4.87c-1.762%204.144-5.204%206.692-9.657%206.692-6.084%200-10.537-4.858-10.537-10.49%200-6.108%204.524-10.776%2010.335-10.776%206.239%200%2010.442%204.954%2010.502%2010.43Zm-4.763-1.405c-.333-2.846-2.643-4.858-5.691-4.858-2.894%200-5.287%201.929-5.621%204.858h11.312Zm-72.667%203.44c0%204.787-3.287%208.371-9.419%208.371H119.363V64.66c-1.917.274-3.87.69-5.811%201.238l4.537%2011.121h-5.418l-3.596-9.585c-5.144%202.084-10.085%205.216-14.217%209.585h-4.786L101.8%2048.312h4.56l5.68%2013.883a44.112%2044.112%200%200%201%207.323-1.774V48.312h9.084c1.703%200%203.156.143%204.061.393%203.453.929%205.727%203.667%205.727%207.323%200%201.917-.738%204.179-2.81%205.691%203.06%201.56%204.501%204.025%204.501%206.93Zm-15.634-8.667a62.664%2062.664%200%200%201%202.06-.036c1.703.012%203.239.131%204.608.37%201.441-.549%202.357-1.727%202.357-3.537%200-1.941-.881-3.144-2.488-3.667-.548-.18-1.358-.286-2.322-.286h-4.215v7.156Zm-16.55%203.905-3.715-9.894-6.394%2016.502c2.833-2.595%206.263-4.858%2010.109-6.608Zm27.254%204.74c0-2.775-3.131-4.347-8.513-4.418-.715%200-1.441.011-2.191.047v8.252h5.918c2.548%200%204.786-1.37%204.786-3.882Z'%20clip-rule='evenodd'/%3e%3c/g%3e%3cdefs%3e%3clinearGradient%20id='b'%20x1='51.47'%20x2='85.916'%20y1='62.946'%20y2='62.946'%20gradientUnits='userSpaceOnUse'%3e%3cstop%20stop-color='%23CD9F28'/%3e%3cstop%20offset='1'%20stop-color='%23ECD80B'/%3e%3c/linearGradient%3e%3cclipPath%20id='a'%3e%3cpath%20fill='%23fff'%20d='M51.47%2045.728h186.104V80.14H51.47z'/%3e%3c/clipPath%3e%3c/defs%3e%3c/svg%3e)


More from Cleveland


Explore Other Assets


© 2026 MaintainX. All rights reserved.