


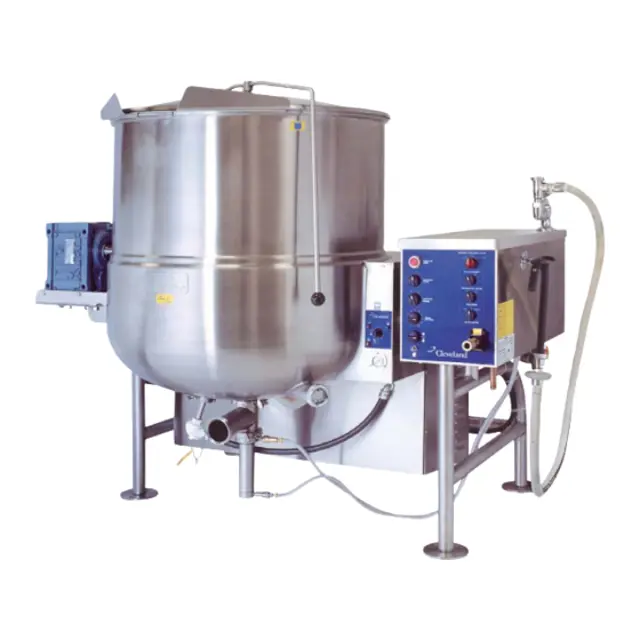
Cleveland Gas Mixing Kettle Horizontal Agitator HA-MKGL-60-CC
Need answers fast?
Explore the manual using AI.
Turn manuals into instant answers
with your AI-powered assistantTurn manuals into instant answers
with your AI-powered assistant
Manual for Cleveland Gas Mixing Kettle Horizontal Agitator HA-MKGL-60-CC
Complete asset maintenance, one click away
Get instant access to all the maintenance information you need. Empower technicians to perform preventive maintenance with asset packages, ready to use right out of the box.

Documents & Manuals
Find all the essential guides in one place.
 Tensioning Guide
- Belt-diagram
- C-120 pulleys
+ 13 more

Work Order Templates
Pre-built workflows to keep your asset running smoothly.
- Daily Electrical System Inspection
- Replace Roller and Pulley
- Install Engine B-120
+ 29 more

Procedures
Integrate maintenance plans directly into your work orders.
- Motion Industries
- Applied Industrial Technologies
- Electrical Brothers
+ 5 more

Parts
Access the parts list for your equipment in MaintainX.
- Drive Motor
- B2 Rollers
- Tensioning System
+ 40 more
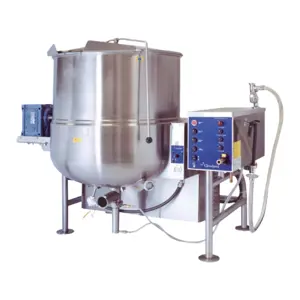
Cleveland Gas Mixing Kettle Horizontal Agitator HA-MKGL-60-CC
Create an account to install this asset package.
Maintenance Plans for Cleveland Gas Mixing Kettle Horizontal Agitator Model HA-MKGL-60-CC
Integrate maintenance plans directly into your work orders in MaintainX.
Vacuum Leak Test
VACUUM LEAK TEST PROCEDURE
If the kettle will not hold vacuum, test for leaks at:
A. Water Level Probe.
B. Pressure Relief Valve/Pressure Gauge and connecting plumbing.
C. Boiler Drain Cap.
D. Sight Glass.
LEAK TEST PROCEDURE:
1. Heat kettle until unit cycles off.
2. Shut off power to the kettle at the fused disconnect switch.

1 Monthly Quad Ring Check
Check quad ring and replace if required. Refer to QUAD RING REPLACEMENT PROCEDURE.
QUAD RING REPLACEMENT PROCEDURE
(Used prior to June 1999, after June 1999 see SEAL RETAINER PLATE REPLACEMENT PROCEDURE.)
1. Remove agitator as per cleaning instructions.
2. Remove hole cap, retaining bolt and retaining washer.
3. Snap retaining ring out from seating inside motor.
4. Remove retaining knobs.
5. Slide seal retainer plate away from kettle.
6. Slide shaft away from kettle body to allow clearance for removing quad ring.
1 Daily Flush Piston Valve Cleaning
FLUSH PISTON VALVE (Used prior to 2003)
Daily - clean valve as follows:
Air regulator controls air flow to automatic dump valve, turn clockwise to open and counterclockwise to close (extend plunger)
Air quick connect: Push yellow tab down to release air pressure before disconnecting air hose
To remove valve from kettle:
Place valve in open position
Holding bottom of valve, loosen and remove sani-clamp (1)
Lower valve, and remove from body
Remove sani-clamp seal (2) and 'O' ring (3)
1 Daily Kettle Cleaning
CAUTION SURFACES MAY BE EXTREMELY HOT!
CARE AND CLEANING
Cooking equipment must be cleaned regularty to maintain its fast, efficient cooking performance and to ensure its continued safe, reliable operation. The best time to clean is shortly after each use (allow unit to cool to a sate temperature).
WARNINGS
Do not use detergents or cleansers that are chloride based or contain quaternary salt.
Do not use a metal bristle brush or scraper.
Steel wool should never be used for cleaning the stainless steel.
Unit should never be cleaned with a high pressure spray hose.
Do not leave water sitting in unit when not in use.
Agitator Bushing Cleaning
AGITATOR BUSHING
Agitator removed
Bushing removed by turning 1/4 turn and pulling away from the kettle wall
Bushing and bushing mounting area cleaned, rinsed and sanitized
Metal surfaces lubricated with food safe grease
Bushing installed by locating retaining pin and sliding bushing on
Bushing rotated to lock into position
Sign off on the agitator bushing cleaning
Parts for Cleveland Gas Mixing Kettle Horizontal Agitator HA-MKGL-60-CC
Access the parts list for your equipment in MaintainX.
Scraper Blade
KE54602
Spring
KE54608
Retaining Knobs
KE01911
O Ring
FA05002-8
Pin
KE54594
Scraper Blade
KE54602
Spring
KE54608
Retaining Knobs
KE01911
O Ring
FA05002-8
Pin
KE54594
Scraper Blade
KE54602
Spring
KE54608
Retaining Knobs
KE01911
O Ring
FA05002-8
Pin
KE54594
Unlock efficiency
with MaintainX CoPilot
MaintainX CoPilot is your expert colleague, on call 24/7, helping your team find the answers they need to keep equipment running.
Reduce Unplanned Downtime
Ensure your team follows consistent procedures to minimize equipment failures and costly delays.
Maximize Asset Availability
Keep your assets running longer and more reliably, with standardized maintenance workflows from OEM manuals.
Lower Maintenance Costs
Turn any technician into an expert to streamline operations, maintain more assets, and reduce overall costs.
Thousands of companies manage their assets with MaintainX

'%3e%3cpath%20fill='url(%23b)'%20d='M66.008%2080.068c-5.084-.786-9.763-3.834-12.442-8.68a16.942%2016.942%200%200%201-1.87-5.18c1.096.19%202.203.476%203.298.87%206.525%202.333%2010.836%207.68%2011.014%2012.99ZM51.47%2061.576c.488-5.524%203.62-10.716%208.847-13.597a17.132%2017.132%200%200%201%2011.335-1.882c-.798%208.145-7.43%2014.848-16.038%2015.599-1.417.119-2.799.07-4.144-.12Zm28.564-11.478a17.513%2017.513%200%200%201%203.727%204.62c4.608%208.335%201.584%2018.813-6.75%2023.409a16.988%2016.988%200%200%201-4.359%201.679%2019.624%2019.624%200%200%201-3.977-12.776c.346-7.561%204.942-13.931%2011.36-16.932Z'/%3e%3cpath%20fill='%23110F0D'%20fill-rule='evenodd'%20d='M142.831%2048.324h4.977V77.03h-4.977V48.324Zm27.278%2013.002c.322%201.048.453%202.263.453%203.62v12.073h-4.787V66.208c0-.75-.047-1.572-.154-2.143-.453-2.382-1.822-3.572-4.215-3.572-2.31%200-3.882%201.274-4.43%203.476-.143.596-.226%201.405-.226%202.25v10.8h-4.787V56.623h4.477v2.989c1.536-2.5%203.906-3.43%206.371-3.43%203.488%200%206.263%201.68%207.298%205.144Zm24.636%207.323c0%203.882-2.358%206.525-5.763%207.727-1.298.453-2.632.643-4.62.643h-10.169V48.324h9.085c1.691%200%203.156.143%204.049.38%203.465.93%205.727%203.68%205.727%207.335%200%202.441-.81%204.156-2.762%205.644%202.905%201.417%204.453%203.727%204.453%206.966Zm-15.634-8.656h4.584c1.024%200%201.917-.143%202.536-.417%201.215-.548%201.905-1.608%201.905-3.167%200-1.548-.643-2.572-1.845-3.132-.691-.31-1.762-.452-2.763-.452h-4.417v7.168Zm10.716%208.465c0-1.536-.893-3.37-3.227-3.893-.428-.095-1.036-.143-1.571-.143h-5.918v8.085h5.501c.56%200%201.429-.048%201.953-.167%201.94-.453%203.262-1.846%203.262-3.882Zm47.747-11.847-8.097%2020.408h-4.429l-8.109-20.408h5.191l5.192%2014.574%205.108-14.574h5.144Zm-20.218%2010.002c0%20.69-.036%201.262-.155%201.94h-15.943c.631%202.87%202.714%204.728%205.882%204.728%202.131%200%203.607-.882%204.703-2.525h4.87c-1.762%204.144-5.204%206.692-9.657%206.692-6.084%200-10.537-4.858-10.537-10.49%200-6.108%204.524-10.776%2010.335-10.776%206.239%200%2010.442%204.954%2010.502%2010.43Zm-4.763-1.405c-.333-2.846-2.643-4.858-5.691-4.858-2.894%200-5.287%201.929-5.621%204.858h11.312Zm-72.667%203.44c0%204.787-3.287%208.371-9.419%208.371H119.363V64.66c-1.917.274-3.87.69-5.811%201.238l4.537%2011.121h-5.418l-3.596-9.585c-5.144%202.084-10.085%205.216-14.217%209.585h-4.786L101.8%2048.312h4.56l5.68%2013.883a44.112%2044.112%200%200%201%207.323-1.774V48.312h9.084c1.703%200%203.156.143%204.061.393%203.453.929%205.727%203.667%205.727%207.323%200%201.917-.738%204.179-2.81%205.691%203.06%201.56%204.501%204.025%204.501%206.93Zm-15.634-8.667a62.664%2062.664%200%200%201%202.06-.036c1.703.012%203.239.131%204.608.37%201.441-.549%202.357-1.727%202.357-3.537%200-1.941-.881-3.144-2.488-3.667-.548-.18-1.358-.286-2.322-.286h-4.215v7.156Zm-16.55%203.905-3.715-9.894-6.394%2016.502c2.833-2.595%206.263-4.858%2010.109-6.608Zm27.254%204.74c0-2.775-3.131-4.347-8.513-4.418-.715%200-1.441.011-2.191.047v8.252h5.918c2.548%200%204.786-1.37%204.786-3.882Z'%20clip-rule='evenodd'/%3e%3c/g%3e%3cdefs%3e%3clinearGradient%20id='b'%20x1='51.47'%20x2='85.916'%20y1='62.946'%20y2='62.946'%20gradientUnits='userSpaceOnUse'%3e%3cstop%20stop-color='%23CD9F28'/%3e%3cstop%20offset='1'%20stop-color='%23ECD80B'/%3e%3c/linearGradient%3e%3cclipPath%20id='a'%3e%3cpath%20fill='%23fff'%20d='M51.47%2045.728h186.104V80.14H51.47z'/%3e%3c/clipPath%3e%3c/defs%3e%3c/svg%3e)


More from Cleveland


Explore Other Assets


© 2026 MaintainX. All rights reserved.