


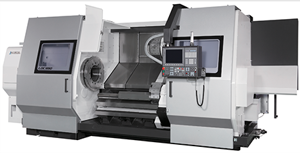
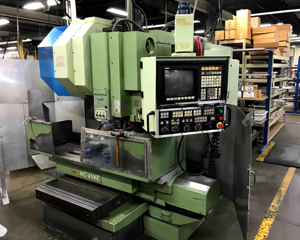
Okuma Lathe LB25
Need answers fast?
Explore the manual using AI.
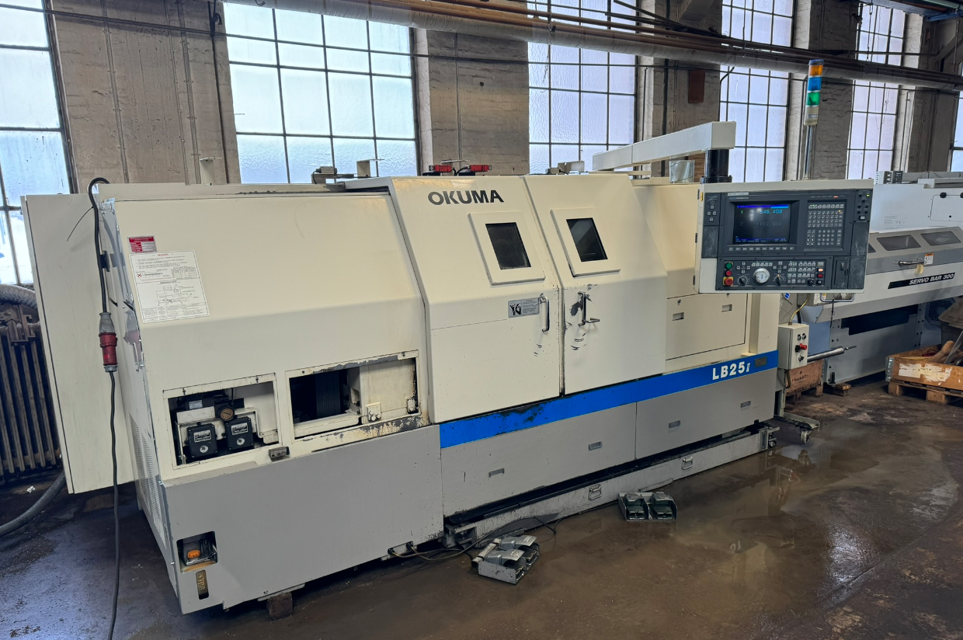
The Okuma Lathe LB25 is a high-precision CNC machine designed for efficient metalworking. Known for its robust construction and advanced features, this lathe is ideal for various machining applications, ensuring reliability and accuracy in production environments. Optimize your operations with the LB25's exceptional performance and durability.
Turn manuals into instant answers
with your AI-powered assistantTurn manuals into instant answers
with your AI-powered assistant
Manual for Okuma Lathe LB25
Complete asset maintenance, one click away
Get instant access to all the maintenance information you need. Empower technicians to perform preventive maintenance with asset packages, ready to use right out of the box.

Documents & Manuals
Find all the essential guides in one place.
 Tensioning Guide
- Belt-diagram
- C-120 pulleys
+ 13 more

Work Order Templates
Pre-built workflows to keep your asset running smoothly.
- Daily Electrical System Inspection
- Replace Roller and Pulley
- Install Engine B-120
+ 29 more

Procedures
Integrate maintenance plans directly into your work orders.
- Motion Industries
- Applied Industrial Technologies
- Electrical Brothers
+ 5 more

Parts
Access the parts list for your equipment in MaintainX.
- Drive Motor
- B2 Rollers
- Tensioning System
+ 40 more
Okuma Lathe LB25
Create an account to install this asset package.
Maintenance Plans for Okuma Lathe Model LB25
Integrate maintenance plans directly into your work orders in MaintainX.
Tensioning Belts
Adjusting Belt Tension by Using A Tension Meter (Optional)
Loosen bolt A
Turn the tension adjusting bolt
Adjust belt tension using a tension meter (optional) by referring to Table 4-2
After adjusting the belt tension, tighten bolt A to clamp the motor base
How to Use Tension Meter
Provide deflection ô at the center of the belt span and read the tension load 'F'
When installing a new belt, or readjusting the present belt, the tension should be adjusted to the values shown in Table 4-2 below
Sign off on the tensioning belts procedure

Coolant Tank Cleaning
Procedure to Clean the Separately Installed Coolant Tank
Remove the front cover
Remove the cover at the side of the coolant pump
Draw the coolant out of the tank by the pump
Pull out the coolant tank to the right until the pump protrudes from the side cover, and pull it out to the front
Clean inside the coolant tank
Clean the filter
After cleaning the tank, reinstall the coolant tank
Warning: The coolant tank must not protrude from the front rail. If the coolant tank is not installed correctly, coolant will leak
Alignment of Headstock
Warning: This procedure requires trained personnel with PPE!
Japanese Industrial Standard (JIS) specifies that the lathe should turn cylindrically to within 0.015 per 225 mm (0.00059 per 8.86 in.) of finishing length of work held in a chuck without the use of tailstock center to hold the work.
Mount the aligning fixtures (A) to the front of the headstock with screws B (M12, 1 pc .~ each)
Tighten screws C (M12, 2 pcs.) lightly to the base
Screw in screws D (M12, 2 pcs.) to fixture (A) until they contact the base
Loosen screws E and F (M24, 6 pcs.)
Adjust the alignment of the headstock with screws C and D
After completing the adjustment, tighten screws E and F, then remove fixtures (A)
Sign off on the alignment of the headstock
6 Months Lathe Inspection
Change hydraulic oil in the hydraulic unit
Supply lubricating oil to the chip conveyor
Check belt tension
Sign off on the 6 months lathe inspection
Lathe Lubrication
Warning: Only use specified lubricating oil and coolant.
Is the correct lubricating oil being used?
Is the correct coolant being used?
If incorrect oil or coolant is used, it may cause corrosion or lubrication failure.
Check for potential issues if non-recommended coolant is used
If any issues are found, avoid using the coolant.
Check the oil level in the tank.
For normal oil consumption amount, refer to 1-2 in this section.
Prior to shipment, the oil and coolant tanks are flushed out and must be refilled during the initial installation.
Parts for Okuma Lathe LB25
Access the parts list for your equipment in MaintainX.
Electromagnetic Brake BXL-08-10-A-17
E2131-835-010
Dester Block DS8Z
H0019-0002-44
Pressure Gauge OPG-DT1/4-¢40 × 70K
T019-400-003-45
Wiper Wiper edge
H1023-0020-65-1
Limit Switch 1LSI-J
E3012-891-001
Electromagnetic Brake BXL-08-10-A-17
E2131-835-010
Dester Block DS8Z
H0019-0002-44
Pressure Gauge OPG-DT1/4-¢40 × 70K
T019-400-003-45
Wiper Wiper edge
H1023-0020-65-1
Limit Switch 1LSI-J
E3012-891-001
Electromagnetic Brake BXL-08-10-A-17
E2131-835-010
Dester Block DS8Z
H0019-0002-44
Pressure Gauge OPG-DT1/4-¢40 × 70K
T019-400-003-45
Wiper Wiper edge
H1023-0020-65-1
Limit Switch 1LSI-J
E3012-891-001
Unlock efficiency
with MaintainX CoPilot
MaintainX CoPilot is your expert colleague, on call 24/7, helping your team find the answers they need to keep equipment running.
Reduce Unplanned Downtime
Ensure your team follows consistent procedures to minimize equipment failures and costly delays.
Maximize Asset Availability
Keep your assets running longer and more reliably, with standardized maintenance workflows from OEM manuals.
Lower Maintenance Costs
Turn any technician into an expert to streamline operations, maintain more assets, and reduce overall costs.
Thousands of companies manage their assets with MaintainX

'%3e%3cpath%20fill='url(%23b)'%20d='M66.008%2080.068c-5.084-.786-9.763-3.834-12.442-8.68a16.942%2016.942%200%200%201-1.87-5.18c1.096.19%202.203.476%203.298.87%206.525%202.333%2010.836%207.68%2011.014%2012.99ZM51.47%2061.576c.488-5.524%203.62-10.716%208.847-13.597a17.132%2017.132%200%200%201%2011.335-1.882c-.798%208.145-7.43%2014.848-16.038%2015.599-1.417.119-2.799.07-4.144-.12Zm28.564-11.478a17.513%2017.513%200%200%201%203.727%204.62c4.608%208.335%201.584%2018.813-6.75%2023.409a16.988%2016.988%200%200%201-4.359%201.679%2019.624%2019.624%200%200%201-3.977-12.776c.346-7.561%204.942-13.931%2011.36-16.932Z'/%3e%3cpath%20fill='%23110F0D'%20fill-rule='evenodd'%20d='M142.831%2048.324h4.977V77.03h-4.977V48.324Zm27.278%2013.002c.322%201.048.453%202.263.453%203.62v12.073h-4.787V66.208c0-.75-.047-1.572-.154-2.143-.453-2.382-1.822-3.572-4.215-3.572-2.31%200-3.882%201.274-4.43%203.476-.143.596-.226%201.405-.226%202.25v10.8h-4.787V56.623h4.477v2.989c1.536-2.5%203.906-3.43%206.371-3.43%203.488%200%206.263%201.68%207.298%205.144Zm24.636%207.323c0%203.882-2.358%206.525-5.763%207.727-1.298.453-2.632.643-4.62.643h-10.169V48.324h9.085c1.691%200%203.156.143%204.049.38%203.465.93%205.727%203.68%205.727%207.335%200%202.441-.81%204.156-2.762%205.644%202.905%201.417%204.453%203.727%204.453%206.966Zm-15.634-8.656h4.584c1.024%200%201.917-.143%202.536-.417%201.215-.548%201.905-1.608%201.905-3.167%200-1.548-.643-2.572-1.845-3.132-.691-.31-1.762-.452-2.763-.452h-4.417v7.168Zm10.716%208.465c0-1.536-.893-3.37-3.227-3.893-.428-.095-1.036-.143-1.571-.143h-5.918v8.085h5.501c.56%200%201.429-.048%201.953-.167%201.94-.453%203.262-1.846%203.262-3.882Zm47.747-11.847-8.097%2020.408h-4.429l-8.109-20.408h5.191l5.192%2014.574%205.108-14.574h5.144Zm-20.218%2010.002c0%20.69-.036%201.262-.155%201.94h-15.943c.631%202.87%202.714%204.728%205.882%204.728%202.131%200%203.607-.882%204.703-2.525h4.87c-1.762%204.144-5.204%206.692-9.657%206.692-6.084%200-10.537-4.858-10.537-10.49%200-6.108%204.524-10.776%2010.335-10.776%206.239%200%2010.442%204.954%2010.502%2010.43Zm-4.763-1.405c-.333-2.846-2.643-4.858-5.691-4.858-2.894%200-5.287%201.929-5.621%204.858h11.312Zm-72.667%203.44c0%204.787-3.287%208.371-9.419%208.371H119.363V64.66c-1.917.274-3.87.69-5.811%201.238l4.537%2011.121h-5.418l-3.596-9.585c-5.144%202.084-10.085%205.216-14.217%209.585h-4.786L101.8%2048.312h4.56l5.68%2013.883a44.112%2044.112%200%200%201%207.323-1.774V48.312h9.084c1.703%200%203.156.143%204.061.393%203.453.929%205.727%203.667%205.727%207.323%200%201.917-.738%204.179-2.81%205.691%203.06%201.56%204.501%204.025%204.501%206.93Zm-15.634-8.667a62.664%2062.664%200%200%201%202.06-.036c1.703.012%203.239.131%204.608.37%201.441-.549%202.357-1.727%202.357-3.537%200-1.941-.881-3.144-2.488-3.667-.548-.18-1.358-.286-2.322-.286h-4.215v7.156Zm-16.55%203.905-3.715-9.894-6.394%2016.502c2.833-2.595%206.263-4.858%2010.109-6.608Zm27.254%204.74c0-2.775-3.131-4.347-8.513-4.418-.715%200-1.441.011-2.191.047v8.252h5.918c2.548%200%204.786-1.37%204.786-3.882Z'%20clip-rule='evenodd'/%3e%3c/g%3e%3cdefs%3e%3clinearGradient%20id='b'%20x1='51.47'%20x2='85.916'%20y1='62.946'%20y2='62.946'%20gradientUnits='userSpaceOnUse'%3e%3cstop%20stop-color='%23CD9F28'/%3e%3cstop%20offset='1'%20stop-color='%23ECD80B'/%3e%3c/linearGradient%3e%3cclipPath%20id='a'%3e%3cpath%20fill='%23fff'%20d='M51.47%2045.728h186.104V80.14H51.47z'/%3e%3c/clipPath%3e%3c/defs%3e%3c/svg%3e)


More from Okuma


Explore Other Assets


© 2026 MaintainX. All rights reserved.