


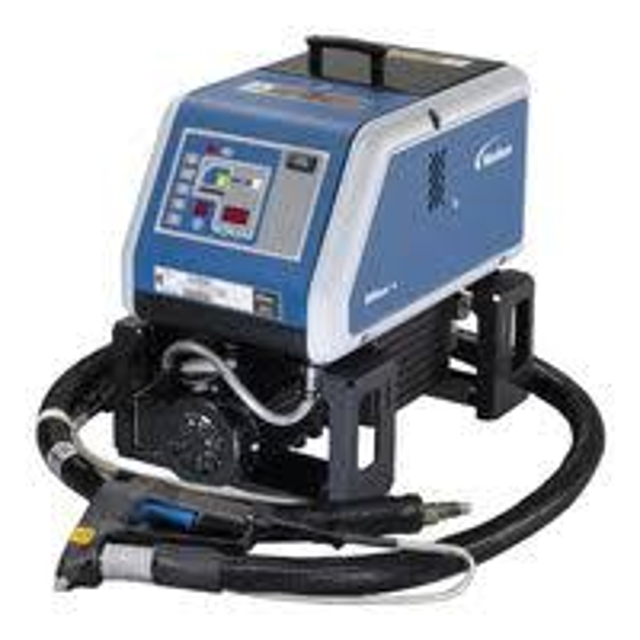
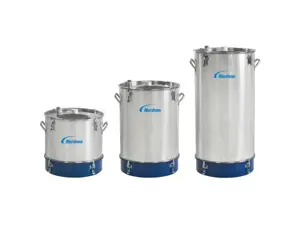
Nordson Adhesive Melter D16L
Need answers fast?
Explore the manual using AI.
Turn manuals into instant answers
with your AI-powered assistantTurn manuals into instant answers
with your AI-powered assistant
Manual for Nordson Adhesive Melter D16L
Complete asset maintenance, one click away
Get instant access to all the maintenance information you need. Empower technicians to perform preventive maintenance with asset packages, ready to use right out of the box.

Documents & Manuals
Find all the essential guides in one place.
 Tensioning Guide
- Belt-diagram
- C-120 pulleys
+ 13 more

Work Order Templates
Pre-built workflows to keep your asset running smoothly.
- Daily Electrical System Inspection
- Replace Roller and Pulley
- Install Engine B-120
+ 29 more

Procedures
Integrate maintenance plans directly into your work orders.
- Motion Industries
- Applied Industrial Technologies
- Electrical Brothers
+ 5 more

Parts
Access the parts list for your equipment in MaintainX.
- Drive Motor
- B2 Rollers
- Tensioning System
+ 40 more
Nordson Adhesive Melter D16L
Create an account to install this asset package.
Maintenance Plans for Nordson Adhesive Melter Model D16L
Integrate maintenance plans directly into your work orders in MaintainX.
Adhesive Melter Tank Cleaning
To avoid the problems that can occur when different hot melt materials are mixed or when hot melt char forms in the tank, clean the tank when:
- changing to a different type of hot melt
- excessive char builds up inside the tank
NOTE: The tank cleaning procedures provided in this section require that an appropriate flushing material be used.; The flushing material should be compatible with both the previous adhesive and the new adhesive, if applicable.
To clean the tank when changing hot melt
1. Operate the melter normally until the tank is empty.
2. Press the Pump key to stop the pump.
3. Allow the melter to heat or cool to the temperature recommended by the manufacturer of the flushing material.
4. While wearing the appropriate protective equipment, wipe any residual hot melt from the inside of the tank.

Pressure Control Valve Adjustment
Warning: Only trained personnel should perform this procedure
Note: The pressure control valve screw is turned fully counterclockwise (at or near the valve’s lowest pressure setting) at the factory and then the lock nut is tightened.
Before starting, is the lock nut loosened?
Before placing the melter into routine operation, loosen the lock nut and adjust the pressure control valve to achieve the desired adhesive output rate for your manufacturing process.
With the line running and the guns dispensing adhesive, turn the adjustment screw on the pressure control valve
Sign off on the pressure control valve adjustment
Adhesive Melter Filter Replacement
Warning: Always relieve hydraulic pressure before disconnecting any hydraulic fitting or opening any pressurized port.
Pump stopped?
Hot melt no longer flows from the guns?
Upload a photo of the removed filter
Dispose of the old filter in accordance with local regulations
O-ring on the new filter in good condition?
Enter the part number of the new filter
Enter the torque applied to the filter (in N•m)
Sign off on the filter replacement
1 Daily Adhesive Melter Cleaning
To prevent components from overheating due to heat build-up or loss of air circulation, regularly remove any hot melt that collects on the exterior of the melter, hoses, and guns.
If hot melt inadvertently spills inside the melter’s interior spaces, the side panels can be removed in order to clean out the spilled hot melt.
WARNING: Risk of electricution and fire! Do not clean the melter with a direct stream of water or steam.; Use only water or an appropriate, non-flammable cleaning solution that is applied using a clean cloth.
Cleaning the melter using a direct stream of water or steam or a flammable solvent can result in property damage and personal injury, including death.
To clean the exterior of the melter:
- Use only cleaning compounds that are compatible with polyester.
- Apply cleaning compounds using a soft cloth.
- Do not use pointed or sharp tools to clean the exterior surface.;
Exterior Panels Replacement
Warning: De-energize the melter before starting. Refer to Section 1, Safety.
Upload a photo of the de-energized melter
Did you use a 4 mm (5/32-inch) hex-head wrench to turn the 1/2-turn fastener located in the center of each side panel counterclockwise?
Upload a photo of the removed panel
Did you lift the panel out of the melter’s frame?
Did you reverse steps 2 and 3 to reinstall each panel?
Sign off on the panel replacement
Parts for Nordson Adhesive Melter D16L
Access the parts list for your equipment in MaintainX.
Service Kit, Panel, Front, D10L/D16L, With Tags
1031177
Switch
1017947
Service Kit, Board, Display/Central Processing Unit (CPU)
1028325
Board
1031200
Cord
1033632
Service Kit, Panel, Front, D10L/D16L, With Tags
1031177
Switch
1017947
Service Kit, Board, Display/Central Processing Unit (CPU)
1028325
Board
1031200
Cord
1033632
Service Kit, Panel, Front, D10L/D16L, With Tags
1031177
Switch
1017947
Service Kit, Board, Display/Central Processing Unit (CPU)
1028325
Board
1031200
Cord
1033632
Unlock efficiency
with MaintainX CoPilot
MaintainX CoPilot is your expert colleague, on call 24/7, helping your team find the answers they need to keep equipment running.
Reduce Unplanned Downtime
Ensure your team follows consistent procedures to minimize equipment failures and costly delays.
Maximize Asset Availability
Keep your assets running longer and more reliably, with standardized maintenance workflows from OEM manuals.
Lower Maintenance Costs
Turn any technician into an expert to streamline operations, maintain more assets, and reduce overall costs.
Thousands of companies manage their assets with MaintainX

'%3e%3cpath%20fill='url(%23b)'%20d='M66.008%2080.068c-5.084-.786-9.763-3.834-12.442-8.68a16.942%2016.942%200%200%201-1.87-5.18c1.096.19%202.203.476%203.298.87%206.525%202.333%2010.836%207.68%2011.014%2012.99ZM51.47%2061.576c.488-5.524%203.62-10.716%208.847-13.597a17.132%2017.132%200%200%201%2011.335-1.882c-.798%208.145-7.43%2014.848-16.038%2015.599-1.417.119-2.799.07-4.144-.12Zm28.564-11.478a17.513%2017.513%200%200%201%203.727%204.62c4.608%208.335%201.584%2018.813-6.75%2023.409a16.988%2016.988%200%200%201-4.359%201.679%2019.624%2019.624%200%200%201-3.977-12.776c.346-7.561%204.942-13.931%2011.36-16.932Z'/%3e%3cpath%20fill='%23110F0D'%20fill-rule='evenodd'%20d='M142.831%2048.324h4.977V77.03h-4.977V48.324Zm27.278%2013.002c.322%201.048.453%202.263.453%203.62v12.073h-4.787V66.208c0-.75-.047-1.572-.154-2.143-.453-2.382-1.822-3.572-4.215-3.572-2.31%200-3.882%201.274-4.43%203.476-.143.596-.226%201.405-.226%202.25v10.8h-4.787V56.623h4.477v2.989c1.536-2.5%203.906-3.43%206.371-3.43%203.488%200%206.263%201.68%207.298%205.144Zm24.636%207.323c0%203.882-2.358%206.525-5.763%207.727-1.298.453-2.632.643-4.62.643h-10.169V48.324h9.085c1.691%200%203.156.143%204.049.38%203.465.93%205.727%203.68%205.727%207.335%200%202.441-.81%204.156-2.762%205.644%202.905%201.417%204.453%203.727%204.453%206.966Zm-15.634-8.656h4.584c1.024%200%201.917-.143%202.536-.417%201.215-.548%201.905-1.608%201.905-3.167%200-1.548-.643-2.572-1.845-3.132-.691-.31-1.762-.452-2.763-.452h-4.417v7.168Zm10.716%208.465c0-1.536-.893-3.37-3.227-3.893-.428-.095-1.036-.143-1.571-.143h-5.918v8.085h5.501c.56%200%201.429-.048%201.953-.167%201.94-.453%203.262-1.846%203.262-3.882Zm47.747-11.847-8.097%2020.408h-4.429l-8.109-20.408h5.191l5.192%2014.574%205.108-14.574h5.144Zm-20.218%2010.002c0%20.69-.036%201.262-.155%201.94h-15.943c.631%202.87%202.714%204.728%205.882%204.728%202.131%200%203.607-.882%204.703-2.525h4.87c-1.762%204.144-5.204%206.692-9.657%206.692-6.084%200-10.537-4.858-10.537-10.49%200-6.108%204.524-10.776%2010.335-10.776%206.239%200%2010.442%204.954%2010.502%2010.43Zm-4.763-1.405c-.333-2.846-2.643-4.858-5.691-4.858-2.894%200-5.287%201.929-5.621%204.858h11.312Zm-72.667%203.44c0%204.787-3.287%208.371-9.419%208.371H119.363V64.66c-1.917.274-3.87.69-5.811%201.238l4.537%2011.121h-5.418l-3.596-9.585c-5.144%202.084-10.085%205.216-14.217%209.585h-4.786L101.8%2048.312h4.56l5.68%2013.883a44.112%2044.112%200%200%201%207.323-1.774V48.312h9.084c1.703%200%203.156.143%204.061.393%203.453.929%205.727%203.667%205.727%207.323%200%201.917-.738%204.179-2.81%205.691%203.06%201.56%204.501%204.025%204.501%206.93Zm-15.634-8.667a62.664%2062.664%200%200%201%202.06-.036c1.703.012%203.239.131%204.608.37%201.441-.549%202.357-1.727%202.357-3.537%200-1.941-.881-3.144-2.488-3.667-.548-.18-1.358-.286-2.322-.286h-4.215v7.156Zm-16.55%203.905-3.715-9.894-6.394%2016.502c2.833-2.595%206.263-4.858%2010.109-6.608Zm27.254%204.74c0-2.775-3.131-4.347-8.513-4.418-.715%200-1.441.011-2.191.047v8.252h5.918c2.548%200%204.786-1.37%204.786-3.882Z'%20clip-rule='evenodd'/%3e%3c/g%3e%3cdefs%3e%3clinearGradient%20id='b'%20x1='51.47'%20x2='85.916'%20y1='62.946'%20y2='62.946'%20gradientUnits='userSpaceOnUse'%3e%3cstop%20stop-color='%23CD9F28'/%3e%3cstop%20offset='1'%20stop-color='%23ECD80B'/%3e%3c/linearGradient%3e%3cclipPath%20id='a'%3e%3cpath%20fill='%23fff'%20d='M51.47%2045.728h186.104V80.14H51.47z'/%3e%3c/clipPath%3e%3c/defs%3e%3c/svg%3e)


More from Nordson


Explore Other Assets


© 2026 MaintainX. All rights reserved.