


JCB Generator G40
Need answers fast?
Explore the manual using AI.
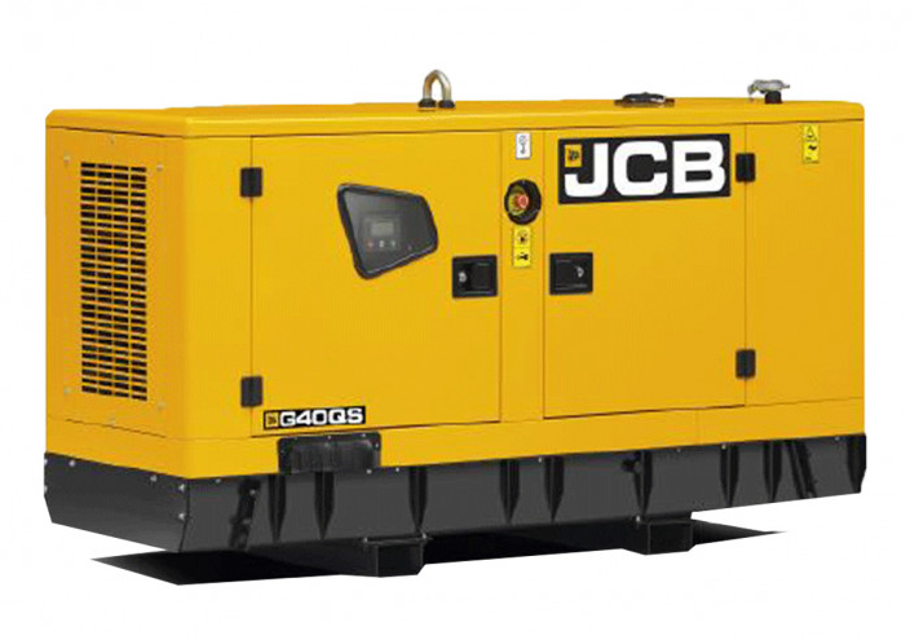
The JCB Generator G40 is a robust industrial generator designed for reliable power supply in various applications. Known for its durability and efficiency, this generator model ensures optimal performance with regular maintenance and quality spare parts. Ideal for construction sites and events, the G40 delivers dependable energy solutions.
Turn manuals into instant answers
with your AI-powered assistantTurn manuals into instant answers
with your AI-powered assistant
Manual for JCB Generator G40
Complete asset maintenance, one click away
Get instant access to all the maintenance information you need. Empower technicians to perform preventive maintenance with asset packages, ready to use right out of the box.

Documents & Manuals
Find all the essential guides in one place.
 Tensioning Guide
- Belt-diagram
- C-120 pulleys
+ 13 more

Work Order Templates
Pre-built workflows to keep your asset running smoothly.
- Daily Electrical System Inspection
- Replace Roller and Pulley
- Install Engine B-120
+ 29 more

Procedures
Integrate maintenance plans directly into your work orders.
- Motion Industries
- Applied Industrial Technologies
- Electrical Brothers
+ 5 more

Parts
Access the parts list for your equipment in MaintainX.
- Drive Motor
- B2 Rollers
- Tensioning System
+ 40 more
JCB Generator G40
Create an account to install this asset package.
Maintenance Plans for JCB Generator Model G40
Integrate maintenance plans directly into your work orders in MaintainX.
1000 Hourly or 1 Yearly Wheel Loader Maintenance
Coolant Change
Intake manifold hose (air filter - intake manifold) Change
Coolant hoses Change
Fuel hose Change (5000 Hourly or 5 Yearly Wheel Loader Maintenance);

Drive Belt Adjustment
Loosen the alternator mount bolts. Do not remove them.
Pull the alternator outwards as shown to tension the belt.
Hold the alternator in position and tighten the mount bolts.
Tighten the alternator mount bolts to correct torque value.
Check the belt tension, if necessary repeat the steps from 1 to 4.
Install the belt cover.
Sign off on the drive belt adjustment
Coolant Check
CAUTION The cooling system is pressurised when the coolant is hot. When you remove the cap, hot coolant can spray out and burn you. Make sure that the engine is cool before you work on the cooling system.
Carefully loosen the radiator cap. Let any pressure escape before removing the cap.
Remove the radiator cap.
Check that the coolant level is flush with the top of the filler neck.
Fill with 50% antifreeze and 50% decalcified water until it reaches the correct level and replace the cap.
Top liquid up until the pipes inside the radiator are covered approximatively by the amount specified. Do not overfill the radiator, but leave room for the coolant to expand. Length/Dimension/Distance: 5mm
Run the engine to raise the coolant to working temperature and pressure. Stop the engine, checks for leaks and re-check the fluid level.
Sign off on the coolant check
Battery Charge Level Check
Precautions before Charging
Follow all the precautions described below, to prevent damage to the alternator and battery.
1. Make the machine safe.
2. Make sure that the battery negative terminal is connected to the earth cable.
3. Do not connect or disconnect the battery or alternator connections, or any part of the charging circuit while the engine is in operation. If you disregard this instruction, the regulator or rectifying diodes will be damaged.
4. Main output cables are always in active state of current flow even when the engine is not in operation. If the alternator connector is removed, do not earth the moulded plug.
5. When you do arc welding on the machine, remove the moulded plug (or if the separate output cables are installed, remove the cables) to protect the alternator.
6. If it is necessary to jump start the battery then do the steps below.
6.1. Connect the secondary battery in parallel without disconnecting the vehicle battery from the charging circuit.
Engine Oil Replace
Notice: Do not exceed the correct level of engine oil in the sump. If there is too much engine oil, the excess must be drained to the correct level. An excess of engine oil could cause the engine speed to increase rapidly without control.
WARNING Hot oil and engine components can burn you. Make sure the engine is cool before doing this job.
Used engine crankcase lubricants contain harmful contaminants. In laboratory tests it was shown that used engine oils can cause skin cancer.
CAUTION It is illegal to pollute drains, sewers or the ground. Clean up all spilt fluids and/or lubricants.
Used fluids and/or lubricants, filters and contaminated materials must be disposed of in accordance with local regulations. Use authorised waste disposal sites.
Make the machine safe.
Get access to the engine.
Remove the oil filler cap.
Remove the engine oil drain plug. Drain the oil in to a suitable container.
Unlock efficiency
with MaintainX CoPilot
MaintainX CoPilot is your expert colleague, on call 24/7, helping your team find the answers they need to keep equipment running.
Reduce Unplanned Downtime
Ensure your team follows consistent procedures to minimize equipment failures and costly delays.
Maximize Asset Availability
Keep your assets running longer and more reliably, with standardized maintenance workflows from OEM manuals.
Lower Maintenance Costs
Turn any technician into an expert to streamline operations, maintain more assets, and reduce overall costs.
Thousands of companies manage their assets with MaintainX

'%3e%3cpath%20fill='url(%23b)'%20d='M66.008%2080.068c-5.084-.786-9.763-3.834-12.442-8.68a16.942%2016.942%200%200%201-1.87-5.18c1.096.19%202.203.476%203.298.87%206.525%202.333%2010.836%207.68%2011.014%2012.99ZM51.47%2061.576c.488-5.524%203.62-10.716%208.847-13.597a17.132%2017.132%200%200%201%2011.335-1.882c-.798%208.145-7.43%2014.848-16.038%2015.599-1.417.119-2.799.07-4.144-.12Zm28.564-11.478a17.513%2017.513%200%200%201%203.727%204.62c4.608%208.335%201.584%2018.813-6.75%2023.409a16.988%2016.988%200%200%201-4.359%201.679%2019.624%2019.624%200%200%201-3.977-12.776c.346-7.561%204.942-13.931%2011.36-16.932Z'/%3e%3cpath%20fill='%23110F0D'%20fill-rule='evenodd'%20d='M142.831%2048.324h4.977V77.03h-4.977V48.324Zm27.278%2013.002c.322%201.048.453%202.263.453%203.62v12.073h-4.787V66.208c0-.75-.047-1.572-.154-2.143-.453-2.382-1.822-3.572-4.215-3.572-2.31%200-3.882%201.274-4.43%203.476-.143.596-.226%201.405-.226%202.25v10.8h-4.787V56.623h4.477v2.989c1.536-2.5%203.906-3.43%206.371-3.43%203.488%200%206.263%201.68%207.298%205.144Zm24.636%207.323c0%203.882-2.358%206.525-5.763%207.727-1.298.453-2.632.643-4.62.643h-10.169V48.324h9.085c1.691%200%203.156.143%204.049.38%203.465.93%205.727%203.68%205.727%207.335%200%202.441-.81%204.156-2.762%205.644%202.905%201.417%204.453%203.727%204.453%206.966Zm-15.634-8.656h4.584c1.024%200%201.917-.143%202.536-.417%201.215-.548%201.905-1.608%201.905-3.167%200-1.548-.643-2.572-1.845-3.132-.691-.31-1.762-.452-2.763-.452h-4.417v7.168Zm10.716%208.465c0-1.536-.893-3.37-3.227-3.893-.428-.095-1.036-.143-1.571-.143h-5.918v8.085h5.501c.56%200%201.429-.048%201.953-.167%201.94-.453%203.262-1.846%203.262-3.882Zm47.747-11.847-8.097%2020.408h-4.429l-8.109-20.408h5.191l5.192%2014.574%205.108-14.574h5.144Zm-20.218%2010.002c0%20.69-.036%201.262-.155%201.94h-15.943c.631%202.87%202.714%204.728%205.882%204.728%202.131%200%203.607-.882%204.703-2.525h4.87c-1.762%204.144-5.204%206.692-9.657%206.692-6.084%200-10.537-4.858-10.537-10.49%200-6.108%204.524-10.776%2010.335-10.776%206.239%200%2010.442%204.954%2010.502%2010.43Zm-4.763-1.405c-.333-2.846-2.643-4.858-5.691-4.858-2.894%200-5.287%201.929-5.621%204.858h11.312Zm-72.667%203.44c0%204.787-3.287%208.371-9.419%208.371H119.363V64.66c-1.917.274-3.87.69-5.811%201.238l4.537%2011.121h-5.418l-3.596-9.585c-5.144%202.084-10.085%205.216-14.217%209.585h-4.786L101.8%2048.312h4.56l5.68%2013.883a44.112%2044.112%200%200%201%207.323-1.774V48.312h9.084c1.703%200%203.156.143%204.061.393%203.453.929%205.727%203.667%205.727%207.323%200%201.917-.738%204.179-2.81%205.691%203.06%201.56%204.501%204.025%204.501%206.93Zm-15.634-8.667a62.664%2062.664%200%200%201%202.06-.036c1.703.012%203.239.131%204.608.37%201.441-.549%202.357-1.727%202.357-3.537%200-1.941-.881-3.144-2.488-3.667-.548-.18-1.358-.286-2.322-.286h-4.215v7.156Zm-16.55%203.905-3.715-9.894-6.394%2016.502c2.833-2.595%206.263-4.858%2010.109-6.608Zm27.254%204.74c0-2.775-3.131-4.347-8.513-4.418-.715%200-1.441.011-2.191.047v8.252h5.918c2.548%200%204.786-1.37%204.786-3.882Z'%20clip-rule='evenodd'/%3e%3c/g%3e%3cdefs%3e%3clinearGradient%20id='b'%20x1='51.47'%20x2='85.916'%20y1='62.946'%20y2='62.946'%20gradientUnits='userSpaceOnUse'%3e%3cstop%20stop-color='%23CD9F28'/%3e%3cstop%20offset='1'%20stop-color='%23ECD80B'/%3e%3c/linearGradient%3e%3cclipPath%20id='a'%3e%3cpath%20fill='%23fff'%20d='M51.47%2045.728h186.104V80.14H51.47z'/%3e%3c/clipPath%3e%3c/defs%3e%3c/svg%3e)


More from JCB


Explore Other Assets


© 2026 MaintainX. All rights reserved.