


Hussmann Open Fish Service Case DSM-EP-CNP-6R W/LIGHTS & TIMER
Need answers fast?
Explore the manual using AI.
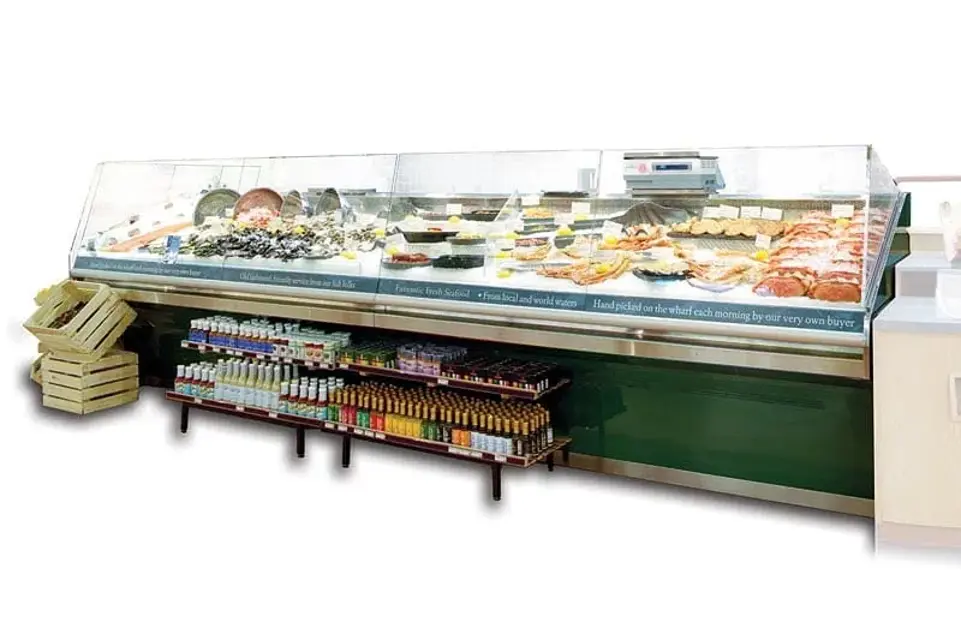
The Hussmann Open Fish Service Case DSM-EP-CNP-6R is designed for optimal display and preservation of seafood. Featuring integrated lights and a timer, this case ensures freshness and visibility, making it an ideal choice for retail environments. Trust Hussmann for reliable performance and quality in your refrigeration needs.
Turn manuals into instant answers
with your AI-powered assistantTurn manuals into instant answers
with your AI-powered assistant
Manual for Hussmann Open Fish Service Case DSM-EP-CNP-6R W/LIGHTS & TIMER
Complete asset maintenance, one click away
Get instant access to all the maintenance information you need. Empower technicians to perform preventive maintenance with asset packages, ready to use right out of the box.

Documents & Manuals
Find all the essential guides in one place.
 Tensioning Guide
- Belt-diagram
- C-120 pulleys
+ 13 more

Work Order Templates
Pre-built workflows to keep your asset running smoothly.
- Daily Electrical System Inspection
- Replace Roller and Pulley
- Install Engine B-120
+ 29 more

Procedures
Integrate maintenance plans directly into your work orders.
- Motion Industries
- Applied Industrial Technologies
- Electrical Brothers
+ 5 more

Parts
Access the parts list for your equipment in MaintainX.
- Drive Motor
- B2 Rollers
- Tensioning System
+ 40 more
Hussmann Open Fish Service Case DSM-EP-CNP-6R W/LIGHTS & TIMER
Create an account to install this asset package.
Maintenance Plans for Hussmann Open Fish Service Case Model DSM-EP-CNP-6R W/LIGHTS & TIMER
Integrate maintenance plans directly into your work orders in MaintainX.
6 Monthly Open Fish Service Case Maintenance
• To maintain good refrigeration performance, a refrigeration service person should be called periodically (at least twice a year) to clean the discharge honeycomb and remove any accumulated dirt from the condenser coil and condensate evaporator pan on self-contained models.
* POOR CIRCULATION OF AIR THROUGH THE CONDENSER COIL WILL RESULT IN POOR REFRIGERATION PERFORMANCE.
• Dirt accumulation inside the condensate evaporator pan will reduce the pan’s capacity and affect the efficiency of the heater causing a burned out heater and an overflow of defrost water onto the store floor.
Before calling for service:
• Check power. Ensure reliable electrical power supply to the equipment
• Check shelf loading. Overstocking will adversely affect case performance.
• If frost is collecting on fixture or product, verify that store Humidity Control is working properly, and that no outside doors/windows allow moisture into store.;

Ballast Replacement
The power supply for the LED fixtures is located under the case in a dedicated electrical box.
For access to the ballast:
- Remove body panels ( See Body panel Removal for reference pg.23)
- Remove screws to grille to expose electrical conduit.
- Replace or service the ballast as required and replace the canopy in reverse order of removal.;
Case Cleaning
- To insure long life, proper sanitation and minimum maintenance costs, the refrigerator should be thoroughly cleaned frequently.
• SHUT OFF FAN BEFORE CLEANING: - It can be unplugged within the case, or shut off entire case at the source. The interior bottom may be wiped with any domestic soap or detergent based cleaners. Sanitizing solutions will not harm the interior bottom.
WARNING! DO NOT USE WATER HOSES! A self contained case empties into an evaporator pan that WILL OVERFLOW IF TOO MUCH WATER IS INTRODUCED during cleaning.
• USE WATERAND A MILD DETERGENT FOR THE EXTERIOR ONLY
• Wipe interior with damp non-abrasive cloth. Soap and hot water are not enough to kill bacteria; a sanitizing solution must be included with each cleaning process to eliminate bacteria.
• Clean any visible debris surrounding or on top of the drain location. The drain is located under the deck pans.
• DO NOT USE A CHLORINATED CLEANER ON ANY SURFACE.
• DO NOT USE ABRASIVES OR STEEL WOOL SCOURING PADS (these will mar the finish)
• DO NOT USE A CLEANING OR SANITIZING SOLUTION THAT HAS AN OIL BASE (these will dissolve the butyl sealants) or an AMMONIA BASE (this will corrode the copper components of the case)
Fan Blade Replacement
WARNING! ALWAYS DISCONNECT THE ELECTRICAL POWER AT THE MAIN DISCONNECT WHEN SERVICING OR REPLACING ANY ELECTRICAL COMPONENT OF THIS REFRIGERATOR. THIS INCLUDES, BUT IS NOT LIMITED TO SUCH ITEMS AS FANS AND THERMOSTATS.
1. The evaporator fan is located directly under the deck pan.
2. Should the fan blade ever need servicing.
* ALWAYS REPLACE THE FAN BLADE WITH THE RAISED EMBOSSING SIDE OF THE BLADE INSTALLED TOWARD THE MOTOR.;
Honeycomb Removal & Cleaning
CAUTION: DO NOT TEAR THE HONEYCOMB
1) Remove the honeycomb assembly as follows: Insert a small Phillips screwdriver behind the rear edge of the honeycomb on the right hand end and gently pull down.
- The bottom of the honeycomb will drop down.
- Continue down the length of the case, lifting the honeycomb out.
2) To clean honeycomb: Mix powdered detergent, in warm water. (5 to 7 Tablespoons per gallon).
- Immerse or spot clean the honeycomb.
- Use care not to damage the cell structure of the honeycomb.
- Rinse thoroughly in clean water. Shake excess water from the honeycomb and dry. (if heat is used, do not exceed 140F dry heat)
3) Install honeycomb by inserting the notched side up against the deflector and press upwards inserting the bottom of the honeycomb into the back ledge.
Unlock efficiency
with MaintainX CoPilot
MaintainX CoPilot is your expert colleague, on call 24/7, helping your team find the answers they need to keep equipment running.
Reduce Unplanned Downtime
Ensure your team follows consistent procedures to minimize equipment failures and costly delays.
Maximize Asset Availability
Keep your assets running longer and more reliably, with standardized maintenance workflows from OEM manuals.
Lower Maintenance Costs
Turn any technician into an expert to streamline operations, maintain more assets, and reduce overall costs.
Thousands of companies manage their assets with MaintainX

'%3e%3cpath%20fill='url(%23b)'%20d='M66.008%2080.068c-5.084-.786-9.763-3.834-12.442-8.68a16.942%2016.942%200%200%201-1.87-5.18c1.096.19%202.203.476%203.298.87%206.525%202.333%2010.836%207.68%2011.014%2012.99ZM51.47%2061.576c.488-5.524%203.62-10.716%208.847-13.597a17.132%2017.132%200%200%201%2011.335-1.882c-.798%208.145-7.43%2014.848-16.038%2015.599-1.417.119-2.799.07-4.144-.12Zm28.564-11.478a17.513%2017.513%200%200%201%203.727%204.62c4.608%208.335%201.584%2018.813-6.75%2023.409a16.988%2016.988%200%200%201-4.359%201.679%2019.624%2019.624%200%200%201-3.977-12.776c.346-7.561%204.942-13.931%2011.36-16.932Z'/%3e%3cpath%20fill='%23110F0D'%20fill-rule='evenodd'%20d='M142.831%2048.324h4.977V77.03h-4.977V48.324Zm27.278%2013.002c.322%201.048.453%202.263.453%203.62v12.073h-4.787V66.208c0-.75-.047-1.572-.154-2.143-.453-2.382-1.822-3.572-4.215-3.572-2.31%200-3.882%201.274-4.43%203.476-.143.596-.226%201.405-.226%202.25v10.8h-4.787V56.623h4.477v2.989c1.536-2.5%203.906-3.43%206.371-3.43%203.488%200%206.263%201.68%207.298%205.144Zm24.636%207.323c0%203.882-2.358%206.525-5.763%207.727-1.298.453-2.632.643-4.62.643h-10.169V48.324h9.085c1.691%200%203.156.143%204.049.38%203.465.93%205.727%203.68%205.727%207.335%200%202.441-.81%204.156-2.762%205.644%202.905%201.417%204.453%203.727%204.453%206.966Zm-15.634-8.656h4.584c1.024%200%201.917-.143%202.536-.417%201.215-.548%201.905-1.608%201.905-3.167%200-1.548-.643-2.572-1.845-3.132-.691-.31-1.762-.452-2.763-.452h-4.417v7.168Zm10.716%208.465c0-1.536-.893-3.37-3.227-3.893-.428-.095-1.036-.143-1.571-.143h-5.918v8.085h5.501c.56%200%201.429-.048%201.953-.167%201.94-.453%203.262-1.846%203.262-3.882Zm47.747-11.847-8.097%2020.408h-4.429l-8.109-20.408h5.191l5.192%2014.574%205.108-14.574h5.144Zm-20.218%2010.002c0%20.69-.036%201.262-.155%201.94h-15.943c.631%202.87%202.714%204.728%205.882%204.728%202.131%200%203.607-.882%204.703-2.525h4.87c-1.762%204.144-5.204%206.692-9.657%206.692-6.084%200-10.537-4.858-10.537-10.49%200-6.108%204.524-10.776%2010.335-10.776%206.239%200%2010.442%204.954%2010.502%2010.43Zm-4.763-1.405c-.333-2.846-2.643-4.858-5.691-4.858-2.894%200-5.287%201.929-5.621%204.858h11.312Zm-72.667%203.44c0%204.787-3.287%208.371-9.419%208.371H119.363V64.66c-1.917.274-3.87.69-5.811%201.238l4.537%2011.121h-5.418l-3.596-9.585c-5.144%202.084-10.085%205.216-14.217%209.585h-4.786L101.8%2048.312h4.56l5.68%2013.883a44.112%2044.112%200%200%201%207.323-1.774V48.312h9.084c1.703%200%203.156.143%204.061.393%203.453.929%205.727%203.667%205.727%207.323%200%201.917-.738%204.179-2.81%205.691%203.06%201.56%204.501%204.025%204.501%206.93Zm-15.634-8.667a62.664%2062.664%200%200%201%202.06-.036c1.703.012%203.239.131%204.608.37%201.441-.549%202.357-1.727%202.357-3.537%200-1.941-.881-3.144-2.488-3.667-.548-.18-1.358-.286-2.322-.286h-4.215v7.156Zm-16.55%203.905-3.715-9.894-6.394%2016.502c2.833-2.595%206.263-4.858%2010.109-6.608Zm27.254%204.74c0-2.775-3.131-4.347-8.513-4.418-.715%200-1.441.011-2.191.047v8.252h5.918c2.548%200%204.786-1.37%204.786-3.882Z'%20clip-rule='evenodd'/%3e%3c/g%3e%3cdefs%3e%3clinearGradient%20id='b'%20x1='51.47'%20x2='85.916'%20y1='62.946'%20y2='62.946'%20gradientUnits='userSpaceOnUse'%3e%3cstop%20stop-color='%23CD9F28'/%3e%3cstop%20offset='1'%20stop-color='%23ECD80B'/%3e%3c/linearGradient%3e%3cclipPath%20id='a'%3e%3cpath%20fill='%23fff'%20d='M51.47%2045.728h186.104V80.14H51.47z'/%3e%3c/clipPath%3e%3c/defs%3e%3c/svg%3e)


More from Hussmann


Explore Other Assets


© 2026 MaintainX. All rights reserved.