
Turn manuals into instant answers
with your AI-powered assistantTurn manuals into instant answers
with your AI-powered assistant
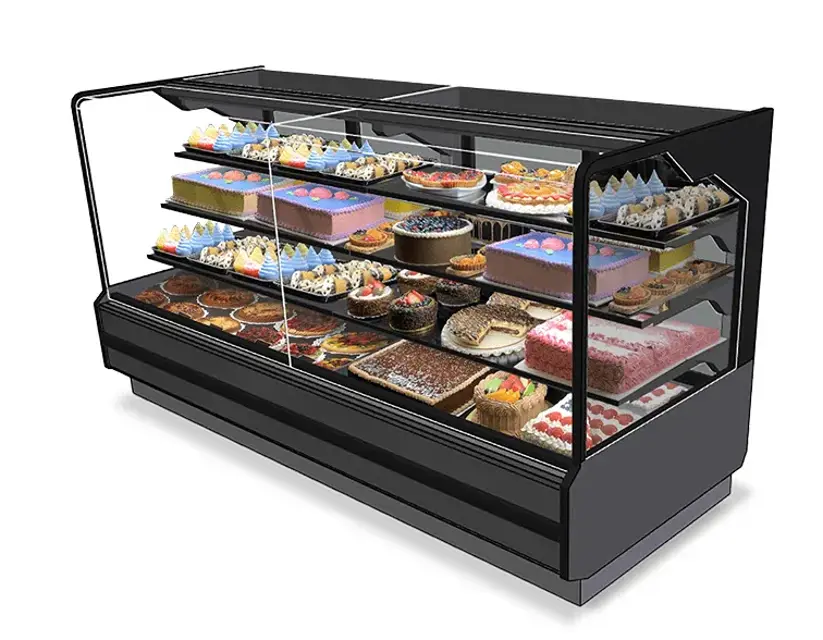
Manual for Hussmann Bakery Service Merchaniser DZC‐V‐144‐DWR‐R
Complete asset maintenance, one click away
Get instant access to all the maintenance information you need. Empower technicians to perform preventive maintenance with asset packages, ready to use right out of the box.
Documents & Manuals
Find all the essential guides in one place.
Tensioning Guide
Belt-diagram
C-120 pulleys
+ 13 more
Work Order Templates
Pre-built workflows to keep your asset running smoothly.
Daily Electrical System Inspection
Replace Roller and Pulley
Install Engine B-120
+ 29 more
Procedures
Integrate maintenance plans directly into your work orders.
Motion Industries
Applied Industrial Technologies
Electrical Brothers
+ 5 more
Parts
Access the parts list for your equipment in MaintainX.
Drive Motor
B2 Rollers
Tensioning System
+ 40 more

Hussmann Bakery Service Merchaniser DZC‐V‐144‐DWR‐R
Create an account to install this asset package.
Maintenance Plans for Hussmann Bakery Service Merchaniser Model DZC‐V‐144‐DWR‐R
Integrate maintenance plans directly into your work orders in MaintainX.
Gas Springs Visually Inspection
IMPORTANT: LIFT HARDWARE GAS SPRINGS ARE WEAR ITEMS AND WILL DEGRADE OVER TIME. LONGEVITY OF SERVICE DEPENDS ON MULTIPLE FACTORS, INCLUDING DAILY OPENINGS AND ENVIRONMENTAL CONDITIONS. GAS SPRINGS REQUIRE MONTHLY INSPECTION. IF INSPECTION DISCOVERS A DETERIORATED CONDITION, THE GAS SPRINGS MUST BE REPLACED.
Raise the front glass to its maximum opening
Using a flashlight, check into the gas spring channel
Check for signs of abnormal wear, such as fluid leakage from the gas spring body
If leakage is apparent, replace the gas springs
Sign off on the gas springs inspection
Air-sweep Heater Service and Cleaning
WARNING! DO NOT WORK ON ENERGIZED PARTS. DISCONNECT POWER TO THE CASE AND ALLOW THE AIRSWEEP HEATER TO COOL BEFORE PEFORMING THIS PROCEDURE
Power to the case disconnected and Air-sweep heater cooled down?
Upper Body Panel removed using a flat-bladed screwdriver or blunt prying tool?
Body panel raised to its highest position in the upper retainer?
Lower edge of the body panel rotated forward to clear the lower retainer?
Panel pulled downward and away from the case?
Heater shield removal necessary?
Area cleaned with a damp cloth?
Sign off on the Air-sweep Heater Service and Cleaning
Gas Spring Physical Function Inspection
IMPORTANT
‐LIFT HARDWARE GAS SPRINGS ARE WEAR ITEMS AND WILL DEGRADE OVER TIME
‐ LONGEVITY OF SERVICE DEPENDS ON MULTIPLE FACTORS, INCLUDING DAILY OPENINGS AND ENVIRONMENTAL CONDITIONS
‐ GAS SPRINGS REQUIRE MONTHLY INSPECTION
‐ IF INSPECTION DISCOVERS A DETERIORATED CONDITION, THE GAS SPRINGS MUST BE REPLACED
1. Raise the front glass to its maximum opening.
• Check that the glass does not begin downward travel on its own. If it does, replace the gas spring
2. Close the front glass, then raise it to approximately 33% of its arc swing. Release it.
• Check that the glass does not slam down to its resting position. If it does, replace the gas spring.
– Lift Hardware Gas Spring Replacement
Remove the Top Glass and set aside.
Remove the Lift Hardware Gasket on the arm of the gas spring that will be replaced.
Raise the Front Glass to its maximum opening and support.
The Front Glass must be supported in this position during the entire replacement procedure. Ensure that the support is rigid and is not disturbed during the replacement.
Remove the (2) T25 Torx Block Screws towards the rear of the lift arm assembly.
Loosen the Anchor Block Set Screw. It is not necessary or recommended to remove this screw. Loosen about 4-5 full revolutions in order to disengage the Gas Spring Block.
Use a magnetic flat-head screwdriver to pull the Retainer Clips from the Pivot Pin, inside the Pivot Arm.
Slide the Pivot Pin from its bushings to release the Gas Spring to Pivot Arm Connection.
Rotate the Gas Spring down and away from the pivot arm, then Pull toward the front of the case. Note that the arm cover will have to be pushed down to create clearance.
1 Weekly Merchandiser Cleaning
WARNING! TO PREVENT INJURY ALWAYS SHUT OFF POWER DURING CLEANING PROCESS.
Case cleaned and all debris removed
Exterior surfaces cleaned with mild detergent and warm water
Bumpers cleaned with household spray cleaners
Lower body panels removed and under the merchandiser cleaned with a vacuum
Stainless Steel Surfaces cleaned with non-abrasive cleaning materials
Interior surfaces cleaned with domestic detergents, ammonia-based cleaners and sanitizing solutions
Coils cleaned with a soft brush or vacuum brush
Product and all loose debris removed
Parts for Hussmann Bakery Service Merchaniser DZC‐V‐144‐DWR‐R
Access the parts list for your equipment in MaintainX.
Glass - Top of Case
3099410150
Glass Hardware - Verical Glass (BLACK)
3125867
Glass Hardware - Double Curve Glass (BLACK)
3125867
Glass Hardware - Verical Glass (SILVER)
3125882
Glass Hardware - Double Curve Glass (SILVER)
3125882
Glass - Top of Case
3099410150
Glass Hardware - Verical Glass (BLACK)
3125867
Glass Hardware - Double Curve Glass (BLACK)
3125867
Glass Hardware - Verical Glass (SILVER)
3125882
Glass Hardware - Double Curve Glass (SILVER)
3125882
Glass - Top of Case
3099410150
Glass Hardware - Verical Glass (BLACK)
3125867
Glass Hardware - Double Curve Glass (BLACK)
3125867
Glass Hardware - Verical Glass (SILVER)
3125882
Glass Hardware - Double Curve Glass (SILVER)
3125882
Unlock efficiency
with MaintainX CoPilot
MaintainX CoPilot is your expert colleague, on call 24/7, helping your team find the answers they need to keep equipment running.
Reduce Unplanned Downtime
Ensure your team follows consistent procedures to minimize equipment failures and costly delays.
Maximize Asset Availability
Keep your assets running longer and more reliably, with standardized maintenance workflows from OEM manuals.
Lower Maintenance Costs
Turn any technician into an expert to streamline operations, maintain more assets, and reduce overall costs.
Thousands of companies manage their assets with MaintainX


