


JCB Generator G20S
Need answers fast?
Explore the manual using AI.
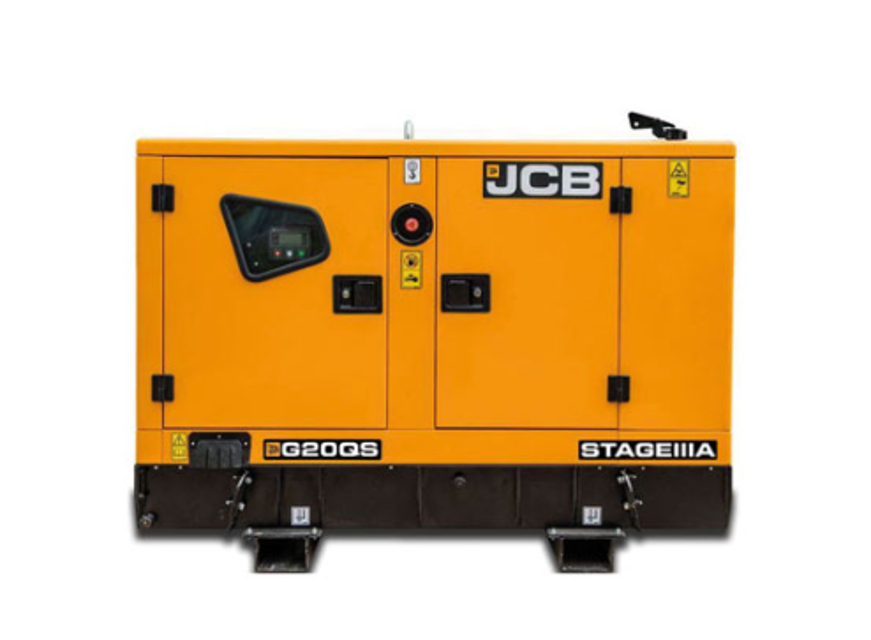
The JCB Generator G20S is a robust industrial generator designed for reliable power generation in various applications. Known for its durability and efficiency, this model ensures optimal performance and minimal downtime, making it an essential asset for any industrial operation.
Turn manuals into instant answers
with your AI-powered assistantTurn manuals into instant answers
with your AI-powered assistant
Manual for JCB Generator G20S
Complete asset maintenance, one click away
Get instant access to all the maintenance information you need. Empower technicians to perform preventive maintenance with asset packages, ready to use right out of the box.

Documents & Manuals
Find all the essential guides in one place.
 Tensioning Guide
- Belt-diagram
- C-120 pulleys
+ 13 more

Work Order Templates
Pre-built workflows to keep your asset running smoothly.
- Daily Electrical System Inspection
- Replace Roller and Pulley
- Install Engine B-120
+ 29 more

Procedures
Integrate maintenance plans directly into your work orders.
- Motion Industries
- Applied Industrial Technologies
- Electrical Brothers
+ 5 more

Parts
Access the parts list for your equipment in MaintainX.
- Drive Motor
- B2 Rollers
- Tensioning System
+ 40 more
JCB Generator G20S
Create an account to install this asset package.
Maintenance Plans for JCB Generator Model G20S
Integrate maintenance plans directly into your work orders in MaintainX.
Battery Disconnect
CAUTION This component is heavy. It must only be removed or handled using a suitable lifting method and device.
Notice: Before you install a pair of batteries to a machine, make sure you know the machines voltage. Some machines require two batteries but have a 12 V electrical system. This means the batteries need to be connected in parallel.
For 24 V machines, the batteries must be connected in series. Incorrect voltage may result in serious damage to the electrical system.
The illustrations show typical battery connections. The actual battery connections installed on your machine may look different
Make the machine safe.
Get access to the battery or batteries (depending on the specification of your machine).
If installed, move the battery isolator switch to the off position and then remove the key.
Disconnect the negative battery lead first. Refer to Figure 94. and Refer to Figure 95.
Disconnect the positive battery lead and put it away from the batteries. Refer to Figure 94. and Refer to Figure 95.

Air Filter Replace
Replace
Do not attempt to wash or clean the elements, they must only be renewed.
Remove
1. Make the machine safe.
2. Depress the clips on the cover and lift off the cover.
3. Remove the outer element. Take care not to tap or knock the element.
4. If the inner element is to be changed, lift up, pull and remove the inner element.
Install
1. Replacement is a reversal of the removal procedure.
10 Hourly or 1 Daily Wheel Loader Maintenance
Visual inspection
Control Panel Check operation
Engine Oil Level Check
WARNING Never check the oil level or add oil with the engine running. Be careful of hot lubricating oil. Danger of scalding.
Notice: Do not exceed the correct level of engine oil in the sump. If there is too much engine oil, the excess must be drained to the correct level. An excess of engine oil could cause the engine speed to increase rapidly without control.
Make the machine safe.
Wait for the oil to drain back into the engine sump before you take a reading. If not, a false low reading may be recorded which can cause the engine to be overfilled.
Get access to the engine.
Remove and clean the dipstick.
Battery Electrolyte Level Check
WARNING: Do not top the battery up with acid. The electrolyte could boil out and burn you.
Maintenance free batteries used in normal temperate climate applications should not need topping up.
However, in certain conditions (such as prolonged operation at tropical temperatures or if the alternator overcharges) the electrolyte level should be checked.
Open the battery access panel and get access to the battery.
Disconnect the battery.
Remove the battery from the machine.
Remove the covers.
Look at the level in each cell.
Enter the electrolyte level above the plates (in mm)
Engine Cleaning
Warning: Follow the correct procedures to avoid contamination of the fuel system and damage to the engine.
Special precautions must be taken if the engine is to be washed using a high pressure system.
Electrical system is isolated
All electrical connectors are correctly coupled
Alternator is covered with a plastic bag to prevent water ingress
Engine air intake, exhaust and breather system are sealed
Oil filler caps and dipstick are correctly installed
Used a low pressure water jet and brush to soak off caked mud or dirt
Applied an approved cleaning and degreasing agent with a brush
Unlock efficiency
with MaintainX CoPilot
MaintainX CoPilot is your expert colleague, on call 24/7, helping your team find the answers they need to keep equipment running.
Reduce Unplanned Downtime
Ensure your team follows consistent procedures to minimize equipment failures and costly delays.
Maximize Asset Availability
Keep your assets running longer and more reliably, with standardized maintenance workflows from OEM manuals.
Lower Maintenance Costs
Turn any technician into an expert to streamline operations, maintain more assets, and reduce overall costs.
Thousands of companies manage their assets with MaintainX

'%3e%3cpath%20fill='url(%23b)'%20d='M66.008%2080.068c-5.084-.786-9.763-3.834-12.442-8.68a16.942%2016.942%200%200%201-1.87-5.18c1.096.19%202.203.476%203.298.87%206.525%202.333%2010.836%207.68%2011.014%2012.99ZM51.47%2061.576c.488-5.524%203.62-10.716%208.847-13.597a17.132%2017.132%200%200%201%2011.335-1.882c-.798%208.145-7.43%2014.848-16.038%2015.599-1.417.119-2.799.07-4.144-.12Zm28.564-11.478a17.513%2017.513%200%200%201%203.727%204.62c4.608%208.335%201.584%2018.813-6.75%2023.409a16.988%2016.988%200%200%201-4.359%201.679%2019.624%2019.624%200%200%201-3.977-12.776c.346-7.561%204.942-13.931%2011.36-16.932Z'/%3e%3cpath%20fill='%23110F0D'%20fill-rule='evenodd'%20d='M142.831%2048.324h4.977V77.03h-4.977V48.324Zm27.278%2013.002c.322%201.048.453%202.263.453%203.62v12.073h-4.787V66.208c0-.75-.047-1.572-.154-2.143-.453-2.382-1.822-3.572-4.215-3.572-2.31%200-3.882%201.274-4.43%203.476-.143.596-.226%201.405-.226%202.25v10.8h-4.787V56.623h4.477v2.989c1.536-2.5%203.906-3.43%206.371-3.43%203.488%200%206.263%201.68%207.298%205.144Zm24.636%207.323c0%203.882-2.358%206.525-5.763%207.727-1.298.453-2.632.643-4.62.643h-10.169V48.324h9.085c1.691%200%203.156.143%204.049.38%203.465.93%205.727%203.68%205.727%207.335%200%202.441-.81%204.156-2.762%205.644%202.905%201.417%204.453%203.727%204.453%206.966Zm-15.634-8.656h4.584c1.024%200%201.917-.143%202.536-.417%201.215-.548%201.905-1.608%201.905-3.167%200-1.548-.643-2.572-1.845-3.132-.691-.31-1.762-.452-2.763-.452h-4.417v7.168Zm10.716%208.465c0-1.536-.893-3.37-3.227-3.893-.428-.095-1.036-.143-1.571-.143h-5.918v8.085h5.501c.56%200%201.429-.048%201.953-.167%201.94-.453%203.262-1.846%203.262-3.882Zm47.747-11.847-8.097%2020.408h-4.429l-8.109-20.408h5.191l5.192%2014.574%205.108-14.574h5.144Zm-20.218%2010.002c0%20.69-.036%201.262-.155%201.94h-15.943c.631%202.87%202.714%204.728%205.882%204.728%202.131%200%203.607-.882%204.703-2.525h4.87c-1.762%204.144-5.204%206.692-9.657%206.692-6.084%200-10.537-4.858-10.537-10.49%200-6.108%204.524-10.776%2010.335-10.776%206.239%200%2010.442%204.954%2010.502%2010.43Zm-4.763-1.405c-.333-2.846-2.643-4.858-5.691-4.858-2.894%200-5.287%201.929-5.621%204.858h11.312Zm-72.667%203.44c0%204.787-3.287%208.371-9.419%208.371H119.363V64.66c-1.917.274-3.87.69-5.811%201.238l4.537%2011.121h-5.418l-3.596-9.585c-5.144%202.084-10.085%205.216-14.217%209.585h-4.786L101.8%2048.312h4.56l5.68%2013.883a44.112%2044.112%200%200%201%207.323-1.774V48.312h9.084c1.703%200%203.156.143%204.061.393%203.453.929%205.727%203.667%205.727%207.323%200%201.917-.738%204.179-2.81%205.691%203.06%201.56%204.501%204.025%204.501%206.93Zm-15.634-8.667a62.664%2062.664%200%200%201%202.06-.036c1.703.012%203.239.131%204.608.37%201.441-.549%202.357-1.727%202.357-3.537%200-1.941-.881-3.144-2.488-3.667-.548-.18-1.358-.286-2.322-.286h-4.215v7.156Zm-16.55%203.905-3.715-9.894-6.394%2016.502c2.833-2.595%206.263-4.858%2010.109-6.608Zm27.254%204.74c0-2.775-3.131-4.347-8.513-4.418-.715%200-1.441.011-2.191.047v8.252h5.918c2.548%200%204.786-1.37%204.786-3.882Z'%20clip-rule='evenodd'/%3e%3c/g%3e%3cdefs%3e%3clinearGradient%20id='b'%20x1='51.47'%20x2='85.916'%20y1='62.946'%20y2='62.946'%20gradientUnits='userSpaceOnUse'%3e%3cstop%20stop-color='%23CD9F28'/%3e%3cstop%20offset='1'%20stop-color='%23ECD80B'/%3e%3c/linearGradient%3e%3cclipPath%20id='a'%3e%3cpath%20fill='%23fff'%20d='M51.47%2045.728h186.104V80.14H51.47z'/%3e%3c/clipPath%3e%3c/defs%3e%3c/svg%3e)


More from JCB


Explore Other Assets


© 2026 MaintainX. All rights reserved.