


CAT CAT Bulldozer D6N D6N
Need answers fast?
Explore the manual using AI.
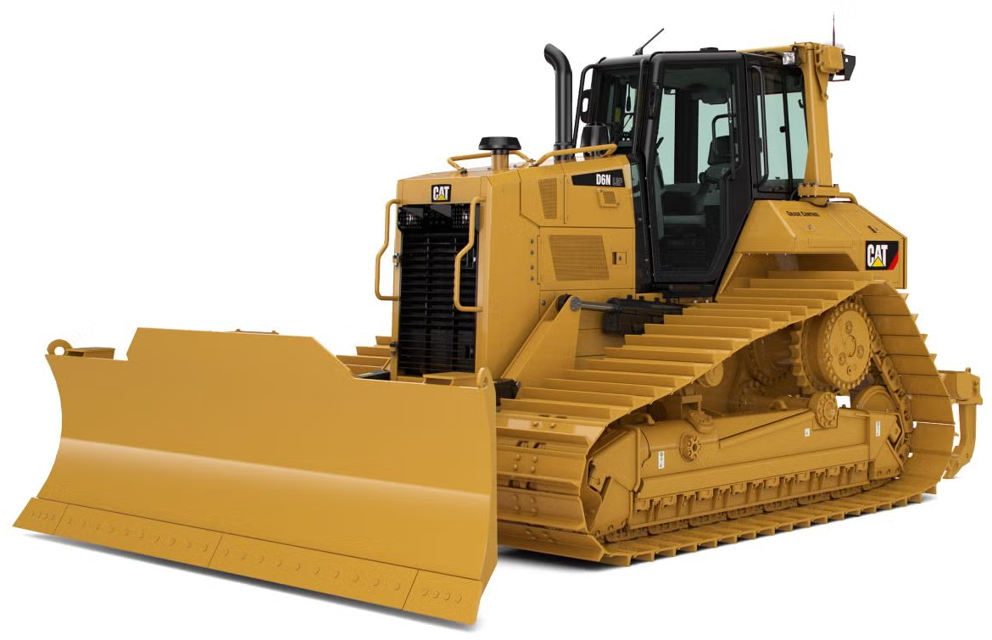
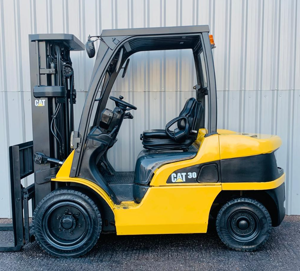
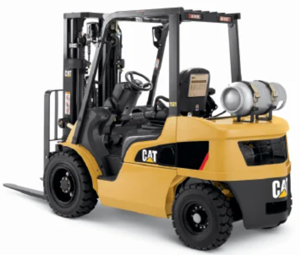
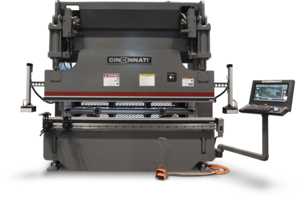
The CAT Bulldozer D6N is a robust and versatile piece of heavy machinery designed for various earthmoving tasks. Known for its durability and efficiency, this model excels in construction and mining applications, making it a reliable choice for operators seeking high performance and productivity.
Turn manuals into instant answers
with your AI-powered assistantTurn manuals into instant answers
with your AI-powered assistant
Manual for CAT CAT Bulldozer D6N D6N
Complete asset maintenance, one click away
Get instant access to all the maintenance information you need. Empower technicians to perform preventive maintenance with asset packages, ready to use right out of the box.

Documents & Manuals
Find all the essential guides in one place.
 Tensioning Guide
- Belt-diagram
- C-120 pulleys
+ 13 more

Work Order Templates
Pre-built workflows to keep your asset running smoothly.
- Daily Electrical System Inspection
- Replace Roller and Pulley
- Install Engine B-120
+ 29 more

Procedures
Integrate maintenance plans directly into your work orders.
- Motion Industries
- Applied Industrial Technologies
- Electrical Brothers
+ 5 more

Parts
Access the parts list for your equipment in MaintainX.
- Drive Motor
- B2 Rollers
- Tensioning System
+ 40 more
CAT CAT Bulldozer D6N D6N
Create an account to install this asset package.
Maintenance Plans for CAT CAT Bulldozer D6N Model D6N
Integrate maintenance plans directly into your work orders in MaintainX.
Hydraulic System Oil Level – Check
Warning: At operating temperature, the hydraulic tank is hot and under pressure. Hot oil and components can cause personal injury. Do not allow hot oil or components to contact skin. Remove the filler cap only when the engine is stopped, and the filler cap is cool enough to touch with your bare hand. Remove the filler cap slowly in order to relieve pressure.
The hydraulic tank is on the right rear corner of the machine.
Is the counterweight fully retracted?
Enter the oil level in sight gauge (1)
Does the hydraulic system require additional hydraulic oil?
If the hydraulic system requires additional hydraulic oil, remove filler cap (2) and add oil. Clean filler cap (2) and install filler cap (2).
Sign off on the hydraulic system oil level check

10 Hourly or 1 Daily Bulldozer Maintenance
Controls for proper operation of boom and hook
Boom Stop operation
Warning: The Boom Stop system stops the boom winch from hauling-in when the boom is vertical, preventing overloading of key machine components. Incorrectly adjusting, or defeating the boom stop valve could result in serious equipment damage, personal injury, or even death. Its operation must be check and verified daily.
Boom Pivot Pins – Lubricate
Counterweight Cylinder Bearings – Lubricate
Counterweight Hinge Pins – Lubricate
Fairlead Sheave – Lubricate
Hook and Wire Cable (Boom and Hook lines) – Inspect
Hydraulic System Oil Level – Check
Hook Load Line – Install
Warning: Do not operate or work on this equipment unless you have read and understand the instructions and warnings in the Operation and Maintenance Manual. Failure to follow the instructions or heed the warnings could result in injury or death. Contact your dealer or Vanguard Equipment or visit our website at vanguardequip.com for replacement manuals. Proper care is your responsibility.
Warning: Personal injury or death can result from worn wire rope cable. Worn or frayed cable could break causing injury. Check the wire rope cable. If cable is worn or is frayed install new cable. Wear gloves when handling the wire rope cable. Proper care is your responsibility.
NOTICE: Make sure that the construction of the wire rope is 6x25 IWRC XIPS (Independent Wire Rope Core, eXtra Improved Plow Steel)conforming to ISO 2408. Also, the established grade of the wire rope is the improved plow bolt (steel), 26670 kg (58,800lb) minimum breaking strength.
Lower the boom to the horizontal position.
Remove the anchor for the wire rope from the drum for the hook. Remove the old wire rope.
Unroll the new wire rope from the spool.
Note: Weld the cable ends in order to prevent fraying.
NOTICE: Unroll all of the cable from the spool. Lay the wire rope on a flat surface. Never lift the wire rope off the spool in coils.
Install the cable into the small slot and through the larger slot in the drum for the boom.
Oil Filter Inspection
Warning: This procedure requires trained personnel with PPE!
Filter element cut open successfully?
Metal or other debris found in the filter element?
If metals are found, use a magnet to differentiate between ferrous and nonferrous metals.
Type of metal found
Ferrous metals indicate wear on steel parts and on cast iron parts. Nonferrous metals indicate wear of the brass or aluminum part of the hydraulics.
Small amounts of debris found?
Small amounts of debris may be caused by friction and normal wear.
Excessive amount of debris found?
Removal of the Boom
Lower the boom enough to remove the load blocks and the sheave block
Remove cotter pin, the retainer, and pin (1). Lower the load block and the hook block to the ground
Replace the pin (1) in the boom
Place the load block and the hook block in the front-mounted rigging tray, and secure the blocks to the tray for transportation
Draw in the excess hook cable in order to pull the sheave blocks to the machine. Use the Hook Line Stowing Guide to keep the line clear of the tracks. DO NOT over tighten the cables
Lower the boom to the horizontal position onto wood blocks that are sufficient to support the boom
Remove the cotter pin, the retainer, and pin (2)
Replace the pin and the retainer (2) in the boom
Move the luff block clear of the boom and area; it will be secured after the boom has been removed
Parts for CAT CAT Bulldozer D6N D6N
Access the parts list for your equipment in MaintainX.
Coupling
118-6539
Washer, Hard, Z (1/2)
8T-4223
Shaft, Pto
224-1144
O-Ring
8S-5654
Washer, Hard, Z (1/2)
5P-1076
Coupling
118-6539
Washer, Hard, Z (1/2)
8T-4223
Shaft, Pto
224-1144
O-Ring
8S-5654
Washer, Hard, Z (1/2)
5P-1076
Coupling
118-6539
Washer, Hard, Z (1/2)
8T-4223
Shaft, Pto
224-1144
O-Ring
8S-5654
Washer, Hard, Z (1/2)
5P-1076
Unlock efficiency
with MaintainX CoPilot
MaintainX CoPilot is your expert colleague, on call 24/7, helping your team find the answers they need to keep equipment running.
Reduce Unplanned Downtime
Ensure your team follows consistent procedures to minimize equipment failures and costly delays.
Maximize Asset Availability
Keep your assets running longer and more reliably, with standardized maintenance workflows from OEM manuals.
Lower Maintenance Costs
Turn any technician into an expert to streamline operations, maintain more assets, and reduce overall costs.
Thousands of companies manage their assets with MaintainX

'%3e%3cpath%20fill='url(%23b)'%20d='M66.008%2080.068c-5.084-.786-9.763-3.834-12.442-8.68a16.942%2016.942%200%200%201-1.87-5.18c1.096.19%202.203.476%203.298.87%206.525%202.333%2010.836%207.68%2011.014%2012.99ZM51.47%2061.576c.488-5.524%203.62-10.716%208.847-13.597a17.132%2017.132%200%200%201%2011.335-1.882c-.798%208.145-7.43%2014.848-16.038%2015.599-1.417.119-2.799.07-4.144-.12Zm28.564-11.478a17.513%2017.513%200%200%201%203.727%204.62c4.608%208.335%201.584%2018.813-6.75%2023.409a16.988%2016.988%200%200%201-4.359%201.679%2019.624%2019.624%200%200%201-3.977-12.776c.346-7.561%204.942-13.931%2011.36-16.932Z'/%3e%3cpath%20fill='%23110F0D'%20fill-rule='evenodd'%20d='M142.831%2048.324h4.977V77.03h-4.977V48.324Zm27.278%2013.002c.322%201.048.453%202.263.453%203.62v12.073h-4.787V66.208c0-.75-.047-1.572-.154-2.143-.453-2.382-1.822-3.572-4.215-3.572-2.31%200-3.882%201.274-4.43%203.476-.143.596-.226%201.405-.226%202.25v10.8h-4.787V56.623h4.477v2.989c1.536-2.5%203.906-3.43%206.371-3.43%203.488%200%206.263%201.68%207.298%205.144Zm24.636%207.323c0%203.882-2.358%206.525-5.763%207.727-1.298.453-2.632.643-4.62.643h-10.169V48.324h9.085c1.691%200%203.156.143%204.049.38%203.465.93%205.727%203.68%205.727%207.335%200%202.441-.81%204.156-2.762%205.644%202.905%201.417%204.453%203.727%204.453%206.966Zm-15.634-8.656h4.584c1.024%200%201.917-.143%202.536-.417%201.215-.548%201.905-1.608%201.905-3.167%200-1.548-.643-2.572-1.845-3.132-.691-.31-1.762-.452-2.763-.452h-4.417v7.168Zm10.716%208.465c0-1.536-.893-3.37-3.227-3.893-.428-.095-1.036-.143-1.571-.143h-5.918v8.085h5.501c.56%200%201.429-.048%201.953-.167%201.94-.453%203.262-1.846%203.262-3.882Zm47.747-11.847-8.097%2020.408h-4.429l-8.109-20.408h5.191l5.192%2014.574%205.108-14.574h5.144Zm-20.218%2010.002c0%20.69-.036%201.262-.155%201.94h-15.943c.631%202.87%202.714%204.728%205.882%204.728%202.131%200%203.607-.882%204.703-2.525h4.87c-1.762%204.144-5.204%206.692-9.657%206.692-6.084%200-10.537-4.858-10.537-10.49%200-6.108%204.524-10.776%2010.335-10.776%206.239%200%2010.442%204.954%2010.502%2010.43Zm-4.763-1.405c-.333-2.846-2.643-4.858-5.691-4.858-2.894%200-5.287%201.929-5.621%204.858h11.312Zm-72.667%203.44c0%204.787-3.287%208.371-9.419%208.371H119.363V64.66c-1.917.274-3.87.69-5.811%201.238l4.537%2011.121h-5.418l-3.596-9.585c-5.144%202.084-10.085%205.216-14.217%209.585h-4.786L101.8%2048.312h4.56l5.68%2013.883a44.112%2044.112%200%200%201%207.323-1.774V48.312h9.084c1.703%200%203.156.143%204.061.393%203.453.929%205.727%203.667%205.727%207.323%200%201.917-.738%204.179-2.81%205.691%203.06%201.56%204.501%204.025%204.501%206.93Zm-15.634-8.667a62.664%2062.664%200%200%201%202.06-.036c1.703.012%203.239.131%204.608.37%201.441-.549%202.357-1.727%202.357-3.537%200-1.941-.881-3.144-2.488-3.667-.548-.18-1.358-.286-2.322-.286h-4.215v7.156Zm-16.55%203.905-3.715-9.894-6.394%2016.502c2.833-2.595%206.263-4.858%2010.109-6.608Zm27.254%204.74c0-2.775-3.131-4.347-8.513-4.418-.715%200-1.441.011-2.191.047v8.252h5.918c2.548%200%204.786-1.37%204.786-3.882Z'%20clip-rule='evenodd'/%3e%3c/g%3e%3cdefs%3e%3clinearGradient%20id='b'%20x1='51.47'%20x2='85.916'%20y1='62.946'%20y2='62.946'%20gradientUnits='userSpaceOnUse'%3e%3cstop%20stop-color='%23CD9F28'/%3e%3cstop%20offset='1'%20stop-color='%23ECD80B'/%3e%3c/linearGradient%3e%3cclipPath%20id='a'%3e%3cpath%20fill='%23fff'%20d='M51.47%2045.728h186.104V80.14H51.47z'/%3e%3c/clipPath%3e%3c/defs%3e%3c/svg%3e)


More from CAT


Explore Other Assets


© 2025 MaintainX. All rights reserved.