


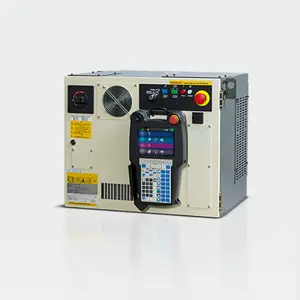
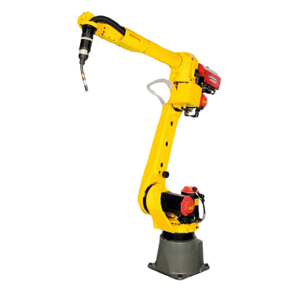
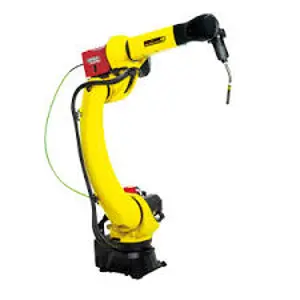
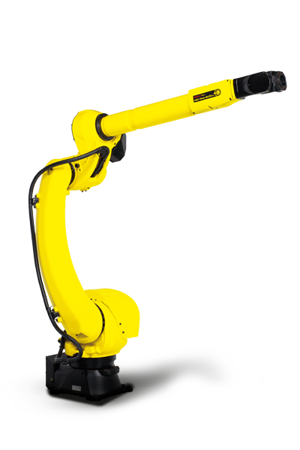
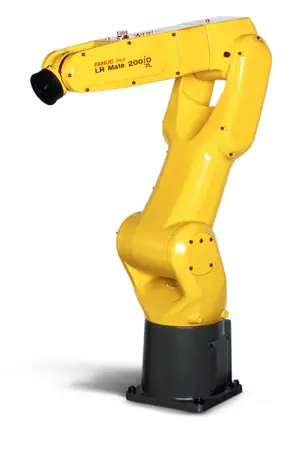
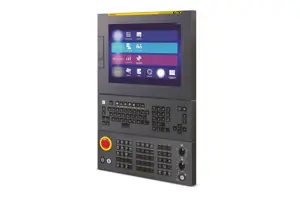
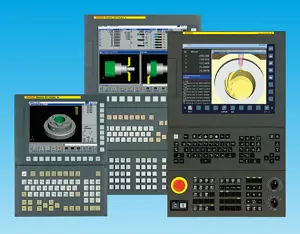
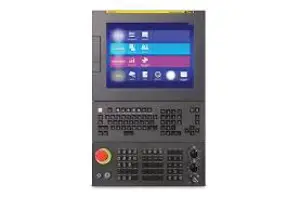
Fanuc Plus Robot Controller R-30iB Mate Plus
Need answers fast?
Explore the manual using AI.
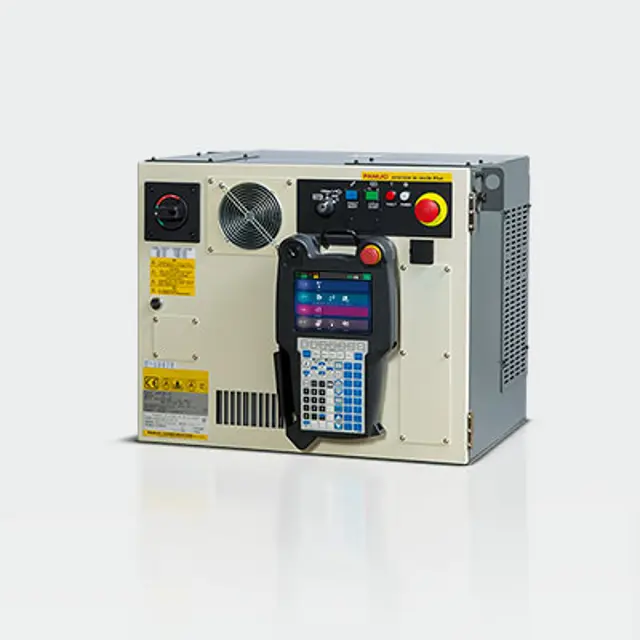
The Fanuc Plus Robot Controller R-30iB Mate Plus is a high-performance industrial automation solution designed for efficient robot control. This advanced controller offers robust features, ensuring optimal performance and reliability in various manufacturing applications. Ideal for enhancing productivity, it integrates seamlessly with Fanuc robots for superior operational efficiency.
Turn manuals into instant answers
with your AI-powered assistantTurn manuals into instant answers
with your AI-powered assistant
Complete asset maintenance, one click away
Get instant access to all the maintenance information you need. Empower technicians to perform preventive maintenance with asset packages, ready to use right out of the box.

Documents & Manuals
Find all the essential guides in one place.
 Tensioning Guide
- Belt-diagram
- C-120 pulleys
+ 13 more

Work Order Templates
Pre-built workflows to keep your asset running smoothly.
- Daily Electrical System Inspection
- Replace Roller and Pulley
- Install Engine B-120
+ 29 more

Procedures
Integrate maintenance plans directly into your work orders.
- Motion Industries
- Applied Industrial Technologies
- Electrical Brothers
+ 5 more

Parts
Access the parts list for your equipment in MaintainX.
- Drive Motor
- B2 Rollers
- Tensioning System
+ 40 more
Fanuc Plus Robot Controller R-30iB Mate Plus
Create an account to install this asset package.
Maintenance Plans for Fanuc Plus Robot Controller Model R-30iB Mate Plus
Integrate maintenance plans directly into your work orders in MaintainX.
The Regenerative Resistor Unit Replacement
(1) Remove the (4) screws fastening the rear plate of the cabinet, and remove the rear plate.
(2) Unplug connector CRR63 and CRR11 at the 6-Axis servo amplifier.
(3) Remove the (4) screws on the regenerative resistor unit and remove it.
(4) Install the replacement unit by reversing above steps.;

The Battery Replacement
Enter the ordering drawing number of the new lithium battery
Turn the robot controller on for about 30 seconds
Turn the robot controller off
Was the battery unit successfully pulled out from the lower right part of the backplane unit?
Was the new battery unit successfully installed?
Is the battery unit latched securely?
The Control Section Fan Motor Replacement
The control section fan motor can be replaced without using a tool. The fan motor is mounted on the backplane unit.
(1) Be sure that the power to the robot controller is turned off.
(2) Pull out the fan motor to be replaced. (When pulling out the fan motor, hold the latch of the fan unit, and unlatch the unit from the case.)
(3) Install a new fan unit. (Insert the unit until the latch of the unit snaps into the case.);
The Ac Fan Motor Replacement
Replacing the Heat Exchanger and Door Fan Unit
The heat exchanger is inside its door. To replace the heat exchanger, it is necessary to remove the door fan unit in advance.
Door fan unit
(1) Remove (4) M4 screws.
(2) Disconnect the connector at the FAN.
(3) Mount the replacement fan unit by reversing above procedure. Be careful not to let the cable get caught in the fan.
Heat exchanger
(1) Dismount the door fan unit. (See the above procedure.)
(2) Open the cabinet door, and detach cables.
The Emergency Stop Unit Replacement
Detach the cables from the emergency stop unit
Remove screws and replace the emergency stop unit
Reconnect the cables
Sign off on the emergency stop unit replacement
Parts for Fanuc Plus Robot Controller R-30iB Mate Plus
Access the parts list for your equipment in MaintainX.
Irvision 2Dv
A05B-2600-J901
Irvision Image To Points
A05B-2600-J912
Irvision 3Dl
A05B-2600-J902
Vision Uif Controls
A05B-2600-J871
Irvision Bin Picking
A05B-2600-J909
Irvision 2Dv
A05B-2600-J901
Irvision Image To Points
A05B-2600-J912
Irvision 3Dl
A05B-2600-J902
Vision Uif Controls
A05B-2600-J871
Irvision Bin Picking
A05B-2600-J909
Irvision 2Dv
A05B-2600-J901
Irvision Image To Points
A05B-2600-J912
Irvision 3Dl
A05B-2600-J902
Vision Uif Controls
A05B-2600-J871
Irvision Bin Picking
A05B-2600-J909
Unlock efficiency
with MaintainX CoPilot
MaintainX CoPilot is your expert colleague, on call 24/7, helping your team find the answers they need to keep equipment running.
Reduce Unplanned Downtime
Ensure your team follows consistent procedures to minimize equipment failures and costly delays.
Maximize Asset Availability
Keep your assets running longer and more reliably, with standardized maintenance workflows from OEM manuals.
Lower Maintenance Costs
Turn any technician into an expert to streamline operations, maintain more assets, and reduce overall costs.
Thousands of companies manage their assets with MaintainX

'%3e%3cpath%20fill='url(%23b)'%20d='M66.008%2080.068c-5.084-.786-9.763-3.834-12.442-8.68a16.942%2016.942%200%200%201-1.87-5.18c1.096.19%202.203.476%203.298.87%206.525%202.333%2010.836%207.68%2011.014%2012.99ZM51.47%2061.576c.488-5.524%203.62-10.716%208.847-13.597a17.132%2017.132%200%200%201%2011.335-1.882c-.798%208.145-7.43%2014.848-16.038%2015.599-1.417.119-2.799.07-4.144-.12Zm28.564-11.478a17.513%2017.513%200%200%201%203.727%204.62c4.608%208.335%201.584%2018.813-6.75%2023.409a16.988%2016.988%200%200%201-4.359%201.679%2019.624%2019.624%200%200%201-3.977-12.776c.346-7.561%204.942-13.931%2011.36-16.932Z'/%3e%3cpath%20fill='%23110F0D'%20fill-rule='evenodd'%20d='M142.831%2048.324h4.977V77.03h-4.977V48.324Zm27.278%2013.002c.322%201.048.453%202.263.453%203.62v12.073h-4.787V66.208c0-.75-.047-1.572-.154-2.143-.453-2.382-1.822-3.572-4.215-3.572-2.31%200-3.882%201.274-4.43%203.476-.143.596-.226%201.405-.226%202.25v10.8h-4.787V56.623h4.477v2.989c1.536-2.5%203.906-3.43%206.371-3.43%203.488%200%206.263%201.68%207.298%205.144Zm24.636%207.323c0%203.882-2.358%206.525-5.763%207.727-1.298.453-2.632.643-4.62.643h-10.169V48.324h9.085c1.691%200%203.156.143%204.049.38%203.465.93%205.727%203.68%205.727%207.335%200%202.441-.81%204.156-2.762%205.644%202.905%201.417%204.453%203.727%204.453%206.966Zm-15.634-8.656h4.584c1.024%200%201.917-.143%202.536-.417%201.215-.548%201.905-1.608%201.905-3.167%200-1.548-.643-2.572-1.845-3.132-.691-.31-1.762-.452-2.763-.452h-4.417v7.168Zm10.716%208.465c0-1.536-.893-3.37-3.227-3.893-.428-.095-1.036-.143-1.571-.143h-5.918v8.085h5.501c.56%200%201.429-.048%201.953-.167%201.94-.453%203.262-1.846%203.262-3.882Zm47.747-11.847-8.097%2020.408h-4.429l-8.109-20.408h5.191l5.192%2014.574%205.108-14.574h5.144Zm-20.218%2010.002c0%20.69-.036%201.262-.155%201.94h-15.943c.631%202.87%202.714%204.728%205.882%204.728%202.131%200%203.607-.882%204.703-2.525h4.87c-1.762%204.144-5.204%206.692-9.657%206.692-6.084%200-10.537-4.858-10.537-10.49%200-6.108%204.524-10.776%2010.335-10.776%206.239%200%2010.442%204.954%2010.502%2010.43Zm-4.763-1.405c-.333-2.846-2.643-4.858-5.691-4.858-2.894%200-5.287%201.929-5.621%204.858h11.312Zm-72.667%203.44c0%204.787-3.287%208.371-9.419%208.371H119.363V64.66c-1.917.274-3.87.69-5.811%201.238l4.537%2011.121h-5.418l-3.596-9.585c-5.144%202.084-10.085%205.216-14.217%209.585h-4.786L101.8%2048.312h4.56l5.68%2013.883a44.112%2044.112%200%200%201%207.323-1.774V48.312h9.084c1.703%200%203.156.143%204.061.393%203.453.929%205.727%203.667%205.727%207.323%200%201.917-.738%204.179-2.81%205.691%203.06%201.56%204.501%204.025%204.501%206.93Zm-15.634-8.667a62.664%2062.664%200%200%201%202.06-.036c1.703.012%203.239.131%204.608.37%201.441-.549%202.357-1.727%202.357-3.537%200-1.941-.881-3.144-2.488-3.667-.548-.18-1.358-.286-2.322-.286h-4.215v7.156Zm-16.55%203.905-3.715-9.894-6.394%2016.502c2.833-2.595%206.263-4.858%2010.109-6.608Zm27.254%204.74c0-2.775-3.131-4.347-8.513-4.418-.715%200-1.441.011-2.191.047v8.252h5.918c2.548%200%204.786-1.37%204.786-3.882Z'%20clip-rule='evenodd'/%3e%3c/g%3e%3cdefs%3e%3clinearGradient%20id='b'%20x1='51.47'%20x2='85.916'%20y1='62.946'%20y2='62.946'%20gradientUnits='userSpaceOnUse'%3e%3cstop%20stop-color='%23CD9F28'/%3e%3cstop%20offset='1'%20stop-color='%23ECD80B'/%3e%3c/linearGradient%3e%3cclipPath%20id='a'%3e%3cpath%20fill='%23fff'%20d='M51.47%2045.728h186.104V80.14H51.47z'/%3e%3c/clipPath%3e%3c/defs%3e%3c/svg%3e)


More from Fanuc


Explore Other Assets


© 2026 MaintainX. All rights reserved.