


Atlas Copco Screw Compressor GA30 VSD ff
Need answers fast?
Explore the manual using AI.
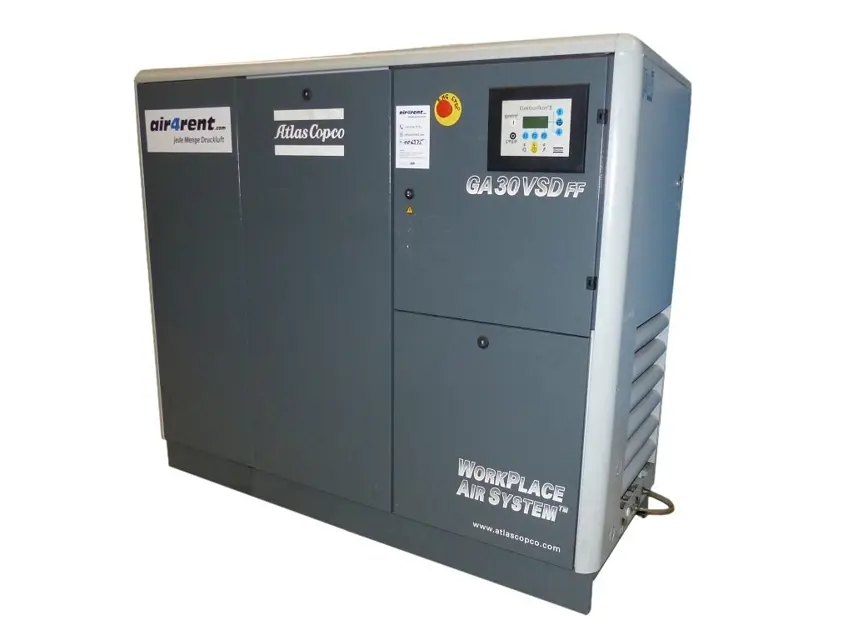
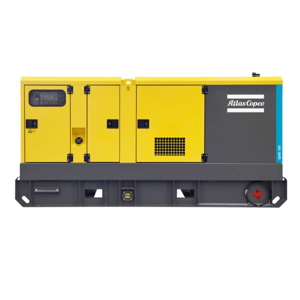
The Atlas Copco Screw Compressor GA30 VSD ff is a high-efficiency, variable speed drive compressor designed for optimal energy savings and reliable performance in industrial applications. This model offers advanced features for enhanced operational efficiency and reduced maintenance costs, making it a preferred choice for various manufacturing environments.
Turn manuals into instant answers
with your AI-powered assistantTurn manuals into instant answers
with your AI-powered assistant
Complete asset maintenance, one click away
Get instant access to all the maintenance information you need. Empower technicians to perform preventive maintenance with asset packages, ready to use right out of the box.

Documents & Manuals
Find all the essential guides in one place.
 Tensioning Guide
- Belt-diagram
- C-120 pulleys
+ 13 more

Work Order Templates
Pre-built workflows to keep your asset running smoothly.
- Daily Electrical System Inspection
- Replace Roller and Pulley
- Install Engine B-120
+ 29 more

Procedures
Integrate maintenance plans directly into your work orders.
- Motion Industries
- Applied Industrial Technologies
- Electrical Brothers
+ 5 more

Parts
Access the parts list for your equipment in MaintainX.
- Drive Motor
- B2 Rollers
- Tensioning System
+ 40 more
Atlas Copco Screw Compressor GA30 VSD ff
Create an account to install this asset package.
Maintenance Plans for Atlas Copco Screw Compressor Model GA30 VSD ff
Integrate maintenance plans directly into your work orders in MaintainX.
3 Monthly Screw Compressor Inspection
Safety Precautions
Did you apply all relevant safety precautions, including those mentioned in this book?
Before starting any maintenance or repairs:
For GA Workplace/Workplace FF, did you press stop button (1-Fig. 3.5); Wait until the compressor has stopped (approx. 30 seconds); Press emergency stop button (S3-Fig. 3.4) and switch off the voltage?
For Pack/Pack FF, did you press stop button (1-Fig. 3.7); Wait until the compressor has stopped (approx. 30 seconds); Press emergency stop button (S3-Fig. 3.6) and switch off the voltage?
Did you close air outlet valve (1-Figs. 3.4/3.6) and depressurize by opening plug (5-Fig. 3.3) one turn and by opening valve (1-Fig. 3.2) (not provided on GA Pack)?
Did you lock the air outlet valve (1-Figs. 3.4/3.6) during maintenance or repair as follows: Close the valve, Remove the bolt fixing the handle, Lift the handle and turn it until the slot of the handle fits over the blocking edge on the valve body, Lock the handle using the special bolt and wrench delivered loose with the compressor?
Maintenance Tasks
Did you check coolers and condenser of dryer; clean if necessary?

8000 Hourly Oil Separator Replacement
Attention: Apply all relevant safety precautions, including those mentioned in this book.
Press stop button (1-Fig. 3.5 for GA Workplace/Workplace FF, 1-Fig. 3.7 for Pack/Pack FF)
Wait until the compressor has stopped (approx. 30 seconds)
Press emergency stop button (S3-Fig. 3.4 for GA Workplace/Workplace FF, S3-Fig. 3.6 for Pack/Pack FF) and switch off the voltage
Close air outlet valve (1-Figs. 3.4/3.6)
Depressurize by opening plug (5-Fig. 3.3) one turn and by opening valve (1-Fig. 3.2) (not provided on GA Pack)
Lock the air outlet valve (1-Figs. 3.4/3.6) during maintenance or repair
Sign off on the oil separator replacement
1 Daily Screw Compressor Inspection
Check oil level
Check readings on display
Check that condensate is discharged during loading
Check air filter service indicator
Drain condensate
4000 Hourly Oil and Oil Filter Replacement
1. Run the compressor until warm; Stop it and close the outlet valve (1-Figs. 3.4/3.6); Wait a few minutes; Depressurize the oil system by opening oil filler plug (5) one turn to permit any pressure to escape
2. Remove plug (4-Fig. 1.5); Drain the oil by unscrewing plug (6); Collect the oil in a collector and deliver it to the local oil collection service; Reinstall the plugs
3. Remove oil filter (4)
4. Clean the filter seat on the manifold; Oil the gasket of the new element; Screw the element into place and tighten firmly by hand
5. Remove filler plug (5) and fill with oil until the level reaches the plug; Reinstall and tighten plug (5)
6. Run the compressor for a few minutes; Stop the compressor and wait a few minutes to allow the oil to settle; Depressurize the system by unscrewing filler plug (5) one turn to permit any pressure in the system to escape; Fill the receiver with oil until the level reaches the filler plug; Tighten plug (5)
7. Reset the service warning; Consult the User manual for Elektronikon I and II regulators: Part 1, section 7 for Elektronikon I or Part 2, section 15 for Elektronikon II
Recommended oil: Atlas Copco Roto-injectfluid; The normal change interval for Roto-injectfluid is 4000 hours; If the compressor runs at unfavourable conditions (polluted air, element outlet temperature continuously above 100°C or below condensation limit), change the oil more often; A yearly oil and oil filter change may be necessary; In this case, also reset the timer yearly (Service plan A); Consult Atlas Copco if in any doubt
Attention: Apply all relevant safety precautions, including those mentioned in this book.
4000 Hourly Screw Compressor Maintenance
Check pressure and temperature readings
Carry out a LED/display test
Check for possible air leakage
- Any leakage should be attended to immediately; Damaged flexibles or flexible joints must be replaced
Replace air filter element
1. Stop the compressor. Remove the air filter cover by turning it anti-clockwise. Remove the air filter element. Discard damaged elements.
2. If necessary, clean the cover. Fit the new element and the cover.
3. Reset service indicator (3-Fig. 3.3) by pushing the knob in the extremity of the body.
4. Reset the service warning. Consult the User manual for Elektronikon I and II regulators: Part 1, section 7 for Elektronikon I or Part 2, section 15 for Elektronikon II.
Parts for Atlas Copco Screw Compressor GA30 VSD ff
Access the parts list for your equipment in MaintainX.
Roto-injectfluid 20-litre can
2901 0522 00
Roto-injectfluid 209-litre drum
2901 0045 01
Roto-injectfluid 20-litre can
2901 0522 00
Roto-injectfluid 209-litre drum
2901 0045 01
Roto-injectfluid 20-litre can
2901 0522 00
Roto-injectfluid 209-litre drum
2901 0045 01
Unlock efficiency
with MaintainX CoPilot
MaintainX CoPilot is your expert colleague, on call 24/7, helping your team find the answers they need to keep equipment running.
Reduce Unplanned Downtime
Ensure your team follows consistent procedures to minimize equipment failures and costly delays.
Maximize Asset Availability
Keep your assets running longer and more reliably, with standardized maintenance workflows from OEM manuals.
Lower Maintenance Costs
Turn any technician into an expert to streamline operations, maintain more assets, and reduce overall costs.
Thousands of companies manage their assets with MaintainX

'%3e%3cpath%20fill='url(%23b)'%20d='M66.008%2080.068c-5.084-.786-9.763-3.834-12.442-8.68a16.942%2016.942%200%200%201-1.87-5.18c1.096.19%202.203.476%203.298.87%206.525%202.333%2010.836%207.68%2011.014%2012.99ZM51.47%2061.576c.488-5.524%203.62-10.716%208.847-13.597a17.132%2017.132%200%200%201%2011.335-1.882c-.798%208.145-7.43%2014.848-16.038%2015.599-1.417.119-2.799.07-4.144-.12Zm28.564-11.478a17.513%2017.513%200%200%201%203.727%204.62c4.608%208.335%201.584%2018.813-6.75%2023.409a16.988%2016.988%200%200%201-4.359%201.679%2019.624%2019.624%200%200%201-3.977-12.776c.346-7.561%204.942-13.931%2011.36-16.932Z'/%3e%3cpath%20fill='%23110F0D'%20fill-rule='evenodd'%20d='M142.831%2048.324h4.977V77.03h-4.977V48.324Zm27.278%2013.002c.322%201.048.453%202.263.453%203.62v12.073h-4.787V66.208c0-.75-.047-1.572-.154-2.143-.453-2.382-1.822-3.572-4.215-3.572-2.31%200-3.882%201.274-4.43%203.476-.143.596-.226%201.405-.226%202.25v10.8h-4.787V56.623h4.477v2.989c1.536-2.5%203.906-3.43%206.371-3.43%203.488%200%206.263%201.68%207.298%205.144Zm24.636%207.323c0%203.882-2.358%206.525-5.763%207.727-1.298.453-2.632.643-4.62.643h-10.169V48.324h9.085c1.691%200%203.156.143%204.049.38%203.465.93%205.727%203.68%205.727%207.335%200%202.441-.81%204.156-2.762%205.644%202.905%201.417%204.453%203.727%204.453%206.966Zm-15.634-8.656h4.584c1.024%200%201.917-.143%202.536-.417%201.215-.548%201.905-1.608%201.905-3.167%200-1.548-.643-2.572-1.845-3.132-.691-.31-1.762-.452-2.763-.452h-4.417v7.168Zm10.716%208.465c0-1.536-.893-3.37-3.227-3.893-.428-.095-1.036-.143-1.571-.143h-5.918v8.085h5.501c.56%200%201.429-.048%201.953-.167%201.94-.453%203.262-1.846%203.262-3.882Zm47.747-11.847-8.097%2020.408h-4.429l-8.109-20.408h5.191l5.192%2014.574%205.108-14.574h5.144Zm-20.218%2010.002c0%20.69-.036%201.262-.155%201.94h-15.943c.631%202.87%202.714%204.728%205.882%204.728%202.131%200%203.607-.882%204.703-2.525h4.87c-1.762%204.144-5.204%206.692-9.657%206.692-6.084%200-10.537-4.858-10.537-10.49%200-6.108%204.524-10.776%2010.335-10.776%206.239%200%2010.442%204.954%2010.502%2010.43Zm-4.763-1.405c-.333-2.846-2.643-4.858-5.691-4.858-2.894%200-5.287%201.929-5.621%204.858h11.312Zm-72.667%203.44c0%204.787-3.287%208.371-9.419%208.371H119.363V64.66c-1.917.274-3.87.69-5.811%201.238l4.537%2011.121h-5.418l-3.596-9.585c-5.144%202.084-10.085%205.216-14.217%209.585h-4.786L101.8%2048.312h4.56l5.68%2013.883a44.112%2044.112%200%200%201%207.323-1.774V48.312h9.084c1.703%200%203.156.143%204.061.393%203.453.929%205.727%203.667%205.727%207.323%200%201.917-.738%204.179-2.81%205.691%203.06%201.56%204.501%204.025%204.501%206.93Zm-15.634-8.667a62.664%2062.664%200%200%201%202.06-.036c1.703.012%203.239.131%204.608.37%201.441-.549%202.357-1.727%202.357-3.537%200-1.941-.881-3.144-2.488-3.667-.548-.18-1.358-.286-2.322-.286h-4.215v7.156Zm-16.55%203.905-3.715-9.894-6.394%2016.502c2.833-2.595%206.263-4.858%2010.109-6.608Zm27.254%204.74c0-2.775-3.131-4.347-8.513-4.418-.715%200-1.441.011-2.191.047v8.252h5.918c2.548%200%204.786-1.37%204.786-3.882Z'%20clip-rule='evenodd'/%3e%3c/g%3e%3cdefs%3e%3clinearGradient%20id='b'%20x1='51.47'%20x2='85.916'%20y1='62.946'%20y2='62.946'%20gradientUnits='userSpaceOnUse'%3e%3cstop%20stop-color='%23CD9F28'/%3e%3cstop%20offset='1'%20stop-color='%23ECD80B'/%3e%3c/linearGradient%3e%3cclipPath%20id='a'%3e%3cpath%20fill='%23fff'%20d='M51.47%2045.728h186.104V80.14H51.47z'/%3e%3c/clipPath%3e%3c/defs%3e%3c/svg%3e)


More from Atlas Copco


Explore Other Assets


© 2026 MaintainX. All rights reserved.