


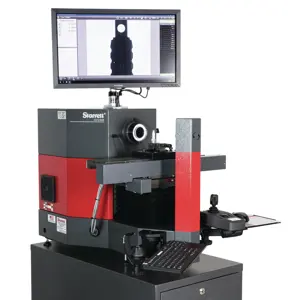
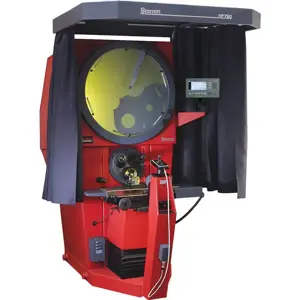
Starrett Optical Projector VB400
Need answers fast?
Explore the manual using AI.
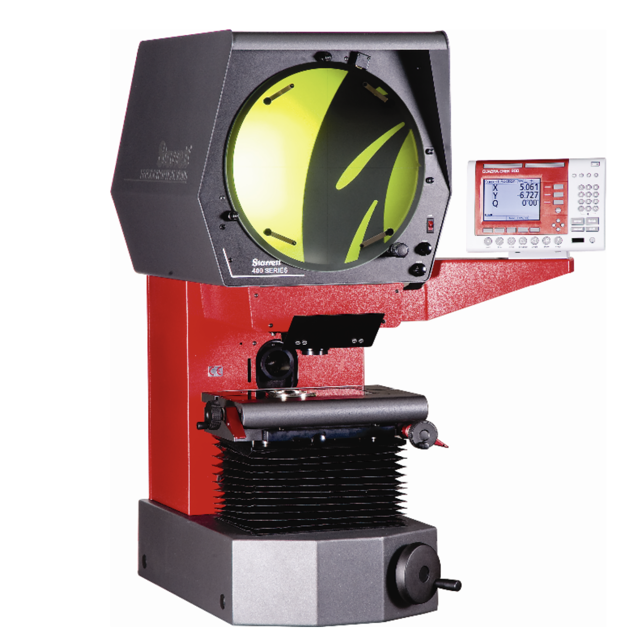
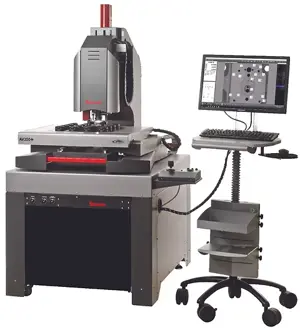
The Starrett Optical Projector VB400 is a precision measurement tool designed for high-quality optical inspection and measurement tasks. This reliable projector is ideal for various industrial applications, ensuring accurate results and enhanced productivity in manufacturing environments.
Turn manuals into instant answers
with your AI-powered assistantTurn manuals into instant answers
with your AI-powered assistant
Manual for Starrett Optical Projector VB400
Complete asset maintenance, one click away
Get instant access to all the maintenance information you need. Empower technicians to perform preventive maintenance with asset packages, ready to use right out of the box.

Documents & Manuals
Find all the essential guides in one place.
 Tensioning Guide
- Belt-diagram
- C-120 pulleys
+ 13 more

Work Order Templates
Pre-built workflows to keep your asset running smoothly.
- Daily Electrical System Inspection
- Replace Roller and Pulley
- Install Engine B-120
+ 29 more

Procedures
Integrate maintenance plans directly into your work orders.
- Motion Industries
- Applied Industrial Technologies
- Electrical Brothers
+ 5 more

Parts
Access the parts list for your equipment in MaintainX.
- Drive Motor
- B2 Rollers
- Tensioning System
+ 40 more
Starrett Optical Projector VB400
Create an account to install this asset package.
Maintenance Plans for Starrett Optical Projector Model VB400
Integrate maintenance plans directly into your work orders in MaintainX.
Optical Projector Cleaning
1. Cleaning Lenses
CAUTION - Do not use polishes, or window cleaning aerosols and liquids for cleaning lenses.
• Do not touch the inner surfaces, (those facing away from the work piece), of the projection or condenser lens. The projection lens is the most critical; a finger mark on the inner surface will degrade the quality of the projected image.
• Remove any accumulated dust with a photographic lens brush.
• Remove any grease or finger marks with a new photographic cleaning tissue, which may be moistened with methanol if necessary.
2. Cleaning the Mirror
CAUTION - The mirror should be cleaned as infrequently as possible. It is recommended that cleaning is performed by service engineers.
• Do not place fingers on the surface of the mirror.
• If necessary, remove loose dust with a photographic lens brush.

Projection Lens Replacement
CAUTION - Do not touch the surfaces of the lens.
Upload a photo of the lens before removal
Rotate the lens anti-clockwise and withdraw it
Upload a photo of the lens after removal
Fit the replacement lens
Rotate the replacement lens clockwise until it is secure
Check that the two red spots are aligned
Upload a photo of the lens after replacement
Sign off on the lens replacement
Latch Block Adjustment
Warning: This procedure requires trained personnel with PPE!
End cap successfully withdrawn?
Engagement handle unscrewed and removed?
Allen key inserted into the socket lock screw and screw slackened?
Internal nut held in position with the key?
Bearing mount/collet rotated to give the required tension?
Socket lock screw tightened?
Engagement handle and end cap refitted?
Sign off on the latch block adjustment
60000 Hourly Profile Illumination Replacement
Warning: This procedure requires trained personnel with PPE!
LED lighting functional?
If LED lighting is not functional, contact Projector Dealer or SPO Technical Department.
LEDs passed environmental and mechanical stress tests?
LED's lifetime hours
LEDs help reduce power consumption and are free of hazardous materials.
Surface illumination functional?
If surface illumination is not functional, contact Projector Dealer or SPO Technical Department.
Sign off on the illumination replacement
Parts for Starrett Optical Projector VB400
Access the parts list for your equipment in MaintainX.
Profile High/Low Switch
5H07
X100 Lens Assembly
10E012
X50 Lens Assembly
10E011
Mirror
10D03
X25 Lens Assembly
10E008
Profile High/Low Switch
5H07
X100 Lens Assembly
10E012
X50 Lens Assembly
10E011
Mirror
10D03
X25 Lens Assembly
10E008
Profile High/Low Switch
5H07
X100 Lens Assembly
10E012
X50 Lens Assembly
10E011
Mirror
10D03
X25 Lens Assembly
10E008
Unlock efficiency
with MaintainX CoPilot
MaintainX CoPilot is your expert colleague, on call 24/7, helping your team find the answers they need to keep equipment running.
Reduce Unplanned Downtime
Ensure your team follows consistent procedures to minimize equipment failures and costly delays.
Maximize Asset Availability
Keep your assets running longer and more reliably, with standardized maintenance workflows from OEM manuals.
Lower Maintenance Costs
Turn any technician into an expert to streamline operations, maintain more assets, and reduce overall costs.
Thousands of companies manage their assets with MaintainX

'%3e%3cpath%20fill='url(%23b)'%20d='M66.008%2080.068c-5.084-.786-9.763-3.834-12.442-8.68a16.942%2016.942%200%200%201-1.87-5.18c1.096.19%202.203.476%203.298.87%206.525%202.333%2010.836%207.68%2011.014%2012.99ZM51.47%2061.576c.488-5.524%203.62-10.716%208.847-13.597a17.132%2017.132%200%200%201%2011.335-1.882c-.798%208.145-7.43%2014.848-16.038%2015.599-1.417.119-2.799.07-4.144-.12Zm28.564-11.478a17.513%2017.513%200%200%201%203.727%204.62c4.608%208.335%201.584%2018.813-6.75%2023.409a16.988%2016.988%200%200%201-4.359%201.679%2019.624%2019.624%200%200%201-3.977-12.776c.346-7.561%204.942-13.931%2011.36-16.932Z'/%3e%3cpath%20fill='%23110F0D'%20fill-rule='evenodd'%20d='M142.831%2048.324h4.977V77.03h-4.977V48.324Zm27.278%2013.002c.322%201.048.453%202.263.453%203.62v12.073h-4.787V66.208c0-.75-.047-1.572-.154-2.143-.453-2.382-1.822-3.572-4.215-3.572-2.31%200-3.882%201.274-4.43%203.476-.143.596-.226%201.405-.226%202.25v10.8h-4.787V56.623h4.477v2.989c1.536-2.5%203.906-3.43%206.371-3.43%203.488%200%206.263%201.68%207.298%205.144Zm24.636%207.323c0%203.882-2.358%206.525-5.763%207.727-1.298.453-2.632.643-4.62.643h-10.169V48.324h9.085c1.691%200%203.156.143%204.049.38%203.465.93%205.727%203.68%205.727%207.335%200%202.441-.81%204.156-2.762%205.644%202.905%201.417%204.453%203.727%204.453%206.966Zm-15.634-8.656h4.584c1.024%200%201.917-.143%202.536-.417%201.215-.548%201.905-1.608%201.905-3.167%200-1.548-.643-2.572-1.845-3.132-.691-.31-1.762-.452-2.763-.452h-4.417v7.168Zm10.716%208.465c0-1.536-.893-3.37-3.227-3.893-.428-.095-1.036-.143-1.571-.143h-5.918v8.085h5.501c.56%200%201.429-.048%201.953-.167%201.94-.453%203.262-1.846%203.262-3.882Zm47.747-11.847-8.097%2020.408h-4.429l-8.109-20.408h5.191l5.192%2014.574%205.108-14.574h5.144Zm-20.218%2010.002c0%20.69-.036%201.262-.155%201.94h-15.943c.631%202.87%202.714%204.728%205.882%204.728%202.131%200%203.607-.882%204.703-2.525h4.87c-1.762%204.144-5.204%206.692-9.657%206.692-6.084%200-10.537-4.858-10.537-10.49%200-6.108%204.524-10.776%2010.335-10.776%206.239%200%2010.442%204.954%2010.502%2010.43Zm-4.763-1.405c-.333-2.846-2.643-4.858-5.691-4.858-2.894%200-5.287%201.929-5.621%204.858h11.312Zm-72.667%203.44c0%204.787-3.287%208.371-9.419%208.371H119.363V64.66c-1.917.274-3.87.69-5.811%201.238l4.537%2011.121h-5.418l-3.596-9.585c-5.144%202.084-10.085%205.216-14.217%209.585h-4.786L101.8%2048.312h4.56l5.68%2013.883a44.112%2044.112%200%200%201%207.323-1.774V48.312h9.084c1.703%200%203.156.143%204.061.393%203.453.929%205.727%203.667%205.727%207.323%200%201.917-.738%204.179-2.81%205.691%203.06%201.56%204.501%204.025%204.501%206.93Zm-15.634-8.667a62.664%2062.664%200%200%201%202.06-.036c1.703.012%203.239.131%204.608.37%201.441-.549%202.357-1.727%202.357-3.537%200-1.941-.881-3.144-2.488-3.667-.548-.18-1.358-.286-2.322-.286h-4.215v7.156Zm-16.55%203.905-3.715-9.894-6.394%2016.502c2.833-2.595%206.263-4.858%2010.109-6.608Zm27.254%204.74c0-2.775-3.131-4.347-8.513-4.418-.715%200-1.441.011-2.191.047v8.252h5.918c2.548%200%204.786-1.37%204.786-3.882Z'%20clip-rule='evenodd'/%3e%3c/g%3e%3cdefs%3e%3clinearGradient%20id='b'%20x1='51.47'%20x2='85.916'%20y1='62.946'%20y2='62.946'%20gradientUnits='userSpaceOnUse'%3e%3cstop%20stop-color='%23CD9F28'/%3e%3cstop%20offset='1'%20stop-color='%23ECD80B'/%3e%3c/linearGradient%3e%3cclipPath%20id='a'%3e%3cpath%20fill='%23fff'%20d='M51.47%2045.728h186.104V80.14H51.47z'/%3e%3c/clipPath%3e%3c/defs%3e%3c/svg%3e)


More from Starrett


Explore Other Assets


© 2026 MaintainX. All rights reserved.