


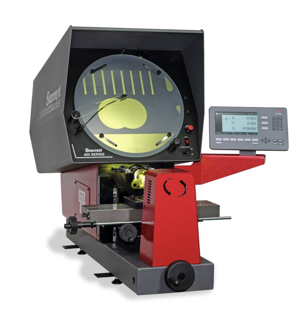
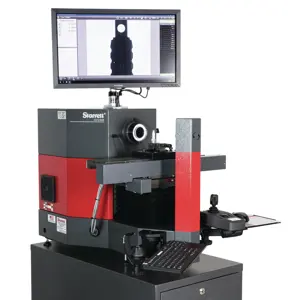
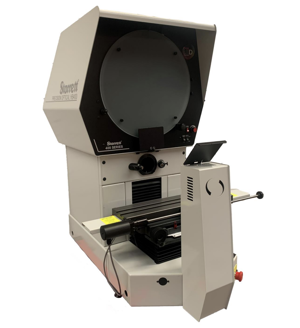
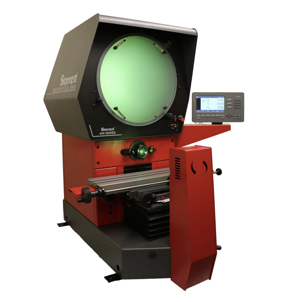
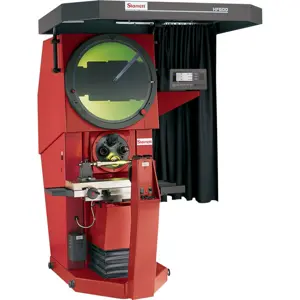
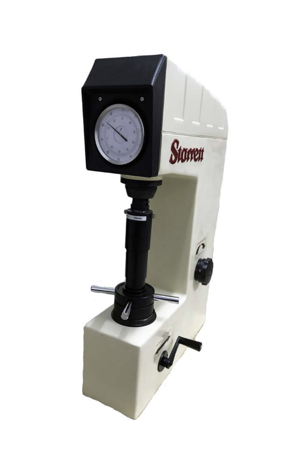
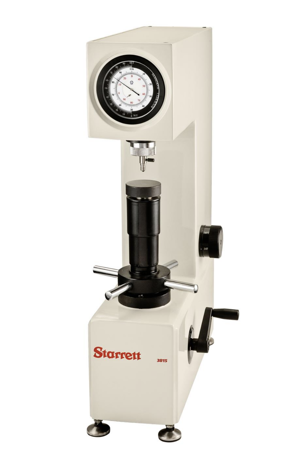
Starrett Optical Projector HF750
Need answers fast?
Explore the manual using AI.
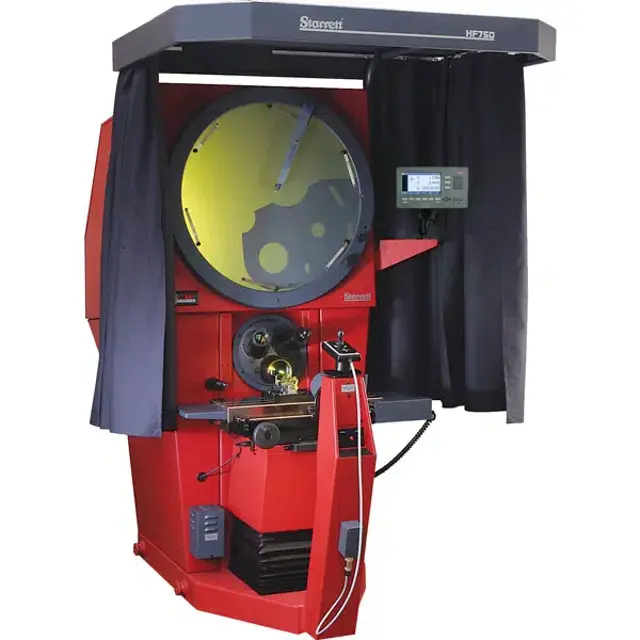
The Starrett Optical Projector HF750 is a precision measurement tool designed for accurate dimensional analysis in manufacturing and quality control. This versatile optical projector offers exceptional clarity and reliability, making it an essential asset for professionals seeking high-performance optical inspection solutions.
Turn manuals into instant answers
with your AI-powered assistantTurn manuals into instant answers
with your AI-powered assistant
Manual for Starrett Optical Projector HF750
Complete asset maintenance, one click away
Get instant access to all the maintenance information you need. Empower technicians to perform preventive maintenance with asset packages, ready to use right out of the box.

Documents & Manuals
Find all the essential guides in one place.
 Tensioning Guide
- Belt-diagram
- C-120 pulleys
+ 13 more

Work Order Templates
Pre-built workflows to keep your asset running smoothly.
- Daily Electrical System Inspection
- Replace Roller and Pulley
- Install Engine B-120
+ 29 more

Procedures
Integrate maintenance plans directly into your work orders.
- Motion Industries
- Applied Industrial Technologies
- Electrical Brothers
+ 5 more

Parts
Access the parts list for your equipment in MaintainX.
- Drive Motor
- B2 Rollers
- Tensioning System
+ 40 more
Starrett Optical Projector HF750
Create an account to install this asset package.
Maintenance Plans for Starrett Optical Projector Model HF750
Integrate maintenance plans directly into your work orders in MaintainX.
Surface Illumination Lamp Replacement
Remove the two screws securing the cover
Remove the surface illumination lamp cover
Raise the wire handle of the lamp ejection clip on the housing to lift the lamp pins out of their connectors, and remove the used lamp
Insert the new lamp into the housing
Refit the lamp cover and secure it with the two screws
Sign off on the lamp replacement

Projection Lens Replacement
CAUTION! Do not touch the surfaces of the lens.
Slacken the two screws securing the clamps (2)
Remove screws and clamps
Withdraw the lens
Fit the replacement lens
Secure the clamps and tighten the securing screws
Sign off on the lens replacement
Profile Illumination Lamp Replacement
CAUTION! Do not finger the surface of the new lamp; handle it in its protective wrapping. Any fingermarks will be fired into the surface of the quartz envelope, reducing the output and life of the lamp. If the envelope is accidentally finger marked, remove the marks immediately with a cotton wool swab moistened with methanol.
Remove the 3 securing screws from the profile lamp cover and lift the cover clear.
Remove the used lamp by holding it carefully between finger and thumb and pulling it gently upwards until the terminal pins are clear of the connectors (4).
Remove the new replacement lamp from its box and with a sharp knife cut approximately 6 mm (1/4 in) from the bottom of the protective wrapping, allowing the terminal pins to protrude.
Holding the lamp by its protective wrapping, insert the terminal pins into the connectors (4).
Check that the lamp is vertical and securely located, and dispose of the protective wrapping.
Refit the lamp cover and secure it with the 3 screws.
Sign off on the lamp replacement
Latch Block Adjustment
Warning: This procedure requires trained personnel with PPE!
End cap successfully withdrawn?
Engagement handle unscrewed and removed?
Allen key inserted into the socket lockscrew and screw released?
Internal nut held in position with the key?
Bearing mount/collet rotated to give the required tension?
Socket lock screw tightened?
Engagement handle and end cap refitted?
Sign off on the latch block adjustment
Optical Projector Cleaning
1. Cleaning Lenses
CAUTION! Do not use polishes, or window cleaning aerosols and liquids for cleaning lenses. Do not touch the inner surfaces, (those facing away from the workpiece), of the projection or condenser lens. The projection lens is the most critical; a finger mark on the inner surface will degrade the quality of the projected image.
• Remove any accumulated dust with a photographic lens brush.
• Remove any grease or fingermarks with a new photographic cleaning tissue, which may be moistened with methanol if necessary.
2. Cleaning the Mirror
CAUTION! The mirror should be cleaned as infrequently as possible. It is recommended that cleaning is performed by an authorised service engineer. Do not finger the surface of the mirror.
• If necessary, remove loose dust with a photographic lens brush.
• If necessary, remove grease and finger marks with surgical quality cotton wool moistened with methanol. Apply the cotton wool lightly, and then polish the surface with clean dry surgical quality cotton wool.
CAUTION! Do not use force.
Parts for Starrett Optical Projector HF750
Access the parts list for your equipment in MaintainX.
RFI Filter
QA09
Surface Illumination Lamp Holder
6G06
Profile Illumination And Hot Lamp Lamp Holder
LH11
Cooling Fan Fibre Optic 80mm
LH08
Power Entry Socket
9J02
RFI Filter
QA09
Surface Illumination Lamp Holder
6G06
Profile Illumination And Hot Lamp Lamp Holder
LH11
Cooling Fan Fibre Optic 80mm
LH08
Power Entry Socket
9J02
RFI Filter
QA09
Surface Illumination Lamp Holder
6G06
Profile Illumination And Hot Lamp Lamp Holder
LH11
Cooling Fan Fibre Optic 80mm
LH08
Power Entry Socket
9J02
Unlock efficiency
with MaintainX CoPilot
MaintainX CoPilot is your expert colleague, on call 24/7, helping your team find the answers they need to keep equipment running.
Reduce Unplanned Downtime
Ensure your team follows consistent procedures to minimize equipment failures and costly delays.
Maximize Asset Availability
Keep your assets running longer and more reliably, with standardized maintenance workflows from OEM manuals.
Lower Maintenance Costs
Turn any technician into an expert to streamline operations, maintain more assets, and reduce overall costs.
Thousands of companies manage their assets with MaintainX

'%3e%3cpath%20fill='url(%23b)'%20d='M66.008%2080.068c-5.084-.786-9.763-3.834-12.442-8.68a16.942%2016.942%200%200%201-1.87-5.18c1.096.19%202.203.476%203.298.87%206.525%202.333%2010.836%207.68%2011.014%2012.99ZM51.47%2061.576c.488-5.524%203.62-10.716%208.847-13.597a17.132%2017.132%200%200%201%2011.335-1.882c-.798%208.145-7.43%2014.848-16.038%2015.599-1.417.119-2.799.07-4.144-.12Zm28.564-11.478a17.513%2017.513%200%200%201%203.727%204.62c4.608%208.335%201.584%2018.813-6.75%2023.409a16.988%2016.988%200%200%201-4.359%201.679%2019.624%2019.624%200%200%201-3.977-12.776c.346-7.561%204.942-13.931%2011.36-16.932Z'/%3e%3cpath%20fill='%23110F0D'%20fill-rule='evenodd'%20d='M142.831%2048.324h4.977V77.03h-4.977V48.324Zm27.278%2013.002c.322%201.048.453%202.263.453%203.62v12.073h-4.787V66.208c0-.75-.047-1.572-.154-2.143-.453-2.382-1.822-3.572-4.215-3.572-2.31%200-3.882%201.274-4.43%203.476-.143.596-.226%201.405-.226%202.25v10.8h-4.787V56.623h4.477v2.989c1.536-2.5%203.906-3.43%206.371-3.43%203.488%200%206.263%201.68%207.298%205.144Zm24.636%207.323c0%203.882-2.358%206.525-5.763%207.727-1.298.453-2.632.643-4.62.643h-10.169V48.324h9.085c1.691%200%203.156.143%204.049.38%203.465.93%205.727%203.68%205.727%207.335%200%202.441-.81%204.156-2.762%205.644%202.905%201.417%204.453%203.727%204.453%206.966Zm-15.634-8.656h4.584c1.024%200%201.917-.143%202.536-.417%201.215-.548%201.905-1.608%201.905-3.167%200-1.548-.643-2.572-1.845-3.132-.691-.31-1.762-.452-2.763-.452h-4.417v7.168Zm10.716%208.465c0-1.536-.893-3.37-3.227-3.893-.428-.095-1.036-.143-1.571-.143h-5.918v8.085h5.501c.56%200%201.429-.048%201.953-.167%201.94-.453%203.262-1.846%203.262-3.882Zm47.747-11.847-8.097%2020.408h-4.429l-8.109-20.408h5.191l5.192%2014.574%205.108-14.574h5.144Zm-20.218%2010.002c0%20.69-.036%201.262-.155%201.94h-15.943c.631%202.87%202.714%204.728%205.882%204.728%202.131%200%203.607-.882%204.703-2.525h4.87c-1.762%204.144-5.204%206.692-9.657%206.692-6.084%200-10.537-4.858-10.537-10.49%200-6.108%204.524-10.776%2010.335-10.776%206.239%200%2010.442%204.954%2010.502%2010.43Zm-4.763-1.405c-.333-2.846-2.643-4.858-5.691-4.858-2.894%200-5.287%201.929-5.621%204.858h11.312Zm-72.667%203.44c0%204.787-3.287%208.371-9.419%208.371H119.363V64.66c-1.917.274-3.87.69-5.811%201.238l4.537%2011.121h-5.418l-3.596-9.585c-5.144%202.084-10.085%205.216-14.217%209.585h-4.786L101.8%2048.312h4.56l5.68%2013.883a44.112%2044.112%200%200%201%207.323-1.774V48.312h9.084c1.703%200%203.156.143%204.061.393%203.453.929%205.727%203.667%205.727%207.323%200%201.917-.738%204.179-2.81%205.691%203.06%201.56%204.501%204.025%204.501%206.93Zm-15.634-8.667a62.664%2062.664%200%200%201%202.06-.036c1.703.012%203.239.131%204.608.37%201.441-.549%202.357-1.727%202.357-3.537%200-1.941-.881-3.144-2.488-3.667-.548-.18-1.358-.286-2.322-.286h-4.215v7.156Zm-16.55%203.905-3.715-9.894-6.394%2016.502c2.833-2.595%206.263-4.858%2010.109-6.608Zm27.254%204.74c0-2.775-3.131-4.347-8.513-4.418-.715%200-1.441.011-2.191.047v8.252h5.918c2.548%200%204.786-1.37%204.786-3.882Z'%20clip-rule='evenodd'/%3e%3c/g%3e%3cdefs%3e%3clinearGradient%20id='b'%20x1='51.47'%20x2='85.916'%20y1='62.946'%20y2='62.946'%20gradientUnits='userSpaceOnUse'%3e%3cstop%20stop-color='%23CD9F28'/%3e%3cstop%20offset='1'%20stop-color='%23ECD80B'/%3e%3c/linearGradient%3e%3cclipPath%20id='a'%3e%3cpath%20fill='%23fff'%20d='M51.47%2045.728h186.104V80.14H51.47z'/%3e%3c/clipPath%3e%3c/defs%3e%3c/svg%3e)


More from Starrett


Explore Other Assets


© 2026 MaintainX. All rights reserved.