


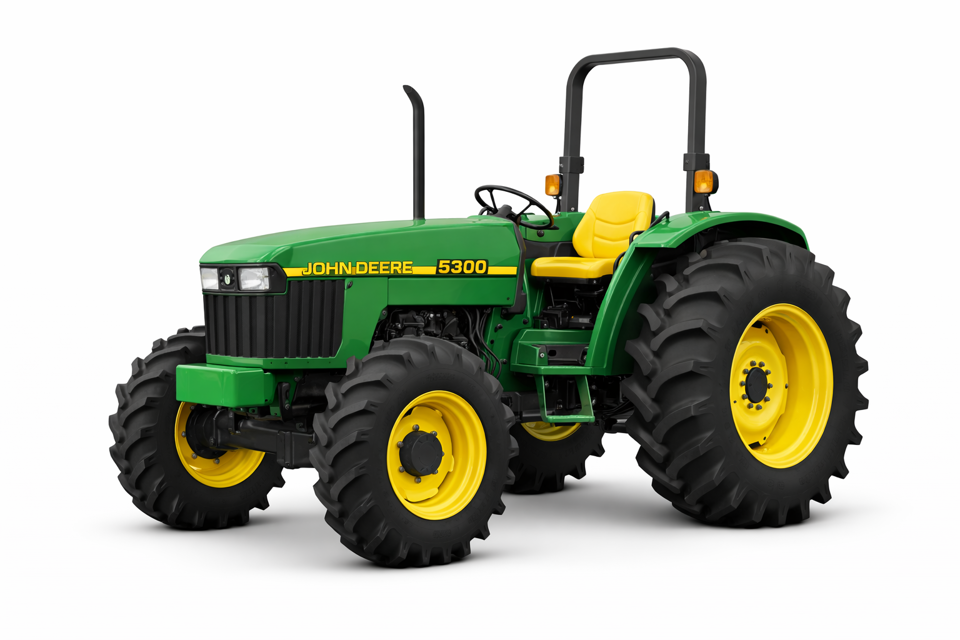
John Deere Tractor 5300
Need answers fast?
Explore the manual using AI.
Turn manuals into instant answers
with your AI-powered assistantTurn manuals into instant answers
with your AI-powered assistant
Manual for John Deere Tractor 5300
Complete asset maintenance, one click away
Get instant access to all the maintenance information you need. Empower technicians to perform preventive maintenance with asset packages, ready to use right out of the box.

Documents & Manuals
Find all the essential guides in one place.
 Tensioning Guide
- Belt-diagram
- C-120 pulleys
+ 13 more

Work Order Templates
Pre-built workflows to keep your asset running smoothly.
- Daily Electrical System Inspection
- Replace Roller and Pulley
- Install Engine B-120
+ 29 more

Procedures
Integrate maintenance plans directly into your work orders.
- Motion Industries
- Applied Industrial Technologies
- Electrical Brothers
+ 5 more

Parts
Access the parts list for your equipment in MaintainX.
- Drive Motor
- B2 Rollers
- Tensioning System
+ 40 more
John Deere Tractor 5300
Create an account to install this asset package.
Maintenance Plans for John Deere Tractor Model 5300
Integrate maintenance plans directly into your work orders in MaintainX.
100 Hourly Tires Check
IMPORTANT: Minimum pressures may be used only for light loads and only if tractor has no added weight. If you install ballast or mounted implements, or if you pull heavy loads, increase pressure.
Enter the current tire pressure
If tires contain liquid ballast, use a special air-water gauge and measure with valve stem at bottom.
Upload a photo of the tire pressure gauge reading
Does the tire pressure match the Tire Inflation Pressure Chart?
If not, describe the discrepancy
Sign off on the tire check

Tail Bulb-Cab Lamp Bulb Replacement
NOTE: Bulb replacement procedures for left and right tail lamps are the same. Left-hand tail lamp shown.
Remove four screws (A)
Remove tail lamp lens
Push and twist to release bulb from socket
Reverse this procedure to reassemble tail lamp
Sign off on the bulb replacement
Initial 50 Hours Tractor Maintenance
Wheel bolts tightened
Alternator/fan belt tension checked
Air intake and cooling system hose clamps tightened
Perform 50 Hours Service
Sign off on the tractor maintenance
Primary Air Cleaner Element Cleaning
Pat sides of element gently to loosen dirt. DO NOT tap element against a hard surface.
Using a John Deere Dry Element Cleaner Gun, clean element with compressed air (below 690 kPa or 100 psi). Hold nozzle next to inner surface, and move up and down pleats.
IMPORTANT: DO NOT direct air against outside of element, as it might force dirt through to inside.
Inspect element before reinstalling.
IMPORTANT: Never wash element in gasoline or any solvent. Never use compressed air on a wet element. Do not oil element.
If element is coated with oil or soot, wash in a solution of warm water and John Deere Filter Element Cleaner or its equivalent. Let element soak at least 15 minutes, then agitate gently to flush out dirt.
Rinse element thoroughly from inside with clean water. Use element cleaning gun or a free-running hose. Keep water pressure low (below 280 kPa or 40 psi) to avoid damaging element.
Allow element to dry completely before using. This usually takes from one to three days. DO NOT oven dry or use drying agents. Protect element from freezing until dry.
Inspect element before installing.
1200 Hourly Transmission-Hydraulic Filter Screen Cleaning
Warning: This procedure requires trained personnel with PPE!
Drained oil successfully?
Removed two cap screws (A) and screen cover (B)?
Screen removed and examined for damage?
Is the screen damaged?
If the screen is damaged, replace it.
Screen cleaned in solvent and blow dried with compressed air?
Screen carefully installed so the front of screen is inserted in hole at front of differential case?
System refilled with transmission-hydraulic oil?
Parts for John Deere Tractor 5300
Access the parts list for your equipment in MaintainX.
Liquid Coolant Conditioner
RE23182
Liquid Coolant Conditioner
RE23182
Liquid Coolant Conditioner
RE23182
Unlock efficiency
with MaintainX CoPilot
MaintainX CoPilot is your expert colleague, on call 24/7, helping your team find the answers they need to keep equipment running.
Reduce Unplanned Downtime
Ensure your team follows consistent procedures to minimize equipment failures and costly delays.
Maximize Asset Availability
Keep your assets running longer and more reliably, with standardized maintenance workflows from OEM manuals.
Lower Maintenance Costs
Turn any technician into an expert to streamline operations, maintain more assets, and reduce overall costs.
Thousands of companies manage their assets with MaintainX

'%3e%3cpath%20fill='url(%23b)'%20d='M66.008%2080.068c-5.084-.786-9.763-3.834-12.442-8.68a16.942%2016.942%200%200%201-1.87-5.18c1.096.19%202.203.476%203.298.87%206.525%202.333%2010.836%207.68%2011.014%2012.99ZM51.47%2061.576c.488-5.524%203.62-10.716%208.847-13.597a17.132%2017.132%200%200%201%2011.335-1.882c-.798%208.145-7.43%2014.848-16.038%2015.599-1.417.119-2.799.07-4.144-.12Zm28.564-11.478a17.513%2017.513%200%200%201%203.727%204.62c4.608%208.335%201.584%2018.813-6.75%2023.409a16.988%2016.988%200%200%201-4.359%201.679%2019.624%2019.624%200%200%201-3.977-12.776c.346-7.561%204.942-13.931%2011.36-16.932Z'/%3e%3cpath%20fill='%23110F0D'%20fill-rule='evenodd'%20d='M142.831%2048.324h4.977V77.03h-4.977V48.324Zm27.278%2013.002c.322%201.048.453%202.263.453%203.62v12.073h-4.787V66.208c0-.75-.047-1.572-.154-2.143-.453-2.382-1.822-3.572-4.215-3.572-2.31%200-3.882%201.274-4.43%203.476-.143.596-.226%201.405-.226%202.25v10.8h-4.787V56.623h4.477v2.989c1.536-2.5%203.906-3.43%206.371-3.43%203.488%200%206.263%201.68%207.298%205.144Zm24.636%207.323c0%203.882-2.358%206.525-5.763%207.727-1.298.453-2.632.643-4.62.643h-10.169V48.324h9.085c1.691%200%203.156.143%204.049.38%203.465.93%205.727%203.68%205.727%207.335%200%202.441-.81%204.156-2.762%205.644%202.905%201.417%204.453%203.727%204.453%206.966Zm-15.634-8.656h4.584c1.024%200%201.917-.143%202.536-.417%201.215-.548%201.905-1.608%201.905-3.167%200-1.548-.643-2.572-1.845-3.132-.691-.31-1.762-.452-2.763-.452h-4.417v7.168Zm10.716%208.465c0-1.536-.893-3.37-3.227-3.893-.428-.095-1.036-.143-1.571-.143h-5.918v8.085h5.501c.56%200%201.429-.048%201.953-.167%201.94-.453%203.262-1.846%203.262-3.882Zm47.747-11.847-8.097%2020.408h-4.429l-8.109-20.408h5.191l5.192%2014.574%205.108-14.574h5.144Zm-20.218%2010.002c0%20.69-.036%201.262-.155%201.94h-15.943c.631%202.87%202.714%204.728%205.882%204.728%202.131%200%203.607-.882%204.703-2.525h4.87c-1.762%204.144-5.204%206.692-9.657%206.692-6.084%200-10.537-4.858-10.537-10.49%200-6.108%204.524-10.776%2010.335-10.776%206.239%200%2010.442%204.954%2010.502%2010.43Zm-4.763-1.405c-.333-2.846-2.643-4.858-5.691-4.858-2.894%200-5.287%201.929-5.621%204.858h11.312Zm-72.667%203.44c0%204.787-3.287%208.371-9.419%208.371H119.363V64.66c-1.917.274-3.87.69-5.811%201.238l4.537%2011.121h-5.418l-3.596-9.585c-5.144%202.084-10.085%205.216-14.217%209.585h-4.786L101.8%2048.312h4.56l5.68%2013.883a44.112%2044.112%200%200%201%207.323-1.774V48.312h9.084c1.703%200%203.156.143%204.061.393%203.453.929%205.727%203.667%205.727%207.323%200%201.917-.738%204.179-2.81%205.691%203.06%201.56%204.501%204.025%204.501%206.93Zm-15.634-8.667a62.664%2062.664%200%200%201%202.06-.036c1.703.012%203.239.131%204.608.37%201.441-.549%202.357-1.727%202.357-3.537%200-1.941-.881-3.144-2.488-3.667-.548-.18-1.358-.286-2.322-.286h-4.215v7.156Zm-16.55%203.905-3.715-9.894-6.394%2016.502c2.833-2.595%206.263-4.858%2010.109-6.608Zm27.254%204.74c0-2.775-3.131-4.347-8.513-4.418-.715%200-1.441.011-2.191.047v8.252h5.918c2.548%200%204.786-1.37%204.786-3.882Z'%20clip-rule='evenodd'/%3e%3c/g%3e%3cdefs%3e%3clinearGradient%20id='b'%20x1='51.47'%20x2='85.916'%20y1='62.946'%20y2='62.946'%20gradientUnits='userSpaceOnUse'%3e%3cstop%20stop-color='%23CD9F28'/%3e%3cstop%20offset='1'%20stop-color='%23ECD80B'/%3e%3c/linearGradient%3e%3cclipPath%20id='a'%3e%3cpath%20fill='%23fff'%20d='M51.47%2045.728h186.104V80.14H51.47z'/%3e%3c/clipPath%3e%3c/defs%3e%3c/svg%3e)


More from John Deere


Explore Other Assets


© 2026 MaintainX. All rights reserved.