


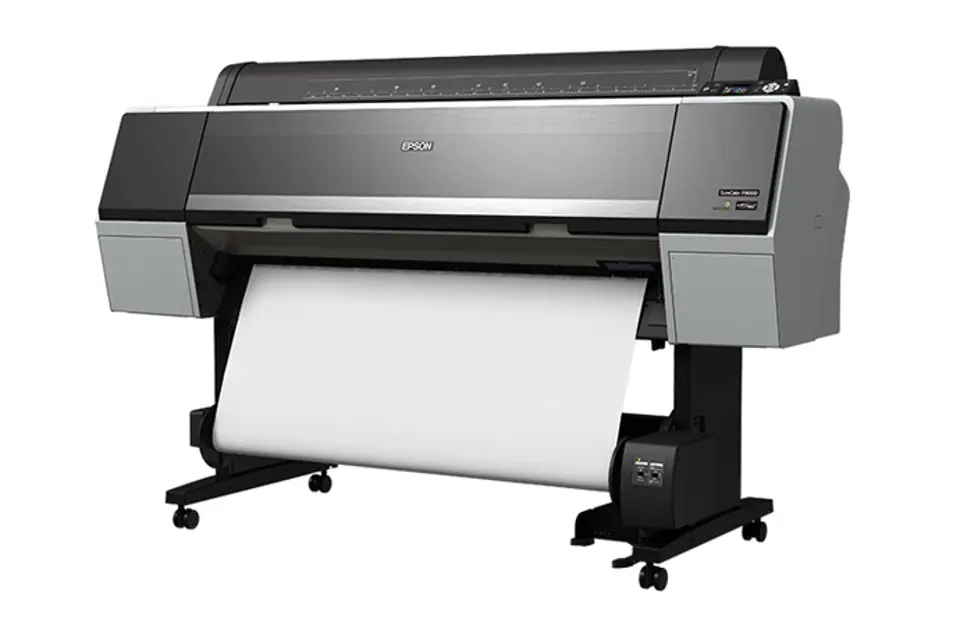
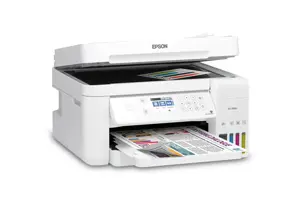
Epson Inkjet Printer SureColor P6000
Need answers fast?
Explore the manual using AI.
Turn manuals into instant answers
with your AI-powered assistantTurn manuals into instant answers
with your AI-powered assistant
Manual for Epson Inkjet Printer SureColor P6000
Complete asset maintenance, one click away
Get instant access to all the maintenance information you need. Empower technicians to perform preventive maintenance with asset packages, ready to use right out of the box.

Documents & Manuals
Find all the essential guides in one place.
 Tensioning Guide
- Belt-diagram
- C-120 pulleys
+ 13 more

Work Order Templates
Pre-built workflows to keep your asset running smoothly.
- Daily Electrical System Inspection
- Replace Roller and Pulley
- Install Engine B-120
+ 29 more

Procedures
Integrate maintenance plans directly into your work orders.
- Motion Industries
- Applied Industrial Technologies
- Electrical Brothers
+ 5 more

Parts
Access the parts list for your equipment in MaintainX.
- Drive Motor
- B2 Rollers
- Tensioning System
+ 40 more
Epson Inkjet Printer SureColor P6000
Create an account to install this asset package.
Maintenance Plans for Epson Inkjet Printer Model SureColor P6000
Integrate maintenance plans directly into your work orders in MaintainX.
6 Monthly Ink Cartridge Replacement
Replacing Ink Cartridges
If the Check ink light stays lit and the icon appears above an ink cartridge on the LCD screen, the cartridge is expended. When an ink cartridge is expended, you need to replace it.
You may also need to replace a cartridge that is more than six months old, or if your printouts do not look their best, even after cleaning and aligning the print head.
Note: Please dispose of your used Epson branded ink cartridges responsibly and in accordance with local requirements. If you would like to return your used ink cartridges to Epson for proper disposal, please go to epson.com/recycle for more information.
Checking Ink and Maintenance Box Status With Windows
You can check your ink or maintenance box status at any time using a utility on your Windows computer.
1. To check your status, access the Windows Desktop, double-click the product icon in the Windows taskbar, and click Details.
2. Replace or reinstall the maintenance box or ink cartridge as indicated on the screen.
Note: If any of the ink cartridges installed in the product is broken, incompatible with the product model, or improperly installed, Epson Status Monitor will not display an accurate ink status.

Cutter Replacement
Warning: Keep the cutter out of the reach of children. The blade is sharp and can cause injury.
Remove any paper from the printer.
Press the Menu button.
Select Maintenance and press the right arrow button.
Select Cutter Maintenance and press the right arrow button.
Select Replace Cutter and press the right arrow button.
Press the OK button.
Press in on the tab on the cutter cover, release it, and pull down on the cutter cover to remove it.
Using a Phillips head screwdriver, loosen the screw holding the cutter in place.
Print Head Cleaning
Print Head Maintenance
If your printouts become too light, or you see dark or light bands across them, you may need to clean the print head nozzles. Cleaning uses ink, so clean the nozzles only if print quality declines.
You can check for clogged nozzles before you clean them so you don't clean them unnecessarily.
Note: You cannot clean the print head if an ink cartridge is expended, and may not be able to clean it when a cartridge is low. You must replace the cartridge first.
Print Head Cleaning
If print quality has declined and the nozzle check pattern indicates clogged nozzles, you can clean the print head. Use the nozzle check pattern to determine which colors need cleaning. You can save ink by cleaning only selected colors (control panel only).
Note: You cannot clean the print head if an ink cartridge is expended, and may not be able to clean it when a cartridge is low. You must replace the cartridge first.
Cleaning the Print Head Using the Product Control Panel
You can clean the print head using the control panel on your product.
1 Monthly Printer Cleaning
Warning: Do not use a hard brush, benzene, alcohol, or paint thinner to clean the product or you may damage it. Do not use oil or other lubricants inside the product or let water get inside.
Turn off the product
Unplug the power cable
Disconnect any connected cables
Remove any paper from the product
Open the front cover and carefully clean the inside of the product with a soft, clean cloth
Note: Do not touch the gray areas (the rollers or the ink absorption pads) or your prints may be soiled. Be careful not to touch the gears or ink tubes inside the product.
If your product is still dirty, dampen the cloth with a small amount of water and a mild detergent and repeat the previous step. Then, wipe the inside of the printer with a soft, dry cloth
If paper particles have accumulated in the holes on the platen, use a toothpick or similar tool to push them through
Print Head Alignment
Print Head Alignment
If your printouts become grainy or blurry, you notice misalignment of vertical lines, or you see dark or light horizontal bands, you may need to align the print head. You can align the print head automatically from the control panel or your computer, or align it manually from the control panel.
Before you align the print head, note the following:
• Alignment will vary based on the loaded media. Align the print head using the media on which you want to print and select the correct paper type as the Select Paper Type setting.
• Run a nozzle check before you align the print head. If there are any gaps in the nozzle check pattern, clean the print head.
• Automatic print head alignment cannot be performed on any transparent or colored paper or on these paper types: Plain paper, Epson Enhanced Matte Posterboard. Manually align from the printer control panel when using these media types.
• Make sure the printer is not exposed to direct, bright light (such as direct sunlight) while performing an automatic print head alignment.
Aligning the Print Head Automatically Using the Product Control Panel
You can automatically align the print head using the control panel on your product.
Parts for Epson Inkjet Printer SureColor P6000
Access the parts list for your equipment in MaintainX.
Replacement Ink Maintenance Box
T699700
SpectroProofer 24” UVS
Spectro24UVS
Internal Print Server
C12C848031
Additional Roll Media Adapters
C12C811241
Replacement Printer Cutter Blade
C12C815331
Replacement Ink Maintenance Box
T699700
SpectroProofer 24” UVS
Spectro24UVS
Internal Print Server
C12C848031
Additional Roll Media Adapters
C12C811241
Replacement Printer Cutter Blade
C12C815331
Replacement Ink Maintenance Box
T699700
SpectroProofer 24” UVS
Spectro24UVS
Internal Print Server
C12C848031
Additional Roll Media Adapters
C12C811241
Replacement Printer Cutter Blade
C12C815331
Unlock efficiency
with MaintainX CoPilot
MaintainX CoPilot is your expert colleague, on call 24/7, helping your team find the answers they need to keep equipment running.
Reduce Unplanned Downtime
Ensure your team follows consistent procedures to minimize equipment failures and costly delays.
Maximize Asset Availability
Keep your assets running longer and more reliably, with standardized maintenance workflows from OEM manuals.
Lower Maintenance Costs
Turn any technician into an expert to streamline operations, maintain more assets, and reduce overall costs.
Thousands of companies manage their assets with MaintainX

'%3e%3cpath%20fill='url(%23b)'%20d='M66.008%2080.068c-5.084-.786-9.763-3.834-12.442-8.68a16.942%2016.942%200%200%201-1.87-5.18c1.096.19%202.203.476%203.298.87%206.525%202.333%2010.836%207.68%2011.014%2012.99ZM51.47%2061.576c.488-5.524%203.62-10.716%208.847-13.597a17.132%2017.132%200%200%201%2011.335-1.882c-.798%208.145-7.43%2014.848-16.038%2015.599-1.417.119-2.799.07-4.144-.12Zm28.564-11.478a17.513%2017.513%200%200%201%203.727%204.62c4.608%208.335%201.584%2018.813-6.75%2023.409a16.988%2016.988%200%200%201-4.359%201.679%2019.624%2019.624%200%200%201-3.977-12.776c.346-7.561%204.942-13.931%2011.36-16.932Z'/%3e%3cpath%20fill='%23110F0D'%20fill-rule='evenodd'%20d='M142.831%2048.324h4.977V77.03h-4.977V48.324Zm27.278%2013.002c.322%201.048.453%202.263.453%203.62v12.073h-4.787V66.208c0-.75-.047-1.572-.154-2.143-.453-2.382-1.822-3.572-4.215-3.572-2.31%200-3.882%201.274-4.43%203.476-.143.596-.226%201.405-.226%202.25v10.8h-4.787V56.623h4.477v2.989c1.536-2.5%203.906-3.43%206.371-3.43%203.488%200%206.263%201.68%207.298%205.144Zm24.636%207.323c0%203.882-2.358%206.525-5.763%207.727-1.298.453-2.632.643-4.62.643h-10.169V48.324h9.085c1.691%200%203.156.143%204.049.38%203.465.93%205.727%203.68%205.727%207.335%200%202.441-.81%204.156-2.762%205.644%202.905%201.417%204.453%203.727%204.453%206.966Zm-15.634-8.656h4.584c1.024%200%201.917-.143%202.536-.417%201.215-.548%201.905-1.608%201.905-3.167%200-1.548-.643-2.572-1.845-3.132-.691-.31-1.762-.452-2.763-.452h-4.417v7.168Zm10.716%208.465c0-1.536-.893-3.37-3.227-3.893-.428-.095-1.036-.143-1.571-.143h-5.918v8.085h5.501c.56%200%201.429-.048%201.953-.167%201.94-.453%203.262-1.846%203.262-3.882Zm47.747-11.847-8.097%2020.408h-4.429l-8.109-20.408h5.191l5.192%2014.574%205.108-14.574h5.144Zm-20.218%2010.002c0%20.69-.036%201.262-.155%201.94h-15.943c.631%202.87%202.714%204.728%205.882%204.728%202.131%200%203.607-.882%204.703-2.525h4.87c-1.762%204.144-5.204%206.692-9.657%206.692-6.084%200-10.537-4.858-10.537-10.49%200-6.108%204.524-10.776%2010.335-10.776%206.239%200%2010.442%204.954%2010.502%2010.43Zm-4.763-1.405c-.333-2.846-2.643-4.858-5.691-4.858-2.894%200-5.287%201.929-5.621%204.858h11.312Zm-72.667%203.44c0%204.787-3.287%208.371-9.419%208.371H119.363V64.66c-1.917.274-3.87.69-5.811%201.238l4.537%2011.121h-5.418l-3.596-9.585c-5.144%202.084-10.085%205.216-14.217%209.585h-4.786L101.8%2048.312h4.56l5.68%2013.883a44.112%2044.112%200%200%201%207.323-1.774V48.312h9.084c1.703%200%203.156.143%204.061.393%203.453.929%205.727%203.667%205.727%207.323%200%201.917-.738%204.179-2.81%205.691%203.06%201.56%204.501%204.025%204.501%206.93Zm-15.634-8.667a62.664%2062.664%200%200%201%202.06-.036c1.703.012%203.239.131%204.608.37%201.441-.549%202.357-1.727%202.357-3.537%200-1.941-.881-3.144-2.488-3.667-.548-.18-1.358-.286-2.322-.286h-4.215v7.156Zm-16.55%203.905-3.715-9.894-6.394%2016.502c2.833-2.595%206.263-4.858%2010.109-6.608Zm27.254%204.74c0-2.775-3.131-4.347-8.513-4.418-.715%200-1.441.011-2.191.047v8.252h5.918c2.548%200%204.786-1.37%204.786-3.882Z'%20clip-rule='evenodd'/%3e%3c/g%3e%3cdefs%3e%3clinearGradient%20id='b'%20x1='51.47'%20x2='85.916'%20y1='62.946'%20y2='62.946'%20gradientUnits='userSpaceOnUse'%3e%3cstop%20stop-color='%23CD9F28'/%3e%3cstop%20offset='1'%20stop-color='%23ECD80B'/%3e%3c/linearGradient%3e%3cclipPath%20id='a'%3e%3cpath%20fill='%23fff'%20d='M51.47%2045.728h186.104V80.14H51.47z'/%3e%3c/clipPath%3e%3c/defs%3e%3c/svg%3e)


More from Epson


Explore Other Assets


© 2026 MaintainX. All rights reserved.