


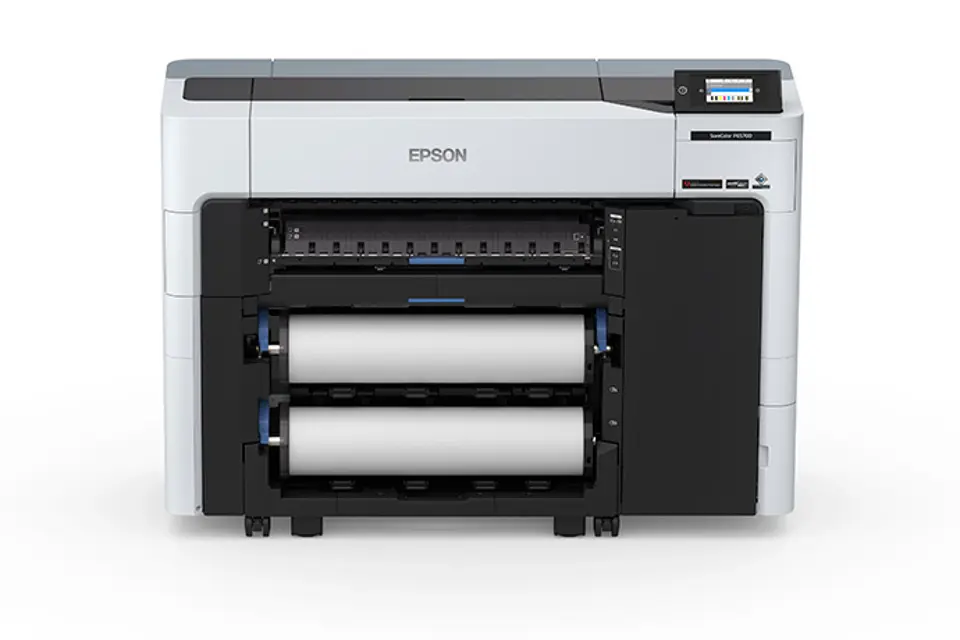
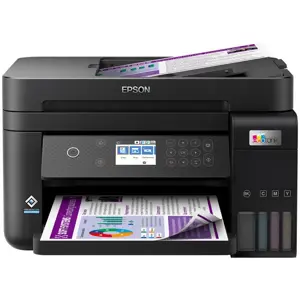
Epson Inkjet Printer SureColor T7770DL
Need answers fast?
Explore the manual using AI.
Turn manuals into instant answers
with your AI-powered assistantTurn manuals into instant answers
with your AI-powered assistant
Manual for Epson Inkjet Printer SureColor T7770DL
Complete asset maintenance, one click away
Get instant access to all the maintenance information you need. Empower technicians to perform preventive maintenance with asset packages, ready to use right out of the box.

Documents & Manuals
Find all the essential guides in one place.
 Tensioning Guide
- Belt-diagram
- C-120 pulleys
+ 13 more

Work Order Templates
Pre-built workflows to keep your asset running smoothly.
- Daily Electrical System Inspection
- Replace Roller and Pulley
- Install Engine B-120
+ 29 more

Procedures
Integrate maintenance plans directly into your work orders.
- Motion Industries
- Applied Industrial Technologies
- Electrical Brothers
+ 5 more

Parts
Access the parts list for your equipment in MaintainX.
- Drive Motor
- B2 Rollers
- Tensioning System
+ 40 more
Epson Inkjet Printer SureColor T7770DL
Create an account to install this asset package.
Maintenance Plans for Epson Inkjet Printer Model SureColor T7770DL
Integrate maintenance plans directly into your work orders in MaintainX.
Cutter Replacement
Caution: Store the replacement cutter out of the reach of children. Do not remove the protective material from the new cutter until instructed to do so. Do not drop the cutter or knock it against anything or you may chip the blade.
Remove all paper from the printer.
Select the Menu icon.
Select Maintenance > Replace Auto cutter blade > Start.
Open the maintenance cover.
Use a Phillips-head screwdriver to loosen the screw holding the cutter in place and carefully remove the cutter. Place the cutter in a plastic bag and dispose of it properly.
Warning: Keep the cutter out of the reach of children. The blade is sharp and can cause injury.
Install the new cutter in the product with the protective material still attached.
Tighten the cutter screw securely.

Print Head Wiping
Caution: Do not touch any circuit boards or any parts inside the printer besides those which need to be cleaned.
Always use new cleaning sticks, or dirt may be transferred into the printer.
Do not touch the tips of the cleaning sticks. This may reduce the cleaning effect.
Touch a metal object before cleaning to discharge any static electricity.
Do not use an organic solvent such as alcohol to wipe the caps, as it may damage the print head.
Do not move the print head by hand. Doing so could damage the printer.
If paper is loaded in the printer, remove it.
On the LCD screen, select Maintenance > Cleaning the Maintenance Parts > Wiping the Print Head > Start.
The print head moves to the cleaning position.
Roll Paper Feeder Cleaning
Warning: Ensure the printer is turned off and unplugged before starting the cleaning process.
Enter the type of roll paper used for cleaning
Select the roll paper setting
Did the paper feed forward without any ink smears?
Was the roll paper cut successfully?
Sign off on the cleaning process
Borderless Maintenance Boxes Replacement
Warning: Do not replace the borderless maintenance box while printing, otherwise ink may leak.
Warning: Do not touch the chip on the borderless maintenance box or you may prevent normal operation and printing.
Warning: Do not reuse a borderless maintenance box you have removed from the printer and exposed to air for a long period of time. The box will not absorb any more ink.
Warning: Do not tilt the borderless maintenance box until the bag is firmly sealed, otherwise ink may leak.
Warning: Dispose of the used borderless maintenance box carefully.
Check the LCD screen to determine which maintenance box needs to be replaced.
Upload a photo of the new borderless maintenance box from the package.
Lift up the paper support lock lever, then move the paper support down to position A (the lowest position).
Extend the paper output flap as shown.
Paper Feed Adjustment
Paper Feed Adjust: Adjust the paper feed if you are unable to resolve banding issues even after cleaning and aligning the print head.
Adjusting the Paper Feed Using the Product Control Panel
If your printouts are grainy or blurry, or you still see dark or light horizontal bands, you may need to adjust the paper feed using the product control panel.
1. Load roll paper or cut sheet paper in the printer.
Note: Load paper that is at least 13.3 inches wide by 21.9 inches long (338 mm × 558 mm).
2. Make sure the correct paper type is selected.
Note: If you are using commercially available paper, make sure you create the custom paper settings in advance.
3. Select Paper Setting > paper source > Print Adjustments > Paper Feed Adjust.
4. Select one of the following:
Parts for Epson Inkjet Printer SureColor T7770DL
Access the parts list for your equipment in MaintainX.
Replacement Printer Cutter Blade
C13S210117
Maintenance Box
C13S210115
Borderless Maintenance Box
C13S210116
Cleaning Stick
C13S090013
SSD Unit
C12C936671
Replacement Printer Cutter Blade
C13S210117
Maintenance Box
C13S210115
Borderless Maintenance Box
C13S210116
Cleaning Stick
C13S090013
SSD Unit
C12C936671
Replacement Printer Cutter Blade
C13S210117
Maintenance Box
C13S210115
Borderless Maintenance Box
C13S210116
Cleaning Stick
C13S090013
SSD Unit
C12C936671
Unlock efficiency
with MaintainX CoPilot
MaintainX CoPilot is your expert colleague, on call 24/7, helping your team find the answers they need to keep equipment running.
Reduce Unplanned Downtime
Ensure your team follows consistent procedures to minimize equipment failures and costly delays.
Maximize Asset Availability
Keep your assets running longer and more reliably, with standardized maintenance workflows from OEM manuals.
Lower Maintenance Costs
Turn any technician into an expert to streamline operations, maintain more assets, and reduce overall costs.
Thousands of companies manage their assets with MaintainX

'%3e%3cpath%20fill='url(%23b)'%20d='M66.008%2080.068c-5.084-.786-9.763-3.834-12.442-8.68a16.942%2016.942%200%200%201-1.87-5.18c1.096.19%202.203.476%203.298.87%206.525%202.333%2010.836%207.68%2011.014%2012.99ZM51.47%2061.576c.488-5.524%203.62-10.716%208.847-13.597a17.132%2017.132%200%200%201%2011.335-1.882c-.798%208.145-7.43%2014.848-16.038%2015.599-1.417.119-2.799.07-4.144-.12Zm28.564-11.478a17.513%2017.513%200%200%201%203.727%204.62c4.608%208.335%201.584%2018.813-6.75%2023.409a16.988%2016.988%200%200%201-4.359%201.679%2019.624%2019.624%200%200%201-3.977-12.776c.346-7.561%204.942-13.931%2011.36-16.932Z'/%3e%3cpath%20fill='%23110F0D'%20fill-rule='evenodd'%20d='M142.831%2048.324h4.977V77.03h-4.977V48.324Zm27.278%2013.002c.322%201.048.453%202.263.453%203.62v12.073h-4.787V66.208c0-.75-.047-1.572-.154-2.143-.453-2.382-1.822-3.572-4.215-3.572-2.31%200-3.882%201.274-4.43%203.476-.143.596-.226%201.405-.226%202.25v10.8h-4.787V56.623h4.477v2.989c1.536-2.5%203.906-3.43%206.371-3.43%203.488%200%206.263%201.68%207.298%205.144Zm24.636%207.323c0%203.882-2.358%206.525-5.763%207.727-1.298.453-2.632.643-4.62.643h-10.169V48.324h9.085c1.691%200%203.156.143%204.049.38%203.465.93%205.727%203.68%205.727%207.335%200%202.441-.81%204.156-2.762%205.644%202.905%201.417%204.453%203.727%204.453%206.966Zm-15.634-8.656h4.584c1.024%200%201.917-.143%202.536-.417%201.215-.548%201.905-1.608%201.905-3.167%200-1.548-.643-2.572-1.845-3.132-.691-.31-1.762-.452-2.763-.452h-4.417v7.168Zm10.716%208.465c0-1.536-.893-3.37-3.227-3.893-.428-.095-1.036-.143-1.571-.143h-5.918v8.085h5.501c.56%200%201.429-.048%201.953-.167%201.94-.453%203.262-1.846%203.262-3.882Zm47.747-11.847-8.097%2020.408h-4.429l-8.109-20.408h5.191l5.192%2014.574%205.108-14.574h5.144Zm-20.218%2010.002c0%20.69-.036%201.262-.155%201.94h-15.943c.631%202.87%202.714%204.728%205.882%204.728%202.131%200%203.607-.882%204.703-2.525h4.87c-1.762%204.144-5.204%206.692-9.657%206.692-6.084%200-10.537-4.858-10.537-10.49%200-6.108%204.524-10.776%2010.335-10.776%206.239%200%2010.442%204.954%2010.502%2010.43Zm-4.763-1.405c-.333-2.846-2.643-4.858-5.691-4.858-2.894%200-5.287%201.929-5.621%204.858h11.312Zm-72.667%203.44c0%204.787-3.287%208.371-9.419%208.371H119.363V64.66c-1.917.274-3.87.69-5.811%201.238l4.537%2011.121h-5.418l-3.596-9.585c-5.144%202.084-10.085%205.216-14.217%209.585h-4.786L101.8%2048.312h4.56l5.68%2013.883a44.112%2044.112%200%200%201%207.323-1.774V48.312h9.084c1.703%200%203.156.143%204.061.393%203.453.929%205.727%203.667%205.727%207.323%200%201.917-.738%204.179-2.81%205.691%203.06%201.56%204.501%204.025%204.501%206.93Zm-15.634-8.667a62.664%2062.664%200%200%201%202.06-.036c1.703.012%203.239.131%204.608.37%201.441-.549%202.357-1.727%202.357-3.537%200-1.941-.881-3.144-2.488-3.667-.548-.18-1.358-.286-2.322-.286h-4.215v7.156Zm-16.55%203.905-3.715-9.894-6.394%2016.502c2.833-2.595%206.263-4.858%2010.109-6.608Zm27.254%204.74c0-2.775-3.131-4.347-8.513-4.418-.715%200-1.441.011-2.191.047v8.252h5.918c2.548%200%204.786-1.37%204.786-3.882Z'%20clip-rule='evenodd'/%3e%3c/g%3e%3cdefs%3e%3clinearGradient%20id='b'%20x1='51.47'%20x2='85.916'%20y1='62.946'%20y2='62.946'%20gradientUnits='userSpaceOnUse'%3e%3cstop%20stop-color='%23CD9F28'/%3e%3cstop%20offset='1'%20stop-color='%23ECD80B'/%3e%3c/linearGradient%3e%3cclipPath%20id='a'%3e%3cpath%20fill='%23fff'%20d='M51.47%2045.728h186.104V80.14H51.47z'/%3e%3c/clipPath%3e%3c/defs%3e%3c/svg%3e)


More from Epson


Explore Other Assets


© 2026 MaintainX. All rights reserved.