


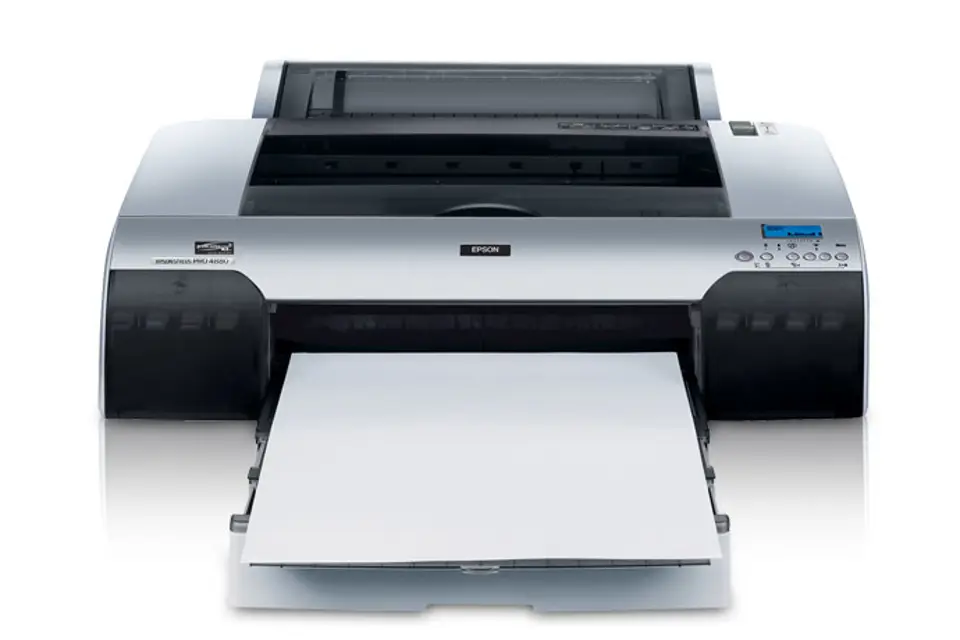
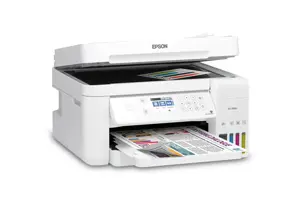
Epson Printer Pro 4880
Need answers fast?
Explore the manual using AI.
Turn manuals into instant answers
with your AI-powered assistantTurn manuals into instant answers
with your AI-powered assistant
Manual for Epson Printer Pro 4880
Complete asset maintenance, one click away
Get instant access to all the maintenance information you need. Empower technicians to perform preventive maintenance with asset packages, ready to use right out of the box.

Documents & Manuals
Find all the essential guides in one place.
 Tensioning Guide
- Belt-diagram
- C-120 pulleys
+ 13 more

Work Order Templates
Pre-built workflows to keep your asset running smoothly.
- Daily Electrical System Inspection
- Replace Roller and Pulley
- Install Engine B-120
+ 29 more

Procedures
Integrate maintenance plans directly into your work orders.
- Motion Industries
- Applied Industrial Technologies
- Electrical Brothers
+ 5 more

Parts
Access the parts list for your equipment in MaintainX.
- Drive Motor
- B2 Rollers
- Tensioning System
+ 40 more
Epson Printer Pro 4880
Create an account to install this asset package.
Maintenance Plans for Epson Printer Model Pro 4880
Integrate maintenance plans directly into your work orders in MaintainX.
Ink Cartridge Replacement
Warning: Use genuine Epson cartridges and do not refill them. The use of other products may affect your print quality and could result in printer damage.
Caution: Leave the old ink cartridge installed in the printer until you are ready to replace it with a new one.
Is the printer on?
Did you find out which cartridge needs to be replaced, as indicated by the steady or flashing B ink light?
Did you press the ink compartment cover to open it?
Did you raise the ink lever to the released position?
Did you carefully pull the expended cartridge straight out of the printer?
Warning: If ink gets on your hands, wash them thoroughly with soap and water. If ink gets into your eyes, flush them immediately with water.
Caution: Do not shake the expended ink cartridge, or ink may leak out.

Paper Cutter Blade Replacement
Warning: Be careful not to cut yourself while replacing the paper cutter.
You can obtain a new cutter blade from Epson (product code C12C815291).
Is the printer on?
Press Menu to enter the printer’s menu system.
Press to highlight CUTTER REPLACE.
Press Menu to display EXEC, then press Menu again. The print head moves to the replacement position and OPEN TOP COVER appears on the LCD.
Caution: Never move the paper cutter holder by hand; otherwise, damage to your printer may occur.
Did you open the top cover?
When REPLACE CUTTER appears on the LCD, hold down the side pin as shown and turn the latch to the right.
Maintenance Tank Replacement
Warning: Make sure the printer is not printing or performing any other operations (READY or PAPER OUT should appear on the LCD).
MNT TNK FULL or MNT TK NEAR FULL appears on the LCD?
If you are using 220 ml ink cartridges, remove the four ink cartridges from the right ink compartment. Make sure to close the ink compartment cover after you have removed the ink cartridges.
Upload a photo of the removed ink cartridges
Remove the new maintenance tank from its package.
Warning: If ink gets on your hands, wash them thoroughly with soap and water. If ink gets into your eyes, flush them immediately with water.
Place your hand on the handle under the right ink compartment, then gently pull out the maintenance tank.
Upload a photo of the removed maintenance tank
Place the used maintenance tank in the plastic bag included with the new tank. Note: Do not tilt the used maintenance tank until after it is sealed in the plastic bag.
Black Ink Cartridge Replacement
Caution: Do not turn off the printer, open the top cover, remove the rear cover, move the paper lever to the released position, remove the ink cartridges, remove the maintenance tank, or unplug the power cord during the procedure.
Note: If an electrical power failure occurs during this operation, turn the printer on again. You can continue your procedure at the breakpoint.
Note: The Black Ink Conversion Kit is required when changing the black ink. Also, the black ink cartridge that you want to change to (either Matte or Photo) is required.
Note: If MNT TK NEAR FULL or MNT TNK FULL appears on the LCD, you need to replace the maintenance tank.
Note: The black ink installed in your printer before the change cannot be expended.
Choose the type of black ink
READY appears on the LCD
Press Menu to enter the printer’s menu system
Select MAINTENANCE, then press Menu
Printer Cleaning
Warning: Do not touch the gears inside the printer.
Caution: Never use alcohol or paint thinner to clean the printer; these chemicals can damage the components as well as the case.
Do not let water get on the printer mechanism or electronic components.
Do not use a hard or abrasive brush to clean the printer.
Do not spray the inside of the printer with lubricants; unsuitable oils can damage the mechanism. Contact your dealer or a qualified service person if lubrication is needed.
Is the printer turned off and all the lights are off?
Did you unplug the power cord and let the printer sit for a minute?
Caution: Do not touch the following parts; otherwise, printouts may be soiled.
Did you open the top cover and use a soft, clean cloth to carefully remove any dust or dirt inside the printer?
Unlock efficiency
with MaintainX CoPilot
MaintainX CoPilot is your expert colleague, on call 24/7, helping your team find the answers they need to keep equipment running.
Reduce Unplanned Downtime
Ensure your team follows consistent procedures to minimize equipment failures and costly delays.
Maximize Asset Availability
Keep your assets running longer and more reliably, with standardized maintenance workflows from OEM manuals.
Lower Maintenance Costs
Turn any technician into an expert to streamline operations, maintain more assets, and reduce overall costs.
Thousands of companies manage their assets with MaintainX

'%3e%3cpath%20fill='url(%23b)'%20d='M66.008%2080.068c-5.084-.786-9.763-3.834-12.442-8.68a16.942%2016.942%200%200%201-1.87-5.18c1.096.19%202.203.476%203.298.87%206.525%202.333%2010.836%207.68%2011.014%2012.99ZM51.47%2061.576c.488-5.524%203.62-10.716%208.847-13.597a17.132%2017.132%200%200%201%2011.335-1.882c-.798%208.145-7.43%2014.848-16.038%2015.599-1.417.119-2.799.07-4.144-.12Zm28.564-11.478a17.513%2017.513%200%200%201%203.727%204.62c4.608%208.335%201.584%2018.813-6.75%2023.409a16.988%2016.988%200%200%201-4.359%201.679%2019.624%2019.624%200%200%201-3.977-12.776c.346-7.561%204.942-13.931%2011.36-16.932Z'/%3e%3cpath%20fill='%23110F0D'%20fill-rule='evenodd'%20d='M142.831%2048.324h4.977V77.03h-4.977V48.324Zm27.278%2013.002c.322%201.048.453%202.263.453%203.62v12.073h-4.787V66.208c0-.75-.047-1.572-.154-2.143-.453-2.382-1.822-3.572-4.215-3.572-2.31%200-3.882%201.274-4.43%203.476-.143.596-.226%201.405-.226%202.25v10.8h-4.787V56.623h4.477v2.989c1.536-2.5%203.906-3.43%206.371-3.43%203.488%200%206.263%201.68%207.298%205.144Zm24.636%207.323c0%203.882-2.358%206.525-5.763%207.727-1.298.453-2.632.643-4.62.643h-10.169V48.324h9.085c1.691%200%203.156.143%204.049.38%203.465.93%205.727%203.68%205.727%207.335%200%202.441-.81%204.156-2.762%205.644%202.905%201.417%204.453%203.727%204.453%206.966Zm-15.634-8.656h4.584c1.024%200%201.917-.143%202.536-.417%201.215-.548%201.905-1.608%201.905-3.167%200-1.548-.643-2.572-1.845-3.132-.691-.31-1.762-.452-2.763-.452h-4.417v7.168Zm10.716%208.465c0-1.536-.893-3.37-3.227-3.893-.428-.095-1.036-.143-1.571-.143h-5.918v8.085h5.501c.56%200%201.429-.048%201.953-.167%201.94-.453%203.262-1.846%203.262-3.882Zm47.747-11.847-8.097%2020.408h-4.429l-8.109-20.408h5.191l5.192%2014.574%205.108-14.574h5.144Zm-20.218%2010.002c0%20.69-.036%201.262-.155%201.94h-15.943c.631%202.87%202.714%204.728%205.882%204.728%202.131%200%203.607-.882%204.703-2.525h4.87c-1.762%204.144-5.204%206.692-9.657%206.692-6.084%200-10.537-4.858-10.537-10.49%200-6.108%204.524-10.776%2010.335-10.776%206.239%200%2010.442%204.954%2010.502%2010.43Zm-4.763-1.405c-.333-2.846-2.643-4.858-5.691-4.858-2.894%200-5.287%201.929-5.621%204.858h11.312Zm-72.667%203.44c0%204.787-3.287%208.371-9.419%208.371H119.363V64.66c-1.917.274-3.87.69-5.811%201.238l4.537%2011.121h-5.418l-3.596-9.585c-5.144%202.084-10.085%205.216-14.217%209.585h-4.786L101.8%2048.312h4.56l5.68%2013.883a44.112%2044.112%200%200%201%207.323-1.774V48.312h9.084c1.703%200%203.156.143%204.061.393%203.453.929%205.727%203.667%205.727%207.323%200%201.917-.738%204.179-2.81%205.691%203.06%201.56%204.501%204.025%204.501%206.93Zm-15.634-8.667a62.664%2062.664%200%200%201%202.06-.036c1.703.012%203.239.131%204.608.37%201.441-.549%202.357-1.727%202.357-3.537%200-1.941-.881-3.144-2.488-3.667-.548-.18-1.358-.286-2.322-.286h-4.215v7.156Zm-16.55%203.905-3.715-9.894-6.394%2016.502c2.833-2.595%206.263-4.858%2010.109-6.608Zm27.254%204.74c0-2.775-3.131-4.347-8.513-4.418-.715%200-1.441.011-2.191.047v8.252h5.918c2.548%200%204.786-1.37%204.786-3.882Z'%20clip-rule='evenodd'/%3e%3c/g%3e%3cdefs%3e%3clinearGradient%20id='b'%20x1='51.47'%20x2='85.916'%20y1='62.946'%20y2='62.946'%20gradientUnits='userSpaceOnUse'%3e%3cstop%20stop-color='%23CD9F28'/%3e%3cstop%20offset='1'%20stop-color='%23ECD80B'/%3e%3c/linearGradient%3e%3cclipPath%20id='a'%3e%3cpath%20fill='%23fff'%20d='M51.47%2045.728h186.104V80.14H51.47z'/%3e%3c/clipPath%3e%3c/defs%3e%3c/svg%3e)


More from Epson


Explore Other Assets


© 2026 MaintainX. All rights reserved.