


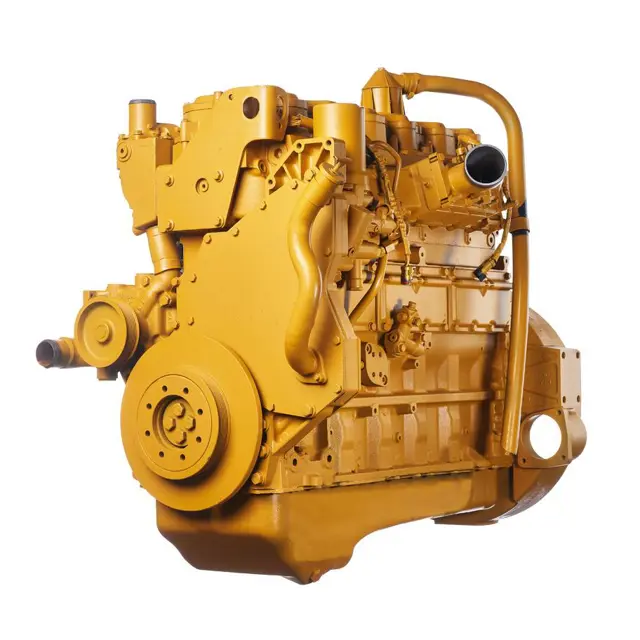
Caterpillar Truck Engine 3126
Need answers fast?
Explore the manual using AI.
Turn manuals into instant answers
with your AI-powered assistantTurn manuals into instant answers
with your AI-powered assistant
Complete asset maintenance, one click away
Get instant access to all the maintenance information you need. Empower technicians to perform preventive maintenance with asset packages, ready to use right out of the box.

Documents & Manuals
Find all the essential guides in one place.
 Tensioning Guide
- Belt-diagram
- C-120 pulleys
+ 13 more

Work Order Templates
Pre-built workflows to keep your asset running smoothly.
- Daily Electrical System Inspection
- Replace Roller and Pulley
- Install Engine B-120
+ 29 more

Procedures
Integrate maintenance plans directly into your work orders.
- Motion Industries
- Applied Industrial Technologies
- Electrical Brothers
+ 5 more

Parts
Access the parts list for your equipment in MaintainX.
- Drive Motor
- B2 Rollers
- Tensioning System
+ 40 more
Caterpillar Truck Engine 3126
Create an account to install this asset package.
Maintenance Plans for Caterpillar Truck Engine Model 3126
Integrate maintenance plans directly into your work orders in MaintainX.
2000 Hourly / 2 Yearly Alternator Inspection
Warning: This inspection requires trained personnel with PPE!
Alternator has loose connections?
Battery charging properly?
Ammeter reading during engine operation
Alternator and battery charger operating properly?
Batteries properly charged?
Battery too cold to crank the engine?
Engine not run for long periods or run for short periods?
Battery with low charge?

Cooling System Coolant Extender Level Adjustment
Warning: Check the cooling system only when the engine is stopped and cool.
Engine stopped and cool?
Loosen the cooling system filler cap slowly in order to relieve pressure.
Cooling system filler cap loosened and pressure relieved?
It may be necessary to drain enough coolant from the cooling system in order to add the Extender.
Coolant drained from the cooling system?
Add Extender according to the requirements for your engine’s cooling system capacity.
Extender added according to the requirements?
Clean the cooling system filler cap. Inspect the gaskets on the cooling system filler cap.
250 Hourly / 6 Monthly Radiator Cleaning
Warning: Personal injury can result from air pressure. Personal injury can result without following proper procedure. When using pressure air, wear a protective face shield and protective clothing.
Maximum air pressure at the nozzle must be less than 205 kPa (30 psi) for cleaning purposes.
Inspect the radiator for damaged fins, corrosion, dirt, grease, insects, leaves, oil, and other debris.
Clean the radiator, if necessary.
Pressurized air is the preferred method for removing loose debris.
Direct the air in the opposite direction of the fan’s air flow.
Hold the nozzle approximately 6 mm (0.25 inch) away from the fins.
Slowly move the air nozzle in a direction that is parallel with the tubes.
Pressurized water may also be used for cleaning. The maximum water pressure for cleaning purposes must be less than 275 kPa (40 psi).
Hoses and the Clamps Replacement
Warning: Pressurized System: Hot coolant can cause serious burns. To open the cooling system filler cap, stop the engine and wait until the cooling system components are cool. Loosen the cooling system pressure cap slowly in order to relieve the pressure.
Engine stopped and cooled down
Cooling system filler cap loosened and removed
Coolant drained to a level below the hose being replaced
Hose clamps removed
Old hose disconnected
New hose installed
Hose clamps installed with a torque wrench
Cooling system refilled
Exhaust Particulate Filter Cleaning
Warning: Wear goggles, gloves, protective clothing and a dust respirator certified by the National Institute for Occupational Safety and Health (NIOSH) and by the Mine Safety and Health Administration (MSHA) when cleaning the diesel particulate filter. Failure to do so could result in personal injury.
Note: If the red warning light has been activated Do Not perform a back pressure test. The catalyst section could begin to regenerate. This will damage the DPF.
Caterpillar recommends recording when the DPF is cleaned. Record the cleaning in the Operation and Maintenance Manual, “Maintenance Log”.
Perform a back pressure test prior to cleaning the DPF and record the results.
After the cleaning of the DPF run the engine on high idle for 5 to 15 minutes. Perform another back pressure test and record the results.
Collection of Ash: A filter bag is required to collect the ash from the DPF. The filter bags are available from your Caterpillar Dealer. The filter bag will trap particles as small as 5 microns. A filter bag can be used 5 to 10 times.
Note: Disposal of the filter bags must be in accordance with the following regulations: Federal, State, and Local Laws.
Follow the recommended method for cleaning the DPF.
The DPF does not have labels on the inlet or outlet ends of the catalyst section or the filter section. Mark the outside of both the filter section and the catalyst section with a marker. This will identify the orientation of the sections. This is important because you will reinstall the sections in the opposite direction.
Parts for Caterpillar Truck Engine 3126
Access the parts list for your equipment in MaintainX.
Liquid Cleaner, Hydrosolv 4165, 19 L (5 US gallon)
1U-5490
Liquid Cleaner, Hydrosolv 100, 19 L (5 US gallon)
174-6854
Fixture Can
FT2931
Engine Pressure Group
1U-5470
Digital Pressure Indicator
198-4240
Liquid Cleaner, Hydrosolv 4165, 19 L (5 US gallon)
1U-5490
Liquid Cleaner, Hydrosolv 100, 19 L (5 US gallon)
174-6854
Fixture Can
FT2931
Engine Pressure Group
1U-5470
Digital Pressure Indicator
198-4240
Liquid Cleaner, Hydrosolv 4165, 19 L (5 US gallon)
1U-5490
Liquid Cleaner, Hydrosolv 100, 19 L (5 US gallon)
174-6854
Fixture Can
FT2931
Engine Pressure Group
1U-5470
Digital Pressure Indicator
198-4240
Unlock efficiency
with MaintainX CoPilot
MaintainX CoPilot is your expert colleague, on call 24/7, helping your team find the answers they need to keep equipment running.
Reduce Unplanned Downtime
Ensure your team follows consistent procedures to minimize equipment failures and costly delays.
Maximize Asset Availability
Keep your assets running longer and more reliably, with standardized maintenance workflows from OEM manuals.
Lower Maintenance Costs
Turn any technician into an expert to streamline operations, maintain more assets, and reduce overall costs.
Thousands of companies manage their assets with MaintainX

'%3e%3cpath%20fill='url(%23b)'%20d='M66.008%2080.068c-5.084-.786-9.763-3.834-12.442-8.68a16.942%2016.942%200%200%201-1.87-5.18c1.096.19%202.203.476%203.298.87%206.525%202.333%2010.836%207.68%2011.014%2012.99ZM51.47%2061.576c.488-5.524%203.62-10.716%208.847-13.597a17.132%2017.132%200%200%201%2011.335-1.882c-.798%208.145-7.43%2014.848-16.038%2015.599-1.417.119-2.799.07-4.144-.12Zm28.564-11.478a17.513%2017.513%200%200%201%203.727%204.62c4.608%208.335%201.584%2018.813-6.75%2023.409a16.988%2016.988%200%200%201-4.359%201.679%2019.624%2019.624%200%200%201-3.977-12.776c.346-7.561%204.942-13.931%2011.36-16.932Z'/%3e%3cpath%20fill='%23110F0D'%20fill-rule='evenodd'%20d='M142.831%2048.324h4.977V77.03h-4.977V48.324Zm27.278%2013.002c.322%201.048.453%202.263.453%203.62v12.073h-4.787V66.208c0-.75-.047-1.572-.154-2.143-.453-2.382-1.822-3.572-4.215-3.572-2.31%200-3.882%201.274-4.43%203.476-.143.596-.226%201.405-.226%202.25v10.8h-4.787V56.623h4.477v2.989c1.536-2.5%203.906-3.43%206.371-3.43%203.488%200%206.263%201.68%207.298%205.144Zm24.636%207.323c0%203.882-2.358%206.525-5.763%207.727-1.298.453-2.632.643-4.62.643h-10.169V48.324h9.085c1.691%200%203.156.143%204.049.38%203.465.93%205.727%203.68%205.727%207.335%200%202.441-.81%204.156-2.762%205.644%202.905%201.417%204.453%203.727%204.453%206.966Zm-15.634-8.656h4.584c1.024%200%201.917-.143%202.536-.417%201.215-.548%201.905-1.608%201.905-3.167%200-1.548-.643-2.572-1.845-3.132-.691-.31-1.762-.452-2.763-.452h-4.417v7.168Zm10.716%208.465c0-1.536-.893-3.37-3.227-3.893-.428-.095-1.036-.143-1.571-.143h-5.918v8.085h5.501c.56%200%201.429-.048%201.953-.167%201.94-.453%203.262-1.846%203.262-3.882Zm47.747-11.847-8.097%2020.408h-4.429l-8.109-20.408h5.191l5.192%2014.574%205.108-14.574h5.144Zm-20.218%2010.002c0%20.69-.036%201.262-.155%201.94h-15.943c.631%202.87%202.714%204.728%205.882%204.728%202.131%200%203.607-.882%204.703-2.525h4.87c-1.762%204.144-5.204%206.692-9.657%206.692-6.084%200-10.537-4.858-10.537-10.49%200-6.108%204.524-10.776%2010.335-10.776%206.239%200%2010.442%204.954%2010.502%2010.43Zm-4.763-1.405c-.333-2.846-2.643-4.858-5.691-4.858-2.894%200-5.287%201.929-5.621%204.858h11.312Zm-72.667%203.44c0%204.787-3.287%208.371-9.419%208.371H119.363V64.66c-1.917.274-3.87.69-5.811%201.238l4.537%2011.121h-5.418l-3.596-9.585c-5.144%202.084-10.085%205.216-14.217%209.585h-4.786L101.8%2048.312h4.56l5.68%2013.883a44.112%2044.112%200%200%201%207.323-1.774V48.312h9.084c1.703%200%203.156.143%204.061.393%203.453.929%205.727%203.667%205.727%207.323%200%201.917-.738%204.179-2.81%205.691%203.06%201.56%204.501%204.025%204.501%206.93Zm-15.634-8.667a62.664%2062.664%200%200%201%202.06-.036c1.703.012%203.239.131%204.608.37%201.441-.549%202.357-1.727%202.357-3.537%200-1.941-.881-3.144-2.488-3.667-.548-.18-1.358-.286-2.322-.286h-4.215v7.156Zm-16.55%203.905-3.715-9.894-6.394%2016.502c2.833-2.595%206.263-4.858%2010.109-6.608Zm27.254%204.74c0-2.775-3.131-4.347-8.513-4.418-.715%200-1.441.011-2.191.047v8.252h5.918c2.548%200%204.786-1.37%204.786-3.882Z'%20clip-rule='evenodd'/%3e%3c/g%3e%3cdefs%3e%3clinearGradient%20id='b'%20x1='51.47'%20x2='85.916'%20y1='62.946'%20y2='62.946'%20gradientUnits='userSpaceOnUse'%3e%3cstop%20stop-color='%23CD9F28'/%3e%3cstop%20offset='1'%20stop-color='%23ECD80B'/%3e%3c/linearGradient%3e%3cclipPath%20id='a'%3e%3cpath%20fill='%23fff'%20d='M51.47%2045.728h186.104V80.14H51.47z'/%3e%3c/clipPath%3e%3c/defs%3e%3c/svg%3e)


More from Caterpillar


Explore Other Assets


© 2026 MaintainX. All rights reserved.