


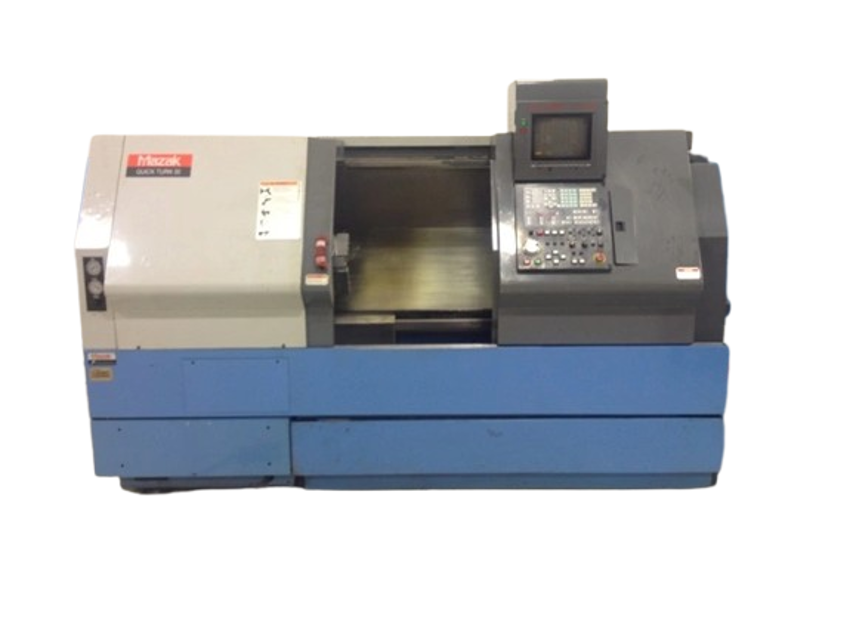
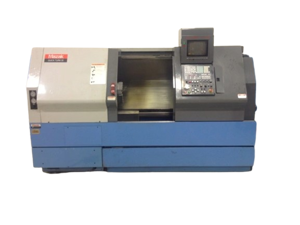
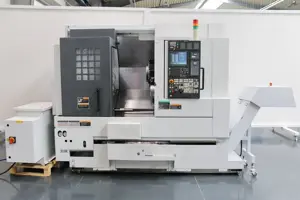
Mazak Computer Numerical Control Machine QTN 30HP
Need answers fast?
Explore the manual using AI.
Turn manuals into instant answers
with your AI-powered assistantTurn manuals into instant answers
with your AI-powered assistant
Manual for Mazak Computer Numerical Control Machine QTN 30HP
Complete asset maintenance, one click away
Get instant access to all the maintenance information you need. Empower technicians to perform preventive maintenance with asset packages, ready to use right out of the box.

Documents & Manuals
Find all the essential guides in one place.
 Tensioning Guide
- Belt-diagram
- C-120 pulleys
+ 13 more

Work Order Templates
Pre-built workflows to keep your asset running smoothly.
- Daily Electrical System Inspection
- Replace Roller and Pulley
- Install Engine B-120
+ 29 more

Procedures
Integrate maintenance plans directly into your work orders.
- Motion Industries
- Applied Industrial Technologies
- Electrical Brothers
+ 5 more

Parts
Access the parts list for your equipment in MaintainX.
- Drive Motor
- B2 Rollers
- Tensioning System
+ 40 more
Mazak Computer Numerical Control Machine QTN 30HP
Create an account to install this asset package.
Maintenance Plans for Mazak Computer Numerical Control Machine Model QTN 30HP
Integrate maintenance plans directly into your work orders in MaintainX.
Tailstock Lubrication
Warning: This procedure requires trained personnel with PPE!
Is the lubricating pump unit mounted at the left front of the machine?
Enter the interval time for lubricating oil supply
Enter the supply volume of the lubricating oil
Enter the pressure of the lubricating oil
Is the SLIDEWAY LUBRICATION ALARM displayed on the CRT screen?
Sign off on the tailstock lubrication

Coolant Joint Section Cleaning
1. Cleaning the coolant joint section.
Section (E) may become clogged with chips which are contained in the coolant. The coolant will then leak from section (E) during clamping and thus the amount of injection onto the workpiece will decrease.
In that case, after unclamping the turret, clean section (E) using an air gun. If the situation does not improve, replace the coolant bushing. Also, clean section (E) at fixed periods (about once a month) using an air gun.
2. Replacing the coolant bushing. Use the following procedure to replace the coolant bushing of the turret:
[1] Remove set bolts A and B.
[2] Remove C and D using the pull-out jig contained in the tool box. (Refer to Figure 5-15)
(a) Insert the bolt into the hole of the block, and then screw the bolt into the threaded section of the end of C.
(b) Tap the nut section of the bolt using the block to remove C.
(c) Then, remove D using a similar method to that described at sub-steps (a) and (b) above.
Air Filter Cleaning
Warning: Chips, dust, and foreign matter inside the electrical control cabinet will cause problems. Always keep the electrical control cabinet clean. Do not use air gun to clean.
Caution: Put the filter in place after it has dried naturally.
Tool to be used
Is the air filter contaminated?
If the air filter is contaminated, remove the filter from the cabinet and wash it with water.
Remove the bolts.
Take out the filter.
Wash it with water.
Sign off on the air filter cleaning
Tail Spindle Alignment Adjustment
1. Vertical direction:
Adjust the total thickness of the shims if the tailstock requires readjustment for vertical alignment. The tailstock is preadjusted by gauge grinding of the shims prior to shipping.
2. Horizontal direction:
[1] Set plate ” on the slideway and press the plate against surface G of the bed (that is, set the tailstock base to its reference position).
[2] Tighten hex socket head bolts ‘ (to move the base of the tailstock to the rear).
[3] Hand-tighten hex socket head bolts “ (to set the tailstock base on the bed).
[4] Measure the degree of parallelism between the carriage (Z-axis) and the sliding surface of the slideway. If the parallelism is not good enough, laterally move the tailstock base using hex socket head bolts ‘ (the maximum allowable amount of parallelism is 10 microns).
[5] After checking for accuracy, if no abnormalities are present, securely tighten hex socket head bolts “.
[6] Secure the rear end of the tailstock base using special bolt ’.
1 Weekly Machine Inspection
1. Headstock:
- Grease the chuck unit.
2. TOOL EYE:
- Check for sounds of reaction during sensor contact.
Parts for Mazak Computer Numerical Control Machine QTN 30HP
Access the parts list for your equipment in MaintainX.
Pump PAVC16102L2
G09USA00020
Motor (Enclosed Fan Type) VM3561 TEFC 3-18-56C-440V-60
G70USA00020
Filter - Assembly 12AT10B015MML1
G30USA00020
Filter - Element 928763-10B
G30USA0002A
Oil Level Gauge LG-3
G29USA00010
Pump PAVC16102L2
G09USA00020
Motor (Enclosed Fan Type) VM3561 TEFC 3-18-56C-440V-60
G70USA00020
Filter - Assembly 12AT10B015MML1
G30USA00020
Filter - Element 928763-10B
G30USA0002A
Oil Level Gauge LG-3
G29USA00010
Pump PAVC16102L2
G09USA00020
Motor (Enclosed Fan Type) VM3561 TEFC 3-18-56C-440V-60
G70USA00020
Filter - Assembly 12AT10B015MML1
G30USA00020
Filter - Element 928763-10B
G30USA0002A
Oil Level Gauge LG-3
G29USA00010
Unlock efficiency
with MaintainX CoPilot
MaintainX CoPilot is your expert colleague, on call 24/7, helping your team find the answers they need to keep equipment running.
Reduce Unplanned Downtime
Ensure your team follows consistent procedures to minimize equipment failures and costly delays.
Maximize Asset Availability
Keep your assets running longer and more reliably, with standardized maintenance workflows from OEM manuals.
Lower Maintenance Costs
Turn any technician into an expert to streamline operations, maintain more assets, and reduce overall costs.
Thousands of companies manage their assets with MaintainX

'%3e%3cpath%20fill='url(%23b)'%20d='M66.008%2080.068c-5.084-.786-9.763-3.834-12.442-8.68a16.942%2016.942%200%200%201-1.87-5.18c1.096.19%202.203.476%203.298.87%206.525%202.333%2010.836%207.68%2011.014%2012.99ZM51.47%2061.576c.488-5.524%203.62-10.716%208.847-13.597a17.132%2017.132%200%200%201%2011.335-1.882c-.798%208.145-7.43%2014.848-16.038%2015.599-1.417.119-2.799.07-4.144-.12Zm28.564-11.478a17.513%2017.513%200%200%201%203.727%204.62c4.608%208.335%201.584%2018.813-6.75%2023.409a16.988%2016.988%200%200%201-4.359%201.679%2019.624%2019.624%200%200%201-3.977-12.776c.346-7.561%204.942-13.931%2011.36-16.932Z'/%3e%3cpath%20fill='%23110F0D'%20fill-rule='evenodd'%20d='M142.831%2048.324h4.977V77.03h-4.977V48.324Zm27.278%2013.002c.322%201.048.453%202.263.453%203.62v12.073h-4.787V66.208c0-.75-.047-1.572-.154-2.143-.453-2.382-1.822-3.572-4.215-3.572-2.31%200-3.882%201.274-4.43%203.476-.143.596-.226%201.405-.226%202.25v10.8h-4.787V56.623h4.477v2.989c1.536-2.5%203.906-3.43%206.371-3.43%203.488%200%206.263%201.68%207.298%205.144Zm24.636%207.323c0%203.882-2.358%206.525-5.763%207.727-1.298.453-2.632.643-4.62.643h-10.169V48.324h9.085c1.691%200%203.156.143%204.049.38%203.465.93%205.727%203.68%205.727%207.335%200%202.441-.81%204.156-2.762%205.644%202.905%201.417%204.453%203.727%204.453%206.966Zm-15.634-8.656h4.584c1.024%200%201.917-.143%202.536-.417%201.215-.548%201.905-1.608%201.905-3.167%200-1.548-.643-2.572-1.845-3.132-.691-.31-1.762-.452-2.763-.452h-4.417v7.168Zm10.716%208.465c0-1.536-.893-3.37-3.227-3.893-.428-.095-1.036-.143-1.571-.143h-5.918v8.085h5.501c.56%200%201.429-.048%201.953-.167%201.94-.453%203.262-1.846%203.262-3.882Zm47.747-11.847-8.097%2020.408h-4.429l-8.109-20.408h5.191l5.192%2014.574%205.108-14.574h5.144Zm-20.218%2010.002c0%20.69-.036%201.262-.155%201.94h-15.943c.631%202.87%202.714%204.728%205.882%204.728%202.131%200%203.607-.882%204.703-2.525h4.87c-1.762%204.144-5.204%206.692-9.657%206.692-6.084%200-10.537-4.858-10.537-10.49%200-6.108%204.524-10.776%2010.335-10.776%206.239%200%2010.442%204.954%2010.502%2010.43Zm-4.763-1.405c-.333-2.846-2.643-4.858-5.691-4.858-2.894%200-5.287%201.929-5.621%204.858h11.312Zm-72.667%203.44c0%204.787-3.287%208.371-9.419%208.371H119.363V64.66c-1.917.274-3.87.69-5.811%201.238l4.537%2011.121h-5.418l-3.596-9.585c-5.144%202.084-10.085%205.216-14.217%209.585h-4.786L101.8%2048.312h4.56l5.68%2013.883a44.112%2044.112%200%200%201%207.323-1.774V48.312h9.084c1.703%200%203.156.143%204.061.393%203.453.929%205.727%203.667%205.727%207.323%200%201.917-.738%204.179-2.81%205.691%203.06%201.56%204.501%204.025%204.501%206.93Zm-15.634-8.667a62.664%2062.664%200%200%201%202.06-.036c1.703.012%203.239.131%204.608.37%201.441-.549%202.357-1.727%202.357-3.537%200-1.941-.881-3.144-2.488-3.667-.548-.18-1.358-.286-2.322-.286h-4.215v7.156Zm-16.55%203.905-3.715-9.894-6.394%2016.502c2.833-2.595%206.263-4.858%2010.109-6.608Zm27.254%204.74c0-2.775-3.131-4.347-8.513-4.418-.715%200-1.441.011-2.191.047v8.252h5.918c2.548%200%204.786-1.37%204.786-3.882Z'%20clip-rule='evenodd'/%3e%3c/g%3e%3cdefs%3e%3clinearGradient%20id='b'%20x1='51.47'%20x2='85.916'%20y1='62.946'%20y2='62.946'%20gradientUnits='userSpaceOnUse'%3e%3cstop%20stop-color='%23CD9F28'/%3e%3cstop%20offset='1'%20stop-color='%23ECD80B'/%3e%3c/linearGradient%3e%3cclipPath%20id='a'%3e%3cpath%20fill='%23fff'%20d='M51.47%2045.728h186.104V80.14H51.47z'/%3e%3c/clipPath%3e%3c/defs%3e%3c/svg%3e)


More from Mazak


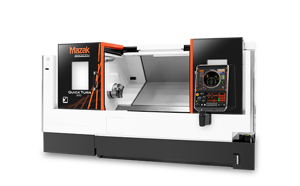


Explore Other Assets


© 2026 MaintainX. All rights reserved.