


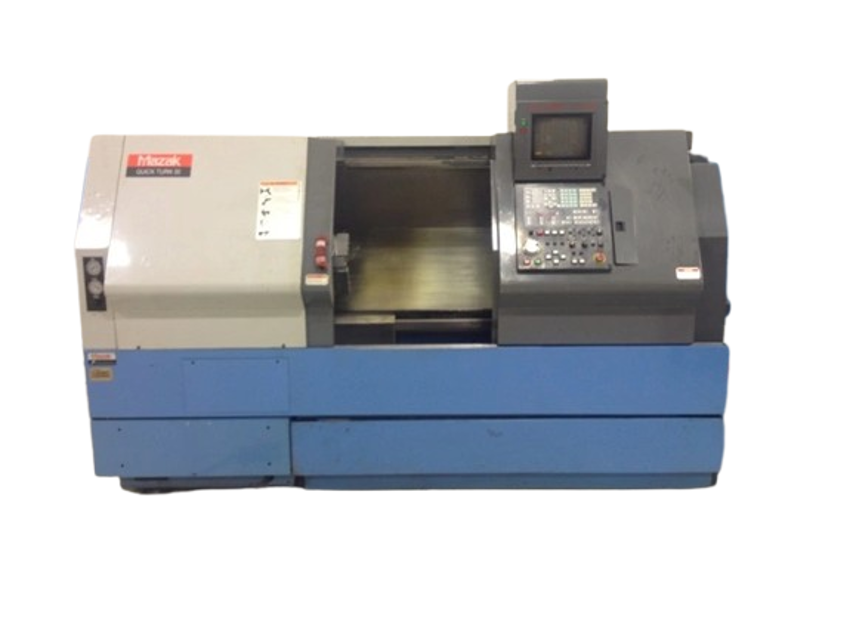
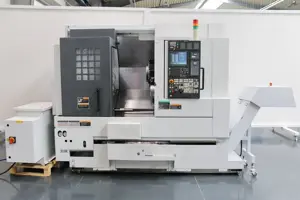
Mazak Computer Numerical Control Machine QTN 20HP
Need answers fast?
Explore the manual using AI.
Turn manuals into instant answers
with your AI-powered assistantTurn manuals into instant answers
with your AI-powered assistant
Manual for Mazak Computer Numerical Control Machine QTN 20HP
Complete asset maintenance, one click away
Get instant access to all the maintenance information you need. Empower technicians to perform preventive maintenance with asset packages, ready to use right out of the box.

Documents & Manuals
Find all the essential guides in one place.
 Tensioning Guide
- Belt-diagram
- C-120 pulleys
+ 13 more

Work Order Templates
Pre-built workflows to keep your asset running smoothly.
- Daily Electrical System Inspection
- Replace Roller and Pulley
- Install Engine B-120
+ 29 more

Procedures
Integrate maintenance plans directly into your work orders.
- Motion Industries
- Applied Industrial Technologies
- Electrical Brothers
+ 5 more

Parts
Access the parts list for your equipment in MaintainX.
- Drive Motor
- B2 Rollers
- Tensioning System
+ 40 more
Mazak Computer Numerical Control Machine QTN 20HP
Create an account to install this asset package.
Maintenance Plans for Mazak Computer Numerical Control Machine Model QTN 20HP
Integrate maintenance plans directly into your work orders in MaintainX.
Electrical Control Cabinet Check
Warning: Only authorized personnel can carry out electric maintenance. Always turn the main circuit breaker to the 'OFF' position, and use an approved lock-out device when completing maintenance or repairs.
All terminal screws of electric parts are tightened securely
Soldered portions have proper strength
The cap of the cartridge fuse is tightened securely
The spark extinguisher case is not discolored
Danger: High voltages are applied to terminals inside the electrical control cabinet, transformer, motor and relay box. Never touch these terminals.
After the power supply has been turned off, the electric components inside the electric control cabinet are still alive with remaining voltage. Before touching these components, make sure that no voltage is applied using a multimeter or other proper instrument.
Before attempting any repair or service work in the electrical control cabinet, confirm the high voltage areas by referring to the electric circuit diagram.
Sign off on the electrical control cabinet check

Pressure Adjustment
Tools to be used: Wrench, Allen wrench
Loosen the locknut of the pressure adjusting screw
Adjust pressure to the specified value 60 kgf/cm2 (854 PSI) while reading the indication of the pressure gauge. Pressure increases when the pressure adjusting screw is turned clockwise
Tighten the locknut securely
Sign off on the pressure adjustment
Strainer Cleaning
1. Cleaning the strainer.
When changing the hydraulic oil, check and clean the strainer at the same time.
A. Disconnect the suction piping. B. Remove the bolts from the suction port cover, and remove the cover. C. Remove the strainer. 2. Cleaning the micro-separator.
When changing the hydraulic oil, check and clean the micro-separator at the bottom of the reserve tank.
At the same time, check and clean the inside of the reserve tank.
The micro-separator is magnetic and sticks to the reserve tank bottom plate. Metallic particles contained in the hydraulic oil are attracted to this magnet so that the hydraulic oil circulating in the hydraulic system is kept as free of metallic particles as possible.
3. Cleaning the oil filler port filter,
Remove the oil filler port filter and clean with an air gun.
1 Yearly Filter Element Replacement
1. Replacing the filter element.
Replace the filter element at least once a year.
Tool to be used: Allen wrench
A. Remove the filter case.
B. Replace the hex socket head screw.
C. Pull out the baffle. The filter element can be removed.
D. Replacing the filter element.
E. Fix the baffle.
F. Tighten the hex socket head screw.
Coolant Cleaning
1. Cleaning the filter.
A. The filter separates the pump chamber from the chip pan. It can be removed easily for cleaning. Clean the filter occasionally.
B. Clean the filter using an air gun.
C. Remove chips from the chip pan every day after completing the day's work.
2. Cleaning the chip pan.
A. After the coolant is drained, remove the separator and clean the inside of the chip pan.
B. Clean the inside of the chip pan with a rag.
Parts for Mazak Computer Numerical Control Machine QTN 20HP
Access the parts list for your equipment in MaintainX.
Pump PAVC16102L2
G09USA00020
Motor (Enclosed Fan Type) VM3561 TEFC 3-18-56C-440V-60
G70USA00020
Heat Exchanger 60462
G49USA00100
Filter - Assembly 12AT10B015MML1
G30USA00020
Filter - Element 928763-10B
G30USA0002A
Pump PAVC16102L2
G09USA00020
Motor (Enclosed Fan Type) VM3561 TEFC 3-18-56C-440V-60
G70USA00020
Heat Exchanger 60462
G49USA00100
Filter - Assembly 12AT10B015MML1
G30USA00020
Filter - Element 928763-10B
G30USA0002A
Pump PAVC16102L2
G09USA00020
Motor (Enclosed Fan Type) VM3561 TEFC 3-18-56C-440V-60
G70USA00020
Heat Exchanger 60462
G49USA00100
Filter - Assembly 12AT10B015MML1
G30USA00020
Filter - Element 928763-10B
G30USA0002A
Unlock efficiency
with MaintainX CoPilot
MaintainX CoPilot is your expert colleague, on call 24/7, helping your team find the answers they need to keep equipment running.
Reduce Unplanned Downtime
Ensure your team follows consistent procedures to minimize equipment failures and costly delays.
Maximize Asset Availability
Keep your assets running longer and more reliably, with standardized maintenance workflows from OEM manuals.
Lower Maintenance Costs
Turn any technician into an expert to streamline operations, maintain more assets, and reduce overall costs.
Thousands of companies manage their assets with MaintainX

'%3e%3cpath%20fill='url(%23b)'%20d='M66.008%2080.068c-5.084-.786-9.763-3.834-12.442-8.68a16.942%2016.942%200%200%201-1.87-5.18c1.096.19%202.203.476%203.298.87%206.525%202.333%2010.836%207.68%2011.014%2012.99ZM51.47%2061.576c.488-5.524%203.62-10.716%208.847-13.597a17.132%2017.132%200%200%201%2011.335-1.882c-.798%208.145-7.43%2014.848-16.038%2015.599-1.417.119-2.799.07-4.144-.12Zm28.564-11.478a17.513%2017.513%200%200%201%203.727%204.62c4.608%208.335%201.584%2018.813-6.75%2023.409a16.988%2016.988%200%200%201-4.359%201.679%2019.624%2019.624%200%200%201-3.977-12.776c.346-7.561%204.942-13.931%2011.36-16.932Z'/%3e%3cpath%20fill='%23110F0D'%20fill-rule='evenodd'%20d='M142.831%2048.324h4.977V77.03h-4.977V48.324Zm27.278%2013.002c.322%201.048.453%202.263.453%203.62v12.073h-4.787V66.208c0-.75-.047-1.572-.154-2.143-.453-2.382-1.822-3.572-4.215-3.572-2.31%200-3.882%201.274-4.43%203.476-.143.596-.226%201.405-.226%202.25v10.8h-4.787V56.623h4.477v2.989c1.536-2.5%203.906-3.43%206.371-3.43%203.488%200%206.263%201.68%207.298%205.144Zm24.636%207.323c0%203.882-2.358%206.525-5.763%207.727-1.298.453-2.632.643-4.62.643h-10.169V48.324h9.085c1.691%200%203.156.143%204.049.38%203.465.93%205.727%203.68%205.727%207.335%200%202.441-.81%204.156-2.762%205.644%202.905%201.417%204.453%203.727%204.453%206.966Zm-15.634-8.656h4.584c1.024%200%201.917-.143%202.536-.417%201.215-.548%201.905-1.608%201.905-3.167%200-1.548-.643-2.572-1.845-3.132-.691-.31-1.762-.452-2.763-.452h-4.417v7.168Zm10.716%208.465c0-1.536-.893-3.37-3.227-3.893-.428-.095-1.036-.143-1.571-.143h-5.918v8.085h5.501c.56%200%201.429-.048%201.953-.167%201.94-.453%203.262-1.846%203.262-3.882Zm47.747-11.847-8.097%2020.408h-4.429l-8.109-20.408h5.191l5.192%2014.574%205.108-14.574h5.144Zm-20.218%2010.002c0%20.69-.036%201.262-.155%201.94h-15.943c.631%202.87%202.714%204.728%205.882%204.728%202.131%200%203.607-.882%204.703-2.525h4.87c-1.762%204.144-5.204%206.692-9.657%206.692-6.084%200-10.537-4.858-10.537-10.49%200-6.108%204.524-10.776%2010.335-10.776%206.239%200%2010.442%204.954%2010.502%2010.43Zm-4.763-1.405c-.333-2.846-2.643-4.858-5.691-4.858-2.894%200-5.287%201.929-5.621%204.858h11.312Zm-72.667%203.44c0%204.787-3.287%208.371-9.419%208.371H119.363V64.66c-1.917.274-3.87.69-5.811%201.238l4.537%2011.121h-5.418l-3.596-9.585c-5.144%202.084-10.085%205.216-14.217%209.585h-4.786L101.8%2048.312h4.56l5.68%2013.883a44.112%2044.112%200%200%201%207.323-1.774V48.312h9.084c1.703%200%203.156.143%204.061.393%203.453.929%205.727%203.667%205.727%207.323%200%201.917-.738%204.179-2.81%205.691%203.06%201.56%204.501%204.025%204.501%206.93Zm-15.634-8.667a62.664%2062.664%200%200%201%202.06-.036c1.703.012%203.239.131%204.608.37%201.441-.549%202.357-1.727%202.357-3.537%200-1.941-.881-3.144-2.488-3.667-.548-.18-1.358-.286-2.322-.286h-4.215v7.156Zm-16.55%203.905-3.715-9.894-6.394%2016.502c2.833-2.595%206.263-4.858%2010.109-6.608Zm27.254%204.74c0-2.775-3.131-4.347-8.513-4.418-.715%200-1.441.011-2.191.047v8.252h5.918c2.548%200%204.786-1.37%204.786-3.882Z'%20clip-rule='evenodd'/%3e%3c/g%3e%3cdefs%3e%3clinearGradient%20id='b'%20x1='51.47'%20x2='85.916'%20y1='62.946'%20y2='62.946'%20gradientUnits='userSpaceOnUse'%3e%3cstop%20stop-color='%23CD9F28'/%3e%3cstop%20offset='1'%20stop-color='%23ECD80B'/%3e%3c/linearGradient%3e%3cclipPath%20id='a'%3e%3cpath%20fill='%23fff'%20d='M51.47%2045.728h186.104V80.14H51.47z'/%3e%3c/clipPath%3e%3c/defs%3e%3c/svg%3e)


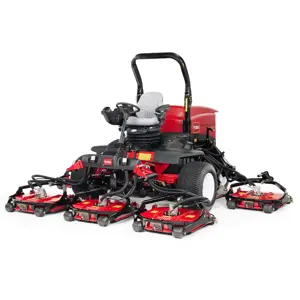
More from Mazak


Explore Other Assets


© 2026 MaintainX. All rights reserved.