


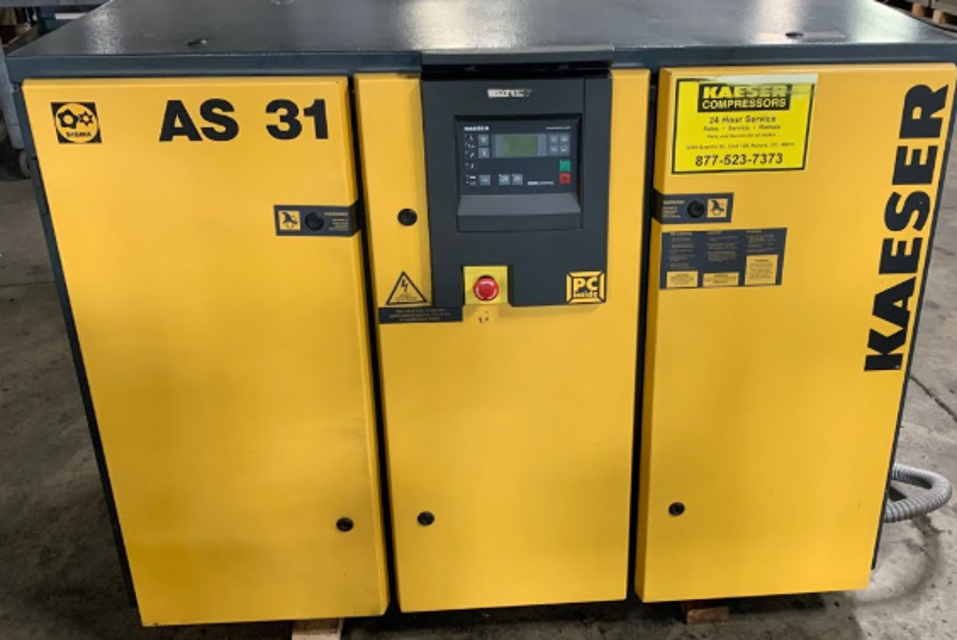
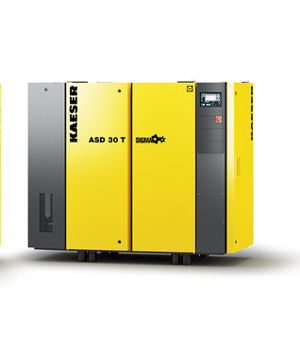
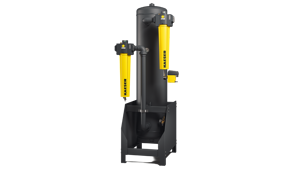
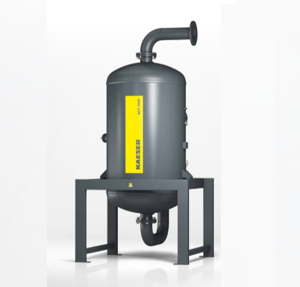
Kaeser Screw Compressor AS31
Need answers fast?
Explore the manual using AI.
Turn manuals into instant answers
with your AI-powered assistantTurn manuals into instant answers
with your AI-powered assistant
Complete asset maintenance, one click away
Get instant access to all the maintenance information you need. Empower technicians to perform preventive maintenance with asset packages, ready to use right out of the box.

Documents & Manuals
Find all the essential guides in one place.
 Tensioning Guide
- Belt-diagram
- C-120 pulleys
+ 13 more

Work Order Templates
Pre-built workflows to keep your asset running smoothly.
- Daily Electrical System Inspection
- Replace Roller and Pulley
- Install Engine B-120
+ 29 more

Procedures
Integrate maintenance plans directly into your work orders.
- Motion Industries
- Applied Industrial Technologies
- Electrical Brothers
+ 5 more

Parts
Access the parts list for your equipment in MaintainX.
- Drive Motor
- B2 Rollers
- Tensioning System
+ 40 more
Kaeser Screw Compressor AS31
Create an account to install this asset package.
Maintenance Plans for Kaeser Screw Compressor Model AS31
Integrate maintenance plans directly into your work orders in MaintainX.
500 Hourly Drive Belt Tension Check
Switch off the compressor unit
Lock the main disconnect switch in the 'off' position
Enter the hours of operation
Check the tension of the belt drive
Re-tension the belt drive if necessary
Open the left-hand maintenance and drive access doors
Loosen the hexagonal nut (1)
Tension the belt drive with the hexagonal nut (2)
Tighten the hexagonal nut (1)

4000 Hourly Oil Change
WARNING: Danger of scalding with hot oil. Beware of air/oil mist that could blow out of the hose. Unrestricted air/oil flow through the hose end will result in a whipping action which could cause severe injury or death.
Attention!: Drain the oil out of the oil separator tank, cooler and the oil pipes completely.
Dispose of the used oil according to environmental regulations.
Perform a test run. When the operating temperature is reached, shut down the compressor unit and lock the main disconnect in the "off" position in accordance with applicable lock out/tag out procedures to ensure the compressor does not restart.
Afterwards, carry out a visual check for leaks.
Switch off the compressor unit and lock the main disconnect in the "off" position in accordance with applicable lockout/tagout procedures to ensure the compressor does not restart.
Lock the isolation shut-off valve in the "closed" position and vent all compressed air trapped between the compressor and the isolation shut-off valve in accordance with applicable lock out/ tag out procedures.
The oil circulation system of the compressor unit vents automatically.
Open the left-hand maintenance and drive access doors.
Direction of Rotation Check
Attention!: The compressor is wired for connection to a clockwise phase sequence power supply.
Phase sequence test passed?
Arrows showing the direction of rotation are located on the motor and on the airend housing.
Direction of rotation verified during initial start?
If the direction of rotation is incorrect, change over the supply conductors L1 and L2.
Attention!: If the airend rotates in the wrong direction, the compressor is automatically shut down by the safety air pressure switch (4.2, see chapter 5.3).
Sign off on the direction of rotation check
Initial 2000 Hourly Oil Change
WARNING: Danger of scalding with hot oil. Beware of air/oil mist that could blow out of the hose. Unrestricted air/oil flow through the hose end will result in a whipping action which could cause severe injury or death.
Attention!: Drain the oil out of the oil separator tank, cooler and the oil pipes completely.
Dispose of the used oil according to environmental regulations.
Perform a test run. When the operating temperature is reached, shut down the compressor unit and lock the main disconnect in the "off" position in accordance with applicable lock out/tag out procedures to ensure the compressor does not restart.
Afterwards, carry out a visual check for leaks.
Switch off the compressor unit
Lock the main disconnect in the "off" position in accordance with applicable lockout/tagout procedures to ensure the compressor does not restart.
Lock the isolation shut-off valve in the "closed" position and vent all compressed air trapped between the compressor and the isolation shut-off valve in accordance with applicable lock out/ tag out procedures.
The oil circulation system of the compressor unit vents automatically.
Initial 6000 Hourly Oil Change
WARNING: Danger of scalding with hot oil. Beware of air/oil mist that could blow out of the hose. Unrestricted air/oil flow through the hose end will result in a whipping action which could cause severe injury or death.
Attention!: Drain the oil out of the oil separator tank, cooler and the oil pipes completely.
Switch off the compressor unit and lock the main disconnect in the "off" position.
Lock the isolation shut-off valve in the "closed" position and vent all compressed air trapped.
The oil circulation system of the compressor unit vents automatically.
Open the left-hand maintenance and drive access doors.
Open the right-hand maintenance door.
The pressure gauge on the oil separator tank must indicate zero psig.
Close the ball valve.
Unlock efficiency
with MaintainX CoPilot
MaintainX CoPilot is your expert colleague, on call 24/7, helping your team find the answers they need to keep equipment running.
Reduce Unplanned Downtime
Ensure your team follows consistent procedures to minimize equipment failures and costly delays.
Maximize Asset Availability
Keep your assets running longer and more reliably, with standardized maintenance workflows from OEM manuals.
Lower Maintenance Costs
Turn any technician into an expert to streamline operations, maintain more assets, and reduce overall costs.
Thousands of companies manage their assets with MaintainX

'%3e%3cpath%20fill='url(%23b)'%20d='M66.008%2080.068c-5.084-.786-9.763-3.834-12.442-8.68a16.942%2016.942%200%200%201-1.87-5.18c1.096.19%202.203.476%203.298.87%206.525%202.333%2010.836%207.68%2011.014%2012.99ZM51.47%2061.576c.488-5.524%203.62-10.716%208.847-13.597a17.132%2017.132%200%200%201%2011.335-1.882c-.798%208.145-7.43%2014.848-16.038%2015.599-1.417.119-2.799.07-4.144-.12Zm28.564-11.478a17.513%2017.513%200%200%201%203.727%204.62c4.608%208.335%201.584%2018.813-6.75%2023.409a16.988%2016.988%200%200%201-4.359%201.679%2019.624%2019.624%200%200%201-3.977-12.776c.346-7.561%204.942-13.931%2011.36-16.932Z'/%3e%3cpath%20fill='%23110F0D'%20fill-rule='evenodd'%20d='M142.831%2048.324h4.977V77.03h-4.977V48.324Zm27.278%2013.002c.322%201.048.453%202.263.453%203.62v12.073h-4.787V66.208c0-.75-.047-1.572-.154-2.143-.453-2.382-1.822-3.572-4.215-3.572-2.31%200-3.882%201.274-4.43%203.476-.143.596-.226%201.405-.226%202.25v10.8h-4.787V56.623h4.477v2.989c1.536-2.5%203.906-3.43%206.371-3.43%203.488%200%206.263%201.68%207.298%205.144Zm24.636%207.323c0%203.882-2.358%206.525-5.763%207.727-1.298.453-2.632.643-4.62.643h-10.169V48.324h9.085c1.691%200%203.156.143%204.049.38%203.465.93%205.727%203.68%205.727%207.335%200%202.441-.81%204.156-2.762%205.644%202.905%201.417%204.453%203.727%204.453%206.966Zm-15.634-8.656h4.584c1.024%200%201.917-.143%202.536-.417%201.215-.548%201.905-1.608%201.905-3.167%200-1.548-.643-2.572-1.845-3.132-.691-.31-1.762-.452-2.763-.452h-4.417v7.168Zm10.716%208.465c0-1.536-.893-3.37-3.227-3.893-.428-.095-1.036-.143-1.571-.143h-5.918v8.085h5.501c.56%200%201.429-.048%201.953-.167%201.94-.453%203.262-1.846%203.262-3.882Zm47.747-11.847-8.097%2020.408h-4.429l-8.109-20.408h5.191l5.192%2014.574%205.108-14.574h5.144Zm-20.218%2010.002c0%20.69-.036%201.262-.155%201.94h-15.943c.631%202.87%202.714%204.728%205.882%204.728%202.131%200%203.607-.882%204.703-2.525h4.87c-1.762%204.144-5.204%206.692-9.657%206.692-6.084%200-10.537-4.858-10.537-10.49%200-6.108%204.524-10.776%2010.335-10.776%206.239%200%2010.442%204.954%2010.502%2010.43Zm-4.763-1.405c-.333-2.846-2.643-4.858-5.691-4.858-2.894%200-5.287%201.929-5.621%204.858h11.312Zm-72.667%203.44c0%204.787-3.287%208.371-9.419%208.371H119.363V64.66c-1.917.274-3.87.69-5.811%201.238l4.537%2011.121h-5.418l-3.596-9.585c-5.144%202.084-10.085%205.216-14.217%209.585h-4.786L101.8%2048.312h4.56l5.68%2013.883a44.112%2044.112%200%200%201%207.323-1.774V48.312h9.084c1.703%200%203.156.143%204.061.393%203.453.929%205.727%203.667%205.727%207.323%200%201.917-.738%204.179-2.81%205.691%203.06%201.56%204.501%204.025%204.501%206.93Zm-15.634-8.667a62.664%2062.664%200%200%201%202.06-.036c1.703.012%203.239.131%204.608.37%201.441-.549%202.357-1.727%202.357-3.537%200-1.941-.881-3.144-2.488-3.667-.548-.18-1.358-.286-2.322-.286h-4.215v7.156Zm-16.55%203.905-3.715-9.894-6.394%2016.502c2.833-2.595%206.263-4.858%2010.109-6.608Zm27.254%204.74c0-2.775-3.131-4.347-8.513-4.418-.715%200-1.441.011-2.191.047v8.252h5.918c2.548%200%204.786-1.37%204.786-3.882Z'%20clip-rule='evenodd'/%3e%3c/g%3e%3cdefs%3e%3clinearGradient%20id='b'%20x1='51.47'%20x2='85.916'%20y1='62.946'%20y2='62.946'%20gradientUnits='userSpaceOnUse'%3e%3cstop%20stop-color='%23CD9F28'/%3e%3cstop%20offset='1'%20stop-color='%23ECD80B'/%3e%3c/linearGradient%3e%3cclipPath%20id='a'%3e%3cpath%20fill='%23fff'%20d='M51.47%2045.728h186.104V80.14H51.47z'/%3e%3c/clipPath%3e%3c/defs%3e%3c/svg%3e)


More from Kaeser


Explore Other Assets


© 2026 MaintainX. All rights reserved.