


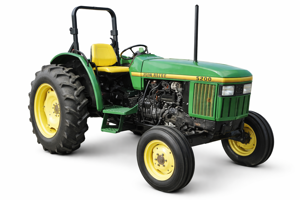
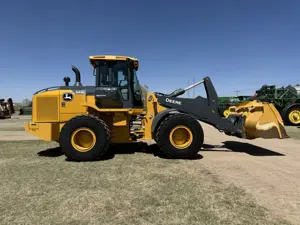
John Deere Tractor 5400
Need answers fast?
Explore the manual using AI.

Turn manuals into instant answers
with your AI-powered assistantTurn manuals into instant answers
with your AI-powered assistant
Manual for John Deere Tractor 5400
Complete asset maintenance, one click away
Get instant access to all the maintenance information you need. Empower technicians to perform preventive maintenance with asset packages, ready to use right out of the box.

Documents & Manuals
Find all the essential guides in one place.
 Tensioning Guide
- Belt-diagram
- C-120 pulleys
+ 13 more

Work Order Templates
Pre-built workflows to keep your asset running smoothly.
- Daily Electrical System Inspection
- Replace Roller and Pulley
- Install Engine B-120
+ 29 more

Procedures
Integrate maintenance plans directly into your work orders.
- Motion Industries
- Applied Industrial Technologies
- Electrical Brothers
+ 5 more

Parts
Access the parts list for your equipment in MaintainX.
- Drive Motor
- B2 Rollers
- Tensioning System
+ 40 more
John Deere Tractor 5400
Create an account to install this asset package.
Maintenance Plans for John Deere Tractor Model 5400
Integrate maintenance plans directly into your work orders in MaintainX.
Throttle Friction Adjustment
Remove rear cowl cover
Tighten friction with adjusting nut (A) (inside nut). The spring provides tension on the adjusting nut.
Sign off on the throttle friction adjustment

PTO Clutch Operating Rod Adjustment
Remove clip pin (B) from forward end of PTO clutch rod.
Loosen jam nut (C) from rear of front clevis (F).
Adjust length of rod (E) so the clip pin (B) can be inserted with the rod pulled forward and the arm pulled rearward to eliminate freeplay. Lengthen rod (C) by 1/2 turn of the clevis (E) to provide a slight amount of lever freeplay.
Reinstall clip pin (B) in clevis (F) and arm (D).
Check for equal thread engagement at each end of the PTO clutch rod. Jam nut at the rear (not shown) can be loosened and the rod turned to equalize thread engagement (PTO adjustment is not affected).
Retighten jam nuts (C) at each end of rod.
Sign off on the PTO Clutch Operating Rod Adjustment
1 Daily Tractor Check
1. Check the engine oil level. Wipe dipstick (A) off and reinsert it fully. Remove and locate oil level. Safe operating range is between two marks on dipstick. Do not operate engine when oil level is below lower mark on dipstick. Add seasonal viscosity grade oil through filler hole (B). (See Fuels and Lubricants section for oil specifications.
2. Check coolant level in recovery tank (A). If engine is COOL and level is below “LOW” mark, add coolant to recovery tank to bring level to “LOW” mark.
NOTE: Coolant level with a cold engine should be at the “LOW” mark. A tractor at operating temperature should have a coolant level at the “FULL” mark.
3. Lubricate the following items at 10 hour intervals if operating in extremely wet or muddy conditions.
- Front axle pivot pin
- Steering spindles
- Tie rod ends
Use multi-purpose grease. See Fuels and Lubricants section for grease specifications. For detail information see Lubrication and Maintenance section.;
Flood Lamp Bulb Replacement
Loosen mounting cap screw and rotate flood lamp (A) outward to access cover fastening screw. Remove screw (B)
Remove lamp cover and lamp from housing
Disconnect wiring leads from bulb
Rotate bulb counterclockwise and remove
Reverse this procedure to reassemble the flood lamp
Sign off on the bulb replacement
Cylinder Stop Adjustment
Warning: Only trained personnel should perform this procedure
Lift lever (A)
Slide adjustable stop (B) to desired position
Push lever down firmly. Be sure lever will not contact stop rod arm (C)
IMPORTANT: Be sure stop clamps securely on rod. If it does not, lift lever and rotate it clockwise, then push it down firmly
Sign off on the cylinder stop adjustment
Parts for John Deere Tractor 5400
Access the parts list for your equipment in MaintainX.
Liquid Coolant Conditioner
RE23182
Liquid Coolant Conditioner
RE23182
Liquid Coolant Conditioner
RE23182
Unlock efficiency
with MaintainX CoPilot
MaintainX CoPilot is your expert colleague, on call 24/7, helping your team find the answers they need to keep equipment running.
Reduce Unplanned Downtime
Ensure your team follows consistent procedures to minimize equipment failures and costly delays.
Maximize Asset Availability
Keep your assets running longer and more reliably, with standardized maintenance workflows from OEM manuals.
Lower Maintenance Costs
Turn any technician into an expert to streamline operations, maintain more assets, and reduce overall costs.
Thousands of companies manage their assets with MaintainX

'%3e%3cpath%20fill='url(%23b)'%20d='M66.008%2080.068c-5.084-.786-9.763-3.834-12.442-8.68a16.942%2016.942%200%200%201-1.87-5.18c1.096.19%202.203.476%203.298.87%206.525%202.333%2010.836%207.68%2011.014%2012.99ZM51.47%2061.576c.488-5.524%203.62-10.716%208.847-13.597a17.132%2017.132%200%200%201%2011.335-1.882c-.798%208.145-7.43%2014.848-16.038%2015.599-1.417.119-2.799.07-4.144-.12Zm28.564-11.478a17.513%2017.513%200%200%201%203.727%204.62c4.608%208.335%201.584%2018.813-6.75%2023.409a16.988%2016.988%200%200%201-4.359%201.679%2019.624%2019.624%200%200%201-3.977-12.776c.346-7.561%204.942-13.931%2011.36-16.932Z'/%3e%3cpath%20fill='%23110F0D'%20fill-rule='evenodd'%20d='M142.831%2048.324h4.977V77.03h-4.977V48.324Zm27.278%2013.002c.322%201.048.453%202.263.453%203.62v12.073h-4.787V66.208c0-.75-.047-1.572-.154-2.143-.453-2.382-1.822-3.572-4.215-3.572-2.31%200-3.882%201.274-4.43%203.476-.143.596-.226%201.405-.226%202.25v10.8h-4.787V56.623h4.477v2.989c1.536-2.5%203.906-3.43%206.371-3.43%203.488%200%206.263%201.68%207.298%205.144Zm24.636%207.323c0%203.882-2.358%206.525-5.763%207.727-1.298.453-2.632.643-4.62.643h-10.169V48.324h9.085c1.691%200%203.156.143%204.049.38%203.465.93%205.727%203.68%205.727%207.335%200%202.441-.81%204.156-2.762%205.644%202.905%201.417%204.453%203.727%204.453%206.966Zm-15.634-8.656h4.584c1.024%200%201.917-.143%202.536-.417%201.215-.548%201.905-1.608%201.905-3.167%200-1.548-.643-2.572-1.845-3.132-.691-.31-1.762-.452-2.763-.452h-4.417v7.168Zm10.716%208.465c0-1.536-.893-3.37-3.227-3.893-.428-.095-1.036-.143-1.571-.143h-5.918v8.085h5.501c.56%200%201.429-.048%201.953-.167%201.94-.453%203.262-1.846%203.262-3.882Zm47.747-11.847-8.097%2020.408h-4.429l-8.109-20.408h5.191l5.192%2014.574%205.108-14.574h5.144Zm-20.218%2010.002c0%20.69-.036%201.262-.155%201.94h-15.943c.631%202.87%202.714%204.728%205.882%204.728%202.131%200%203.607-.882%204.703-2.525h4.87c-1.762%204.144-5.204%206.692-9.657%206.692-6.084%200-10.537-4.858-10.537-10.49%200-6.108%204.524-10.776%2010.335-10.776%206.239%200%2010.442%204.954%2010.502%2010.43Zm-4.763-1.405c-.333-2.846-2.643-4.858-5.691-4.858-2.894%200-5.287%201.929-5.621%204.858h11.312Zm-72.667%203.44c0%204.787-3.287%208.371-9.419%208.371H119.363V64.66c-1.917.274-3.87.69-5.811%201.238l4.537%2011.121h-5.418l-3.596-9.585c-5.144%202.084-10.085%205.216-14.217%209.585h-4.786L101.8%2048.312h4.56l5.68%2013.883a44.112%2044.112%200%200%201%207.323-1.774V48.312h9.084c1.703%200%203.156.143%204.061.393%203.453.929%205.727%203.667%205.727%207.323%200%201.917-.738%204.179-2.81%205.691%203.06%201.56%204.501%204.025%204.501%206.93Zm-15.634-8.667a62.664%2062.664%200%200%201%202.06-.036c1.703.012%203.239.131%204.608.37%201.441-.549%202.357-1.727%202.357-3.537%200-1.941-.881-3.144-2.488-3.667-.548-.18-1.358-.286-2.322-.286h-4.215v7.156Zm-16.55%203.905-3.715-9.894-6.394%2016.502c2.833-2.595%206.263-4.858%2010.109-6.608Zm27.254%204.74c0-2.775-3.131-4.347-8.513-4.418-.715%200-1.441.011-2.191.047v8.252h5.918c2.548%200%204.786-1.37%204.786-3.882Z'%20clip-rule='evenodd'/%3e%3c/g%3e%3cdefs%3e%3clinearGradient%20id='b'%20x1='51.47'%20x2='85.916'%20y1='62.946'%20y2='62.946'%20gradientUnits='userSpaceOnUse'%3e%3cstop%20stop-color='%23CD9F28'/%3e%3cstop%20offset='1'%20stop-color='%23ECD80B'/%3e%3c/linearGradient%3e%3cclipPath%20id='a'%3e%3cpath%20fill='%23fff'%20d='M51.47%2045.728h186.104V80.14H51.47z'/%3e%3c/clipPath%3e%3c/defs%3e%3c/svg%3e)


More from John Deere


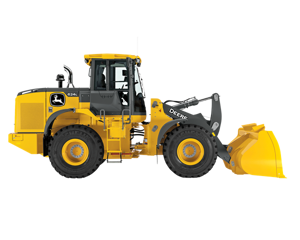


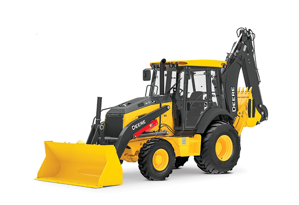
Explore Other Assets


© 2026 MaintainX. All rights reserved.