


JCB Compact Excavator 19C-1
Need answers fast?
Explore the manual using AI.
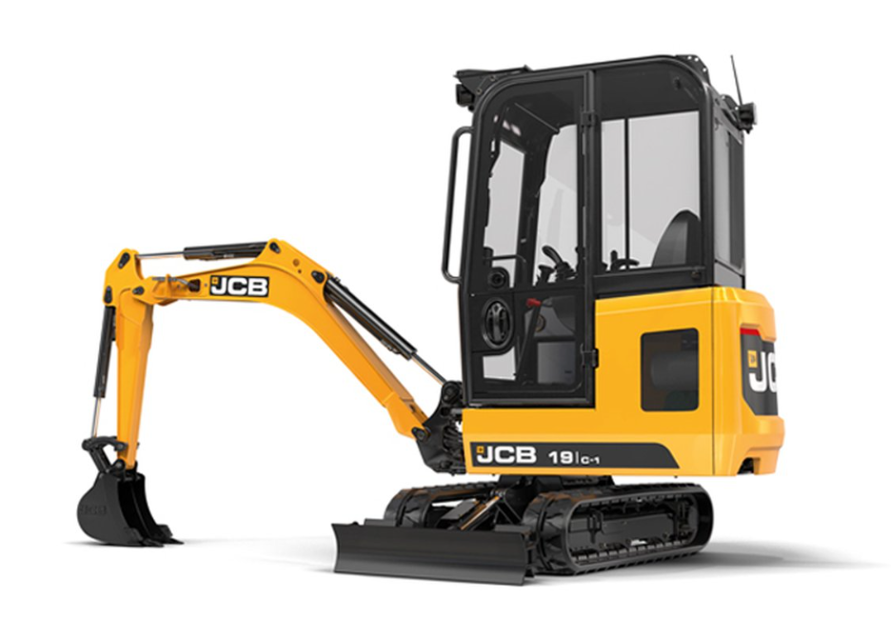
The JCB Compact Excavator 19C-1 is a versatile and efficient machine designed for various construction tasks. Known for its compact size and powerful performance, this excavator is ideal for tight spaces while delivering exceptional digging capabilities. JCB's engineering ensures reliability and ease of maintenance for optimal productivity.
Turn manuals into instant answers
with your AI-powered assistantTurn manuals into instant answers
with your AI-powered assistant
Manual for JCB Compact Excavator 19C-1
Complete asset maintenance, one click away
Get instant access to all the maintenance information you need. Empower technicians to perform preventive maintenance with asset packages, ready to use right out of the box.

Documents & Manuals
Find all the essential guides in one place.
 Tensioning Guide
- Belt-diagram
- C-120 pulleys
+ 13 more

Work Order Templates
Pre-built workflows to keep your asset running smoothly.
- Daily Electrical System Inspection
- Replace Roller and Pulley
- Install Engine B-120
+ 29 more

Procedures
Integrate maintenance plans directly into your work orders.
- Motion Industries
- Applied Industrial Technologies
- Electrical Brothers
+ 5 more

Parts
Access the parts list for your equipment in MaintainX.
- Drive Motor
- B2 Rollers
- Tensioning System
+ 40 more
JCB Compact Excavator 19C-1
Create an account to install this asset package.
Maintenance Plans for JCB Compact Excavator Model 19C-1
Integrate maintenance plans directly into your work orders in MaintainX.
Attachment Check
Examine the Quickhitch for broken or missing parts
Remove any debris from the latch hook locking mechanism
Is the Quickhitch cleaned by high pressure water?
If the Quickhitch is cleaned by high pressure water, always grease the latch hook pivot pin
Always grease the latch hook pin every week
Sign off on the attachment check

Hydraulic Attachment Engage
Park the machine on firm level ground
Lower the excavator arm to the ground
Leave the engine running
Enable the hydraulic controls
Press the Quickhitch switch on the switch console. The light on the control isolation switch will start flashing on the switch panel
With the Quickhitch unlocked LED (Light Emitting Diode) flashing, buzzer sound and instrument panel displaying Quickhitch unlocked symbol, position the Quick-hitch on top of the attachment you want to engage
Press the Quickhitch switch to lock the Quickhitch. The Quickhitch unlock symbol will disappear, the red LED stops flashing and the buzzer stops. To lock the Quickhitch it will be necessary to pressurise the circuit by raising any hydraulic service. The Quickhitch is now locked
Visually check that Quickhitch has locked and push against the bucket to verify security before use
Sign off on the hydraulic attachment engage procedure
Compact Excavator Maintenance
Machine parked on solid, level ground
Hand throttle lever pushed to the idle position
Dozer lowered to the ground
Excavator lowered so the attachment is flat on the ground
Engine stopped
Hydraulic pressure discharged
Controls isolated
Battery disconnected to prevent accidental operation of the engine
Attachment Installation
This operation is easier done by two people, one person to operate the controls and one to line up the pivots.
1. Before the Quickhitch is installed, make sure that the tipping lever locking bolt assembly is attached with the nut and any lifting shackle is removed.
2. Put the Quickhitch on solid, level ground. Use the safe and correct lifting equipment to move the Quickhitch.
3. Move the machine so that the dipper arm and Quickhitch are correctly aligned as shown. Refer to Figure 7.
4. Engage the dipper:
4.1. Operate the controls to line up the hole in the dipper arm with the holes in the Quickhitch.
4.2. Install the pivot pin and secure it with the nut and bolt.
5. Engage the bucket link:
5.1. Operate the controls to line up the hole in the bucket link with the hole in Quickhitch.
Hydraulic Attachment Disengage
1. Park the machine on firm level ground.
2. Lower the excavator arm to the ground.
3. Leave the engine running.
4. Enable the hydraulic controls.
5. Press the Quickhitch switch on the switch console. The light on the control isolation switch will start flashing on the switch panel.
6. Within 5 seconds press the control isolation switch. The red LED on the boom side will star flashing, a constant tone buzzer will be heard.
7. To unlock the quickhitch it will be necessary to pressurise the circuit by crowding the bucket only.
8. The Quickhitch is now unlocked and 'Quickhitch unlocked' symbol will display on the instrument panel. At this point operator can cancel the procedure by pressing the Quickhitch switch or deactivating the hydraulics or turning the ignition off and Quickhitch will be locked.
9. For deactivating the hydraulic.;
Unlock efficiency
with MaintainX CoPilot
MaintainX CoPilot is your expert colleague, on call 24/7, helping your team find the answers they need to keep equipment running.
Reduce Unplanned Downtime
Ensure your team follows consistent procedures to minimize equipment failures and costly delays.
Maximize Asset Availability
Keep your assets running longer and more reliably, with standardized maintenance workflows from OEM manuals.
Lower Maintenance Costs
Turn any technician into an expert to streamline operations, maintain more assets, and reduce overall costs.
Thousands of companies manage their assets with MaintainX

'%3e%3cpath%20fill='url(%23b)'%20d='M66.008%2080.068c-5.084-.786-9.763-3.834-12.442-8.68a16.942%2016.942%200%200%201-1.87-5.18c1.096.19%202.203.476%203.298.87%206.525%202.333%2010.836%207.68%2011.014%2012.99ZM51.47%2061.576c.488-5.524%203.62-10.716%208.847-13.597a17.132%2017.132%200%200%201%2011.335-1.882c-.798%208.145-7.43%2014.848-16.038%2015.599-1.417.119-2.799.07-4.144-.12Zm28.564-11.478a17.513%2017.513%200%200%201%203.727%204.62c4.608%208.335%201.584%2018.813-6.75%2023.409a16.988%2016.988%200%200%201-4.359%201.679%2019.624%2019.624%200%200%201-3.977-12.776c.346-7.561%204.942-13.931%2011.36-16.932Z'/%3e%3cpath%20fill='%23110F0D'%20fill-rule='evenodd'%20d='M142.831%2048.324h4.977V77.03h-4.977V48.324Zm27.278%2013.002c.322%201.048.453%202.263.453%203.62v12.073h-4.787V66.208c0-.75-.047-1.572-.154-2.143-.453-2.382-1.822-3.572-4.215-3.572-2.31%200-3.882%201.274-4.43%203.476-.143.596-.226%201.405-.226%202.25v10.8h-4.787V56.623h4.477v2.989c1.536-2.5%203.906-3.43%206.371-3.43%203.488%200%206.263%201.68%207.298%205.144Zm24.636%207.323c0%203.882-2.358%206.525-5.763%207.727-1.298.453-2.632.643-4.62.643h-10.169V48.324h9.085c1.691%200%203.156.143%204.049.38%203.465.93%205.727%203.68%205.727%207.335%200%202.441-.81%204.156-2.762%205.644%202.905%201.417%204.453%203.727%204.453%206.966Zm-15.634-8.656h4.584c1.024%200%201.917-.143%202.536-.417%201.215-.548%201.905-1.608%201.905-3.167%200-1.548-.643-2.572-1.845-3.132-.691-.31-1.762-.452-2.763-.452h-4.417v7.168Zm10.716%208.465c0-1.536-.893-3.37-3.227-3.893-.428-.095-1.036-.143-1.571-.143h-5.918v8.085h5.501c.56%200%201.429-.048%201.953-.167%201.94-.453%203.262-1.846%203.262-3.882Zm47.747-11.847-8.097%2020.408h-4.429l-8.109-20.408h5.191l5.192%2014.574%205.108-14.574h5.144Zm-20.218%2010.002c0%20.69-.036%201.262-.155%201.94h-15.943c.631%202.87%202.714%204.728%205.882%204.728%202.131%200%203.607-.882%204.703-2.525h4.87c-1.762%204.144-5.204%206.692-9.657%206.692-6.084%200-10.537-4.858-10.537-10.49%200-6.108%204.524-10.776%2010.335-10.776%206.239%200%2010.442%204.954%2010.502%2010.43Zm-4.763-1.405c-.333-2.846-2.643-4.858-5.691-4.858-2.894%200-5.287%201.929-5.621%204.858h11.312Zm-72.667%203.44c0%204.787-3.287%208.371-9.419%208.371H119.363V64.66c-1.917.274-3.87.69-5.811%201.238l4.537%2011.121h-5.418l-3.596-9.585c-5.144%202.084-10.085%205.216-14.217%209.585h-4.786L101.8%2048.312h4.56l5.68%2013.883a44.112%2044.112%200%200%201%207.323-1.774V48.312h9.084c1.703%200%203.156.143%204.061.393%203.453.929%205.727%203.667%205.727%207.323%200%201.917-.738%204.179-2.81%205.691%203.06%201.56%204.501%204.025%204.501%206.93Zm-15.634-8.667a62.664%2062.664%200%200%201%202.06-.036c1.703.012%203.239.131%204.608.37%201.441-.549%202.357-1.727%202.357-3.537%200-1.941-.881-3.144-2.488-3.667-.548-.18-1.358-.286-2.322-.286h-4.215v7.156Zm-16.55%203.905-3.715-9.894-6.394%2016.502c2.833-2.595%206.263-4.858%2010.109-6.608Zm27.254%204.74c0-2.775-3.131-4.347-8.513-4.418-.715%200-1.441.011-2.191.047v8.252h5.918c2.548%200%204.786-1.37%204.786-3.882Z'%20clip-rule='evenodd'/%3e%3c/g%3e%3cdefs%3e%3clinearGradient%20id='b'%20x1='51.47'%20x2='85.916'%20y1='62.946'%20y2='62.946'%20gradientUnits='userSpaceOnUse'%3e%3cstop%20stop-color='%23CD9F28'/%3e%3cstop%20offset='1'%20stop-color='%23ECD80B'/%3e%3c/linearGradient%3e%3cclipPath%20id='a'%3e%3cpath%20fill='%23fff'%20d='M51.47%2045.728h186.104V80.14H51.47z'/%3e%3c/clipPath%3e%3c/defs%3e%3c/svg%3e)


More from JCB


Explore Other Assets


© 2026 MaintainX. All rights reserved.