


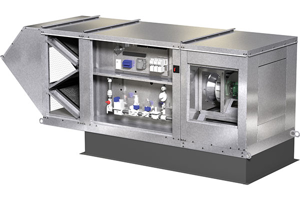
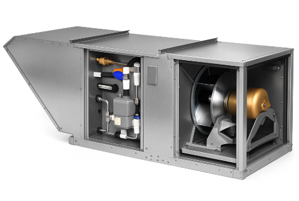
Greenheck Warehouse Make Up Air Unit DGX-125-H35-DB
Need answers fast?
Explore the manual using AI.

The Greenheck Warehouse Make Up Air Unit DGX-125-H35-DB is a high-efficiency air handling solution designed for optimal indoor air quality. This unit effectively manages ventilation and temperature control, making it ideal for warehouses and industrial applications. Experience reliable performance and energy savings with this advanced air unit from Greenheck.
Turn manuals into instant answers
with your AI-powered assistantTurn manuals into instant answers
with your AI-powered assistant
Manual for Greenheck Warehouse Make Up Air Unit DGX-125-H35-DB
Complete asset maintenance, one click away
Get instant access to all the maintenance information you need. Empower technicians to perform preventive maintenance with asset packages, ready to use right out of the box.

Documents & Manuals
Find all the essential guides in one place.
 Tensioning Guide
- Belt-diagram
- C-120 pulleys
+ 13 more

Work Order Templates
Pre-built workflows to keep your asset running smoothly.
- Daily Electrical System Inspection
- Replace Roller and Pulley
- Install Engine B-120
+ 29 more

Procedures
Integrate maintenance plans directly into your work orders.
- Motion Industries
- Applied Industrial Technologies
- Electrical Brothers
+ 5 more

Parts
Access the parts list for your equipment in MaintainX.
- Drive Motor
- B2 Rollers
- Tensioning System
+ 40 more
Greenheck Warehouse Make Up Air Unit DGX-125-H35-DB
Create an account to install this asset package.
Maintenance Plans for Greenheck Warehouse Make Up Air Unit Model DGX-125-H35-DB
Integrate maintenance plans directly into your work orders in MaintainX.
Blowing-Out Coils
Close valves on the supply and return lines
Open drain valves and/or drain plug
Remove vent plug to allow coil to drain faster
After coil is fully drained, connect a blower to the caps. Do not connect the blower to the air vent or drain plug
Close the vent plug on the header that the blower is connected to. Open the drain valve or cap on the other header
Turn on blower for 30 minutes
Place mirror at discharge. If the mirror fogs up, repeat procedure until no fog appears on the mirror
After drying the coil, wait a few minutes then repeat Step #5
Leave drains open and do not install plugs until beginning of cooling season;

Motor Maintenance
Motor maintenance is generally limited to cleaning and lubrication (where applicable)
Limit cleaning to exterior surfaces only. Removing dust and grease build-up on the motor assures proper motor cooling
Grease motors supplied with grease fittings in accordance with the manufacturer’s recommendations
Do not allow water or solvents to enter the motor or bearings. Never spray motors and bearings with steam, water or solvents
Greasing motors is only intended when fittings are provided. Many motors are permanently lubricated, requiring no additional lubrication;
1 Yearly Gas Train Check
Check the gas connections, joints and valves annually for tightness
Apply a soap and water solution to all piping
Watch for bubbling which indicates a leak;
Fan Bearing Lubrication
Fan bearings are carefully selected to match the maximum load and operating conditions of the specific class, arrangement and fan size
The instructions provided in this manual and those provided by the bearing manufacturer will minimize any bearing problems
Lubricate bearings prior to periods of extended shutdowns or storage and rotate shaft monthly to aid in corrosion prevention
If the fan is stored more than three months, purge the bearings with new grease prior to start-up;
Chilled Water Coil Maintenance
Test the circulating fluid for sediment, corrosive products and biological contaminants. Take the necessary corrective measures
Maintain adequate fluid velocities and proper filtering of the fluid
If automatic air vents are not utilized, periodic venting of the coil is recommended to remove accumulated air;
Parts for Greenheck Warehouse Make Up Air Unit DGX-125-H35-DB
Access the parts list for your equipment in MaintainX.
Auto Drain & Fill Valve 1/2"
461262
Auto Drain & Fill Valve 1/4"
461263
Auto Drain & Fill Valve 3/4"
461264
Auto Drain & Fill Valve 1/2"
461262
Auto Drain & Fill Valve 1/4"
461263
Auto Drain & Fill Valve 3/4"
461264
Auto Drain & Fill Valve 1/2"
461262
Auto Drain & Fill Valve 1/4"
461263
Auto Drain & Fill Valve 3/4"
461264
Unlock efficiency
with MaintainX CoPilot
MaintainX CoPilot is your expert colleague, on call 24/7, helping your team find the answers they need to keep equipment running.
Reduce Unplanned Downtime
Ensure your team follows consistent procedures to minimize equipment failures and costly delays.
Maximize Asset Availability
Keep your assets running longer and more reliably, with standardized maintenance workflows from OEM manuals.
Lower Maintenance Costs
Turn any technician into an expert to streamline operations, maintain more assets, and reduce overall costs.
Thousands of companies manage their assets with MaintainX

'%3e%3cpath%20fill='url(%23b)'%20d='M66.008%2080.068c-5.084-.786-9.763-3.834-12.442-8.68a16.942%2016.942%200%200%201-1.87-5.18c1.096.19%202.203.476%203.298.87%206.525%202.333%2010.836%207.68%2011.014%2012.99ZM51.47%2061.576c.488-5.524%203.62-10.716%208.847-13.597a17.132%2017.132%200%200%201%2011.335-1.882c-.798%208.145-7.43%2014.848-16.038%2015.599-1.417.119-2.799.07-4.144-.12Zm28.564-11.478a17.513%2017.513%200%200%201%203.727%204.62c4.608%208.335%201.584%2018.813-6.75%2023.409a16.988%2016.988%200%200%201-4.359%201.679%2019.624%2019.624%200%200%201-3.977-12.776c.346-7.561%204.942-13.931%2011.36-16.932Z'/%3e%3cpath%20fill='%23110F0D'%20fill-rule='evenodd'%20d='M142.831%2048.324h4.977V77.03h-4.977V48.324Zm27.278%2013.002c.322%201.048.453%202.263.453%203.62v12.073h-4.787V66.208c0-.75-.047-1.572-.154-2.143-.453-2.382-1.822-3.572-4.215-3.572-2.31%200-3.882%201.274-4.43%203.476-.143.596-.226%201.405-.226%202.25v10.8h-4.787V56.623h4.477v2.989c1.536-2.5%203.906-3.43%206.371-3.43%203.488%200%206.263%201.68%207.298%205.144Zm24.636%207.323c0%203.882-2.358%206.525-5.763%207.727-1.298.453-2.632.643-4.62.643h-10.169V48.324h9.085c1.691%200%203.156.143%204.049.38%203.465.93%205.727%203.68%205.727%207.335%200%202.441-.81%204.156-2.762%205.644%202.905%201.417%204.453%203.727%204.453%206.966Zm-15.634-8.656h4.584c1.024%200%201.917-.143%202.536-.417%201.215-.548%201.905-1.608%201.905-3.167%200-1.548-.643-2.572-1.845-3.132-.691-.31-1.762-.452-2.763-.452h-4.417v7.168Zm10.716%208.465c0-1.536-.893-3.37-3.227-3.893-.428-.095-1.036-.143-1.571-.143h-5.918v8.085h5.501c.56%200%201.429-.048%201.953-.167%201.94-.453%203.262-1.846%203.262-3.882Zm47.747-11.847-8.097%2020.408h-4.429l-8.109-20.408h5.191l5.192%2014.574%205.108-14.574h5.144Zm-20.218%2010.002c0%20.69-.036%201.262-.155%201.94h-15.943c.631%202.87%202.714%204.728%205.882%204.728%202.131%200%203.607-.882%204.703-2.525h4.87c-1.762%204.144-5.204%206.692-9.657%206.692-6.084%200-10.537-4.858-10.537-10.49%200-6.108%204.524-10.776%2010.335-10.776%206.239%200%2010.442%204.954%2010.502%2010.43Zm-4.763-1.405c-.333-2.846-2.643-4.858-5.691-4.858-2.894%200-5.287%201.929-5.621%204.858h11.312Zm-72.667%203.44c0%204.787-3.287%208.371-9.419%208.371H119.363V64.66c-1.917.274-3.87.69-5.811%201.238l4.537%2011.121h-5.418l-3.596-9.585c-5.144%202.084-10.085%205.216-14.217%209.585h-4.786L101.8%2048.312h4.56l5.68%2013.883a44.112%2044.112%200%200%201%207.323-1.774V48.312h9.084c1.703%200%203.156.143%204.061.393%203.453.929%205.727%203.667%205.727%207.323%200%201.917-.738%204.179-2.81%205.691%203.06%201.56%204.501%204.025%204.501%206.93Zm-15.634-8.667a62.664%2062.664%200%200%201%202.06-.036c1.703.012%203.239.131%204.608.37%201.441-.549%202.357-1.727%202.357-3.537%200-1.941-.881-3.144-2.488-3.667-.548-.18-1.358-.286-2.322-.286h-4.215v7.156Zm-16.55%203.905-3.715-9.894-6.394%2016.502c2.833-2.595%206.263-4.858%2010.109-6.608Zm27.254%204.74c0-2.775-3.131-4.347-8.513-4.418-.715%200-1.441.011-2.191.047v8.252h5.918c2.548%200%204.786-1.37%204.786-3.882Z'%20clip-rule='evenodd'/%3e%3c/g%3e%3cdefs%3e%3clinearGradient%20id='b'%20x1='51.47'%20x2='85.916'%20y1='62.946'%20y2='62.946'%20gradientUnits='userSpaceOnUse'%3e%3cstop%20stop-color='%23CD9F28'/%3e%3cstop%20offset='1'%20stop-color='%23ECD80B'/%3e%3c/linearGradient%3e%3cclipPath%20id='a'%3e%3cpath%20fill='%23fff'%20d='M51.47%2045.728h186.104V80.14H51.47z'/%3e%3c/clipPath%3e%3c/defs%3e%3c/svg%3e)


More from Greenheck


Explore Other Assets


© 2026 MaintainX. All rights reserved.