


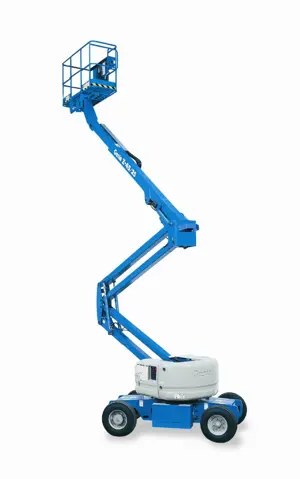
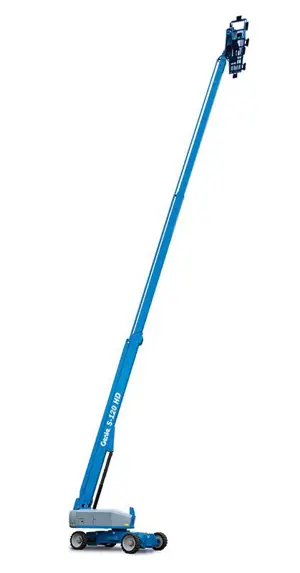
Genie Articulated Boom Lift SX-125
Need answers fast?
Explore the manual using AI.

The Genie Articulated Boom Lift SX-125 is a versatile aerial work platform designed for efficient access to elevated work areas. Known for its robust performance and reliability, this model is ideal for construction, maintenance, and industrial applications, ensuring safety and productivity in various environments.
Turn manuals into instant answers
with your AI-powered assistantTurn manuals into instant answers
with your AI-powered assistant
Manual for Genie Articulated Boom Lift SX-125
Complete asset maintenance, one click away
Get instant access to all the maintenance information you need. Empower technicians to perform preventive maintenance with asset packages, ready to use right out of the box.

Documents & Manuals
Find all the essential guides in one place.
 Tensioning Guide
- Belt-diagram
- C-120 pulleys
+ 13 more

Work Order Templates
Pre-built workflows to keep your asset running smoothly.
- Daily Electrical System Inspection
- Replace Roller and Pulley
- Install Engine B-120
+ 29 more

Procedures
Integrate maintenance plans directly into your work orders.
- Motion Industries
- Applied Industrial Technologies
- Electrical Brothers
+ 5 more

Parts
Access the parts list for your equipment in MaintainX.
- Drive Motor
- B2 Rollers
- Tensioning System
+ 40 more
Genie Articulated Boom Lift SX-125
Create an account to install this asset package.
Maintenance Plans for Genie Articulated Boom Lift Model SX-125
Integrate maintenance plans directly into your work orders in MaintainX.
1 Daily Continental Engine Maintanance
Check Fan belt tension
Check Battery
Replace Engine oil
Replace Oil filter
Check Harness connections
Check Cooling system
Replace Air filter
Check PCV valve
Adjust Valve tappet clearance

2000 Hourly Extendable Axle Wear Pads Check
Maintaining the axle wear pads in good condition is essential to safe machine operation. Wear pads are placed on axle tube surfaces to provide a low friction, replaceable wear pad between moving parts. Improperly shimmed wear pads or continued use of worn out wear pads may result in component damage and unsafe operating conditions
Be sure that the axles are fully extended before attempting this procedure
Measure each wear pad
Is the wear pad less than 0.437 inch/1.12 mm?
If a wear pad is not less than specification, shim as necessary to obtain minimum clearance and no drag
If the wear pads are still within specification, refer to Repair Procedure in the appropriate Service and Repair Manual for your machine, How to Shim the Extendable Axles.
If any wear pads are replaced, refer to Repair Procedure in the appropriate Service and Repair Manual for your machine, Grease the Extendable Axles
Extend and retract the axles through the entire range of motion to check for tight spots that may cause binding or scraping of the axle tubes
Always maintain squareness between the outer and inner axle tubes
2000 Hourly Boom Wear Pads Check
- Check the Boom Wear Pads
Maintaining the boom wear pads in good condition is essential to safe machine operation. Wear pads are placed on boom tube surfaces to provide a low friction, replaceable wear pad between moving parts. Improperly shimmed wear pads or continued use of extremely worn wear pads may result in component damage and unsafe operating conditions
1. Measure each wear pad. Replace the wear pad once it reaches the minimum allowable thickness. If the wear pad is still within specification, shim as necessary to obtain minimum clearance with zero binding
2. Extend and retract the boom through the entire range of motion to check for tight spots that may cause binding or scraping of the boom
Note: Always maintain squareness between the outer and inner boom tubes
SX-150 / SX-180;
3. Grease the platform end bottom wear pads with a suitable lubricant
SX-150: Grease the #1 and #2 boom tubes
SX-180: Grease the #0 and #1 boom tubes
1 Daily GM 3.0L Engine Maintanance
Clean radiator
Drain/clean LPG vaporizer
Clean/replace air cleaner element
Replace engine oil and filter
Replace fuel filter
Replace air filter
Replace distributor cap
Replace spark plug wires
Sign off on the daily maintenance
1 Yearly Turntable Rotation Bearing Bolts Check
- Check the Turntable Rotation Bearing Bolts
Maintaining proper torque on the turntable bearing bolts is essential to safe machine operation
Improper bolt torque could result in an unsafe operating condition and component damage
Note: Access to the upper and lower turntable bearing bolts will vary depending on model
1. S Booms, Z-45 XC and Z-45/25 (J) IC, DC, Bi-Energy: Raise the (primary) boom and place a safety chock on the lift cylinder rod
Carefully lower the boom onto the lift cylinder safety chock OR support the boom assembly with a suitable lifting device
All other Z Booms: Raise the secondary boom and place a safety chock on the lift cylinder rods. Carefully lower the boom onto the lift cylinder safety chock OR support the boom assembly with a suitable lifting device
WARNING!
Crushing hazard. Keep hands away from the cylinder and all moving parts when lowering the boom
Parts for Genie Articulated Boom Lift SX-125
Access the parts list for your equipment in MaintainX.
Digital Level Kit
58351
Digital Protractor
58377
O-ring Field Service Kit
49612
Digital Level Kit
58351
Digital Protractor
58377
O-ring Field Service Kit
49612
Digital Level Kit
58351
Digital Protractor
58377
O-ring Field Service Kit
49612
Unlock efficiency
with MaintainX CoPilot
MaintainX CoPilot is your expert colleague, on call 24/7, helping your team find the answers they need to keep equipment running.
Reduce Unplanned Downtime
Ensure your team follows consistent procedures to minimize equipment failures and costly delays.
Maximize Asset Availability
Keep your assets running longer and more reliably, with standardized maintenance workflows from OEM manuals.
Lower Maintenance Costs
Turn any technician into an expert to streamline operations, maintain more assets, and reduce overall costs.
Thousands of companies manage their assets with MaintainX

'%3e%3cpath%20fill='url(%23b)'%20d='M66.008%2080.068c-5.084-.786-9.763-3.834-12.442-8.68a16.942%2016.942%200%200%201-1.87-5.18c1.096.19%202.203.476%203.298.87%206.525%202.333%2010.836%207.68%2011.014%2012.99ZM51.47%2061.576c.488-5.524%203.62-10.716%208.847-13.597a17.132%2017.132%200%200%201%2011.335-1.882c-.798%208.145-7.43%2014.848-16.038%2015.599-1.417.119-2.799.07-4.144-.12Zm28.564-11.478a17.513%2017.513%200%200%201%203.727%204.62c4.608%208.335%201.584%2018.813-6.75%2023.409a16.988%2016.988%200%200%201-4.359%201.679%2019.624%2019.624%200%200%201-3.977-12.776c.346-7.561%204.942-13.931%2011.36-16.932Z'/%3e%3cpath%20fill='%23110F0D'%20fill-rule='evenodd'%20d='M142.831%2048.324h4.977V77.03h-4.977V48.324Zm27.278%2013.002c.322%201.048.453%202.263.453%203.62v12.073h-4.787V66.208c0-.75-.047-1.572-.154-2.143-.453-2.382-1.822-3.572-4.215-3.572-2.31%200-3.882%201.274-4.43%203.476-.143.596-.226%201.405-.226%202.25v10.8h-4.787V56.623h4.477v2.989c1.536-2.5%203.906-3.43%206.371-3.43%203.488%200%206.263%201.68%207.298%205.144Zm24.636%207.323c0%203.882-2.358%206.525-5.763%207.727-1.298.453-2.632.643-4.62.643h-10.169V48.324h9.085c1.691%200%203.156.143%204.049.38%203.465.93%205.727%203.68%205.727%207.335%200%202.441-.81%204.156-2.762%205.644%202.905%201.417%204.453%203.727%204.453%206.966Zm-15.634-8.656h4.584c1.024%200%201.917-.143%202.536-.417%201.215-.548%201.905-1.608%201.905-3.167%200-1.548-.643-2.572-1.845-3.132-.691-.31-1.762-.452-2.763-.452h-4.417v7.168Zm10.716%208.465c0-1.536-.893-3.37-3.227-3.893-.428-.095-1.036-.143-1.571-.143h-5.918v8.085h5.501c.56%200%201.429-.048%201.953-.167%201.94-.453%203.262-1.846%203.262-3.882Zm47.747-11.847-8.097%2020.408h-4.429l-8.109-20.408h5.191l5.192%2014.574%205.108-14.574h5.144Zm-20.218%2010.002c0%20.69-.036%201.262-.155%201.94h-15.943c.631%202.87%202.714%204.728%205.882%204.728%202.131%200%203.607-.882%204.703-2.525h4.87c-1.762%204.144-5.204%206.692-9.657%206.692-6.084%200-10.537-4.858-10.537-10.49%200-6.108%204.524-10.776%2010.335-10.776%206.239%200%2010.442%204.954%2010.502%2010.43Zm-4.763-1.405c-.333-2.846-2.643-4.858-5.691-4.858-2.894%200-5.287%201.929-5.621%204.858h11.312Zm-72.667%203.44c0%204.787-3.287%208.371-9.419%208.371H119.363V64.66c-1.917.274-3.87.69-5.811%201.238l4.537%2011.121h-5.418l-3.596-9.585c-5.144%202.084-10.085%205.216-14.217%209.585h-4.786L101.8%2048.312h4.56l5.68%2013.883a44.112%2044.112%200%200%201%207.323-1.774V48.312h9.084c1.703%200%203.156.143%204.061.393%203.453.929%205.727%203.667%205.727%207.323%200%201.917-.738%204.179-2.81%205.691%203.06%201.56%204.501%204.025%204.501%206.93Zm-15.634-8.667a62.664%2062.664%200%200%201%202.06-.036c1.703.012%203.239.131%204.608.37%201.441-.549%202.357-1.727%202.357-3.537%200-1.941-.881-3.144-2.488-3.667-.548-.18-1.358-.286-2.322-.286h-4.215v7.156Zm-16.55%203.905-3.715-9.894-6.394%2016.502c2.833-2.595%206.263-4.858%2010.109-6.608Zm27.254%204.74c0-2.775-3.131-4.347-8.513-4.418-.715%200-1.441.011-2.191.047v8.252h5.918c2.548%200%204.786-1.37%204.786-3.882Z'%20clip-rule='evenodd'/%3e%3c/g%3e%3cdefs%3e%3clinearGradient%20id='b'%20x1='51.47'%20x2='85.916'%20y1='62.946'%20y2='62.946'%20gradientUnits='userSpaceOnUse'%3e%3cstop%20stop-color='%23CD9F28'/%3e%3cstop%20offset='1'%20stop-color='%23ECD80B'/%3e%3c/linearGradient%3e%3cclipPath%20id='a'%3e%3cpath%20fill='%23fff'%20d='M51.47%2045.728h186.104V80.14H51.47z'/%3e%3c/clipPath%3e%3c/defs%3e%3c/svg%3e)


More from Genie


Explore Other Assets


© 2026 MaintainX. All rights reserved.