


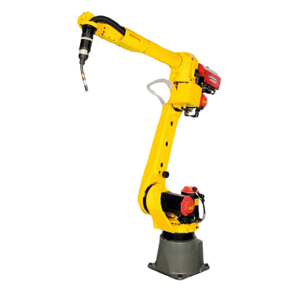
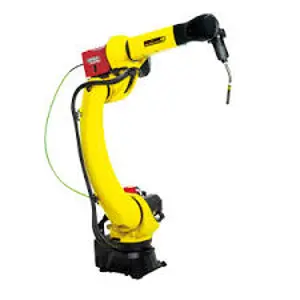
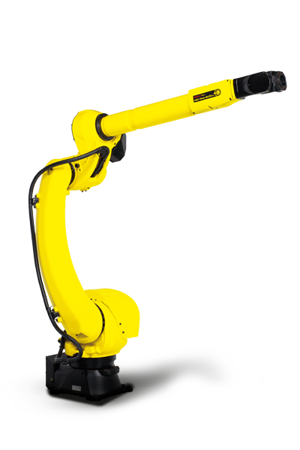
Fanuc Robot S-420iR/120
Need answers fast?
Explore the manual using AI.
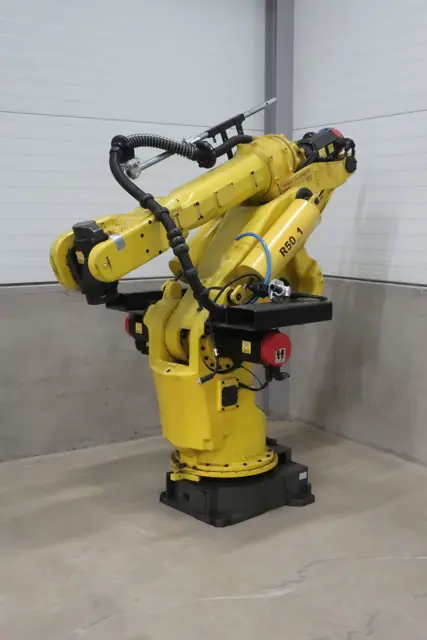
The Fanuc Robot S-420iR/120 is a versatile industrial robot designed for high-performance automation tasks. Known for its precision and reliability, this model excels in various applications, making it an essential asset for manufacturing processes. Optimize your operations with the advanced capabilities of the Fanuc S-420iR/120.
Turn manuals into instant answers
with your AI-powered assistantTurn manuals into instant answers
with your AI-powered assistant
Manual for Fanuc Robot S-420iR/120
Complete asset maintenance, one click away
Get instant access to all the maintenance information you need. Empower technicians to perform preventive maintenance with asset packages, ready to use right out of the box.

Documents & Manuals
Find all the essential guides in one place.
 Tensioning Guide
- Belt-diagram
- C-120 pulleys
+ 13 more

Work Order Templates
Pre-built workflows to keep your asset running smoothly.
- Daily Electrical System Inspection
- Replace Roller and Pulley
- Install Engine B-120
+ 29 more

Procedures
Integrate maintenance plans directly into your work orders.
- Motion Industries
- Applied Industrial Technologies
- Electrical Brothers
+ 5 more

Parts
Access the parts list for your equipment in MaintainX.
- Drive Motor
- B2 Rollers
- Tensioning System
+ 40 more
Fanuc Robot S-420iR/120
Create an account to install this asset package.
Maintenance Plans for Fanuc Robot Model S-420iR/120
Integrate maintenance plans directly into your work orders in MaintainX.
3 Yearly Robot Lubrication
Warning: This lubrication process requires trained personnel with PPE!
Grease Replacement
Select the parts where grease was replaced
Cross-Roller Bearing Lubrication
Was the cross-roller bearing greased?
Required Positions for Greasing
Refer to item 3.2 and list the positions where grease was applied
Sign off on the robot lubrication

Filter Element Replacement
Power turned off
Purge air shut off
Air filter's gauge reading
Upload a photo of the replaced filter element
Air filters and oil mist filter replaced at the same time
Sign off on the filter element replacement
Grease Of The Drive Mechanism Replacement
Power turned off
Grease outlet plug removed
Ventilation plug for J5-axis removed
New grease applied from the grease inlet until it comes out from the grease outlet
Plug at the grease outlet remounted
J4 Axis Motor (M4) And J4 Axis Reducer Replacement
1) Replacing J4--axis motor (M4)
1 Set the posture of the wrist such that no load is applied to the wrist axis.
2 Turn off the power.
3 Remove the connector.
4 Remove four bolts (M12 x 40 2pcs, M12 x 55 2pcs) for mounting the motor, then the motor.
5 Remove the nut and take out the center gear.
6 Replace the motor with a new one. And reassemble it in a reverse order. Also replace the O--ring (as a precaution). Apply Locktite No. 242 to the threaded portion of the motor shaft. Be sure to mount the O- -ring at the appropriate position. Pay special attention so as not to scratch the tooth face of the super gear.
7 Apply grease to the motor (Refer to section 3).
8 Perform mastering (Refer to section 5.3).
3 Monthly Robot Check
1) Check the following items once every three months. Additional inspection areas and times should be added to the table according to the robot’s working conditions, environment, etc.
Check whether the cable connected to the teach pendant is unevenly twisted.
If the ventilation portion of the control unit is dusty, tum off power and clean the unit.
2) First quarterly inspection
Check the following items at the first quarterly inspection, then every year thereafter.
Check whether the jackets of the mechanical unit cables are damaged. Also check whether the cables are excessively bent or unevenly twisted. Check that the connectors of the motors and connector panels are securely engaged.See section 7.2.
Clean each part (remove chips, etc.) and check component parts for cracks and flaws.
Further tighten the end--effecter mounting bolts and external main bolts.
Grease to the balancer bushing. Refer to item 3.2. in every 6 month;
Parts for Fanuc Robot S-420iR/120
Access the parts list for your equipment in MaintainX.
Cables, M6P COUPLING
A660-2004-T285
Cables, DEVICENET (POWER)
A660-4003-T586
Reducer, J3-axis reducer
A97L-0118-0941#250A-141
Reducer, J3-axis reducer
A97L-0118-0941#250A-129
Reducer, J3-axis reducer
A97L-0118-0941#250A-171
Cables, M6P COUPLING
A660-2004-T285
Cables, DEVICENET (POWER)
A660-4003-T586
Reducer, J3-axis reducer
A97L-0118-0941#250A-141
Reducer, J3-axis reducer
A97L-0118-0941#250A-129
Reducer, J3-axis reducer
A97L-0118-0941#250A-171
Cables, M6P COUPLING
A660-2004-T285
Cables, DEVICENET (POWER)
A660-4003-T586
Reducer, J3-axis reducer
A97L-0118-0941#250A-141
Reducer, J3-axis reducer
A97L-0118-0941#250A-129
Reducer, J3-axis reducer
A97L-0118-0941#250A-171
Unlock efficiency
with MaintainX CoPilot
MaintainX CoPilot is your expert colleague, on call 24/7, helping your team find the answers they need to keep equipment running.
Reduce Unplanned Downtime
Ensure your team follows consistent procedures to minimize equipment failures and costly delays.
Maximize Asset Availability
Keep your assets running longer and more reliably, with standardized maintenance workflows from OEM manuals.
Lower Maintenance Costs
Turn any technician into an expert to streamline operations, maintain more assets, and reduce overall costs.
Thousands of companies manage their assets with MaintainX

'%3e%3cpath%20fill='url(%23b)'%20d='M66.008%2080.068c-5.084-.786-9.763-3.834-12.442-8.68a16.942%2016.942%200%200%201-1.87-5.18c1.096.19%202.203.476%203.298.87%206.525%202.333%2010.836%207.68%2011.014%2012.99ZM51.47%2061.576c.488-5.524%203.62-10.716%208.847-13.597a17.132%2017.132%200%200%201%2011.335-1.882c-.798%208.145-7.43%2014.848-16.038%2015.599-1.417.119-2.799.07-4.144-.12Zm28.564-11.478a17.513%2017.513%200%200%201%203.727%204.62c4.608%208.335%201.584%2018.813-6.75%2023.409a16.988%2016.988%200%200%201-4.359%201.679%2019.624%2019.624%200%200%201-3.977-12.776c.346-7.561%204.942-13.931%2011.36-16.932Z'/%3e%3cpath%20fill='%23110F0D'%20fill-rule='evenodd'%20d='M142.831%2048.324h4.977V77.03h-4.977V48.324Zm27.278%2013.002c.322%201.048.453%202.263.453%203.62v12.073h-4.787V66.208c0-.75-.047-1.572-.154-2.143-.453-2.382-1.822-3.572-4.215-3.572-2.31%200-3.882%201.274-4.43%203.476-.143.596-.226%201.405-.226%202.25v10.8h-4.787V56.623h4.477v2.989c1.536-2.5%203.906-3.43%206.371-3.43%203.488%200%206.263%201.68%207.298%205.144Zm24.636%207.323c0%203.882-2.358%206.525-5.763%207.727-1.298.453-2.632.643-4.62.643h-10.169V48.324h9.085c1.691%200%203.156.143%204.049.38%203.465.93%205.727%203.68%205.727%207.335%200%202.441-.81%204.156-2.762%205.644%202.905%201.417%204.453%203.727%204.453%206.966Zm-15.634-8.656h4.584c1.024%200%201.917-.143%202.536-.417%201.215-.548%201.905-1.608%201.905-3.167%200-1.548-.643-2.572-1.845-3.132-.691-.31-1.762-.452-2.763-.452h-4.417v7.168Zm10.716%208.465c0-1.536-.893-3.37-3.227-3.893-.428-.095-1.036-.143-1.571-.143h-5.918v8.085h5.501c.56%200%201.429-.048%201.953-.167%201.94-.453%203.262-1.846%203.262-3.882Zm47.747-11.847-8.097%2020.408h-4.429l-8.109-20.408h5.191l5.192%2014.574%205.108-14.574h5.144Zm-20.218%2010.002c0%20.69-.036%201.262-.155%201.94h-15.943c.631%202.87%202.714%204.728%205.882%204.728%202.131%200%203.607-.882%204.703-2.525h4.87c-1.762%204.144-5.204%206.692-9.657%206.692-6.084%200-10.537-4.858-10.537-10.49%200-6.108%204.524-10.776%2010.335-10.776%206.239%200%2010.442%204.954%2010.502%2010.43Zm-4.763-1.405c-.333-2.846-2.643-4.858-5.691-4.858-2.894%200-5.287%201.929-5.621%204.858h11.312Zm-72.667%203.44c0%204.787-3.287%208.371-9.419%208.371H119.363V64.66c-1.917.274-3.87.69-5.811%201.238l4.537%2011.121h-5.418l-3.596-9.585c-5.144%202.084-10.085%205.216-14.217%209.585h-4.786L101.8%2048.312h4.56l5.68%2013.883a44.112%2044.112%200%200%201%207.323-1.774V48.312h9.084c1.703%200%203.156.143%204.061.393%203.453.929%205.727%203.667%205.727%207.323%200%201.917-.738%204.179-2.81%205.691%203.06%201.56%204.501%204.025%204.501%206.93Zm-15.634-8.667a62.664%2062.664%200%200%201%202.06-.036c1.703.012%203.239.131%204.608.37%201.441-.549%202.357-1.727%202.357-3.537%200-1.941-.881-3.144-2.488-3.667-.548-.18-1.358-.286-2.322-.286h-4.215v7.156Zm-16.55%203.905-3.715-9.894-6.394%2016.502c2.833-2.595%206.263-4.858%2010.109-6.608Zm27.254%204.74c0-2.775-3.131-4.347-8.513-4.418-.715%200-1.441.011-2.191.047v8.252h5.918c2.548%200%204.786-1.37%204.786-3.882Z'%20clip-rule='evenodd'/%3e%3c/g%3e%3cdefs%3e%3clinearGradient%20id='b'%20x1='51.47'%20x2='85.916'%20y1='62.946'%20y2='62.946'%20gradientUnits='userSpaceOnUse'%3e%3cstop%20stop-color='%23CD9F28'/%3e%3cstop%20offset='1'%20stop-color='%23ECD80B'/%3e%3c/linearGradient%3e%3cclipPath%20id='a'%3e%3cpath%20fill='%23fff'%20d='M51.47%2045.728h186.104V80.14H51.47z'/%3e%3c/clipPath%3e%3c/defs%3e%3c/svg%3e)


More from Fanuc


Explore Other Assets


© 2026 MaintainX. All rights reserved.