


Caterpillar Skid Steer Loader 242B3
Need answers fast?
Explore the manual using AI.
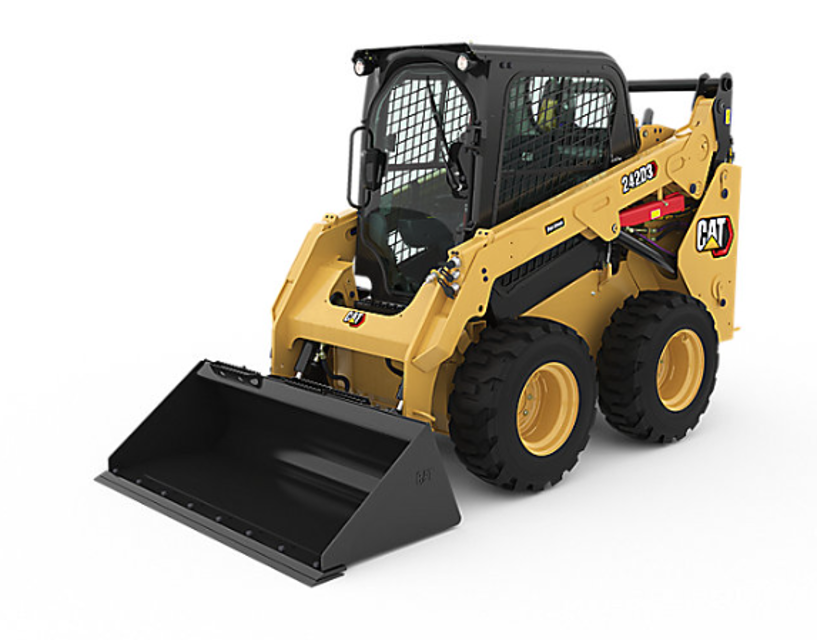
The Caterpillar Skid Steer Loader 242B3 is a versatile and powerful machine designed for various construction and landscaping tasks. Known for its durability and efficiency, this model excels in tight spaces, making it an ideal choice for contractors and operators seeking reliable performance in demanding environments.
Turn manuals into instant answers
with your AI-powered assistantTurn manuals into instant answers
with your AI-powered assistant
Manual for Caterpillar Skid Steer Loader 242B3
Complete asset maintenance, one click away
Get instant access to all the maintenance information you need. Empower technicians to perform preventive maintenance with asset packages, ready to use right out of the box.

Documents & Manuals
Find all the essential guides in one place.
 Tensioning Guide
- Belt-diagram
- C-120 pulleys
+ 13 more

Work Order Templates
Pre-built workflows to keep your asset running smoothly.
- Daily Electrical System Inspection
- Replace Roller and Pulley
- Install Engine B-120
+ 29 more

Procedures
Integrate maintenance plans directly into your work orders.
- Motion Industries
- Applied Industrial Technologies
- Electrical Brothers
+ 5 more

Parts
Access the parts list for your equipment in MaintainX.
- Drive Motor
- B2 Rollers
- Tensioning System
+ 40 more
Caterpillar Skid Steer Loader 242B3
Create an account to install this asset package.
Maintenance Plans for Caterpillar Skid Steer Loader Model 242B3
Integrate maintenance plans directly into your work orders in MaintainX.
500 Hourly / 6 Monthly Skid Steer Loader Maintenance
Fuel System Filter (In-Line) - Replace
Is the filter screen more than half obstructed?
Is the engine performance poor?
Open the engine access door. Refer to Operation and Maintenance Manual, “Access Doors and Covers”.
Loosen hose clamps.
Remove the fuel filter and discard the fuel filter.
Replace the fuel filter. Ensure that the arrow on the filter points upward.
Tighten hose clamps.
Start the engine.

2000 Hourly Skid Steer Loader Maintenance
Refrigerant Dryer - Replace
WARNING: Personal injury can result from contact with refrigerant. Contact with refrigerant can cause frost bite. Keep face and hands away to help prevent injury. Protective goggles must always be worn when refrigerant lines are opened, even if the gauges indicate the system is empty of refrigerant. Always use precaution when a fitting is removed. Slowly loosen the fitting. If the system is still under pressure, release it slowly in a well ventilated area.
Personal injury or death can result from inhaling refrigerant through a lit cigarette. Inhaling air conditioner refrigerant gas through a lit cigarette or other smoking method or inhaling fumes released from a flame contacting air conditioner refrigerant gas, can cause bodily harm or death. Do not smoke when servicing air conditioners or wherever refrigerant gas may be present.
Use a certified recovery and recycling cart to properly remove the refrigerant from the air conditioning system.
NOTICE: If the refrigerant system has been open to the outside air (without being plugged) for more than 30 minutes, the receiver-dryer must be replaced. Moisture will enter an open refrigerant system and cause corrosion which will lead to component failure.
Refer to Service Manual, UENR4125, “Air Conditioning and Heating R-134a For All Caterpillar Machines” for the proper procedure to change the receiver-dryer assembly and for the procedure to reclaim the refrigerant gas.
A qualified mechanic should perform this service because special refrigerant handling tools and training are required. See your Cat dealer for this service.
Refrigerant Dryer replaced?
Sign off on the maintenance
When Required Skid Steer Loader Maintenance
Air Conditioner Condenser - Clean
WARNING:
Personal injury can result from air pressure.
Personal injury can result without following proper procedure. When using pressure air, wear a protective face shield and protective clothing.
Maximum air pressure at the nozzle must be less than 205 kPa (30 psi) for cleaning purposes.
The air conditioner condenser is located behind the engine on the frame.
Open the engine access door.
Inspect the air conditioner condenser for the following conditions:
• Damaged fins
2000 Hourly / 1 Yearly Skid Steer Loader Maintenance
Fuel Injection Timing - Check
Note: The correct fuel timing specification is found on the Engine Information Plate. Fuel timing specifications may vary for different engine applications and/or for different power ratings.
A qualified mechanic should adjust the fuel injection timing because special tools and training are required.
Refer to the Service Manual for the complete adjustment procedure for the fuel injection timing. Refer to your Caterpillar dealer for the complete adjustment procedure for the fuel injection timing.
Hydraulic System Oil - Change
Selection of the Oil Change Interval Your machine may be able to use a 4000 hour interval for the hydraulic oil. The hydraulic oil is in the system that is not integral to the service brakes, the clutches, the final drives, or the differentials. The standard change interval is 2000 hours. The oil should be monitored during intervals of 500 hours.
The extended 4000 hour interval can be used if the following criteria are met.
HYDO Advanced 10
Cat HYDO Advanced 10 is the preferred oil for use in most Caterpillar machine hydraulic and hydrostatic transmission systems when ambient temperature is between −20 °C (−4 °F) and 40 °C (104 °F).
1000 Hourly Skid Steer Loader Maintenance
Engine Valve Lash - Check
Refer to the Service Manual for the complete adjustment procedure for the engine valve lash.
A qualified mechanic should adjust the engine valve lash and the fuel injector timing because special tools and training are required.
See your Cat dealer for this service.
Parts for Caterpillar Skid Steer Loader 242B3
Access the parts list for your equipment in MaintainX.
Dirt Bucket with Bolt On Edge 1676 mm
152-0232
General Purpose Bucket 1524 mm
279-5364
General Purpose Bucket 1676 mm
279-5368
Multipurpose Bucket with Bolt On Edge and Debris Guard 1524 mm
325-7040
Multipurpose Bucket with Bolt On Edge and Debris Guard 1981 mm
325-7070
Dirt Bucket with Bolt On Edge 1676 mm
152-0232
General Purpose Bucket 1524 mm
279-5364
General Purpose Bucket 1676 mm
279-5368
Multipurpose Bucket with Bolt On Edge and Debris Guard 1524 mm
325-7040
Multipurpose Bucket with Bolt On Edge and Debris Guard 1981 mm
325-7070
Dirt Bucket with Bolt On Edge 1676 mm
152-0232
General Purpose Bucket 1524 mm
279-5364
General Purpose Bucket 1676 mm
279-5368
Multipurpose Bucket with Bolt On Edge and Debris Guard 1524 mm
325-7040
Multipurpose Bucket with Bolt On Edge and Debris Guard 1981 mm
325-7070
Unlock efficiency
with MaintainX CoPilot
MaintainX CoPilot is your expert colleague, on call 24/7, helping your team find the answers they need to keep equipment running.
Reduce Unplanned Downtime
Ensure your team follows consistent procedures to minimize equipment failures and costly delays.
Maximize Asset Availability
Keep your assets running longer and more reliably, with standardized maintenance workflows from OEM manuals.
Lower Maintenance Costs
Turn any technician into an expert to streamline operations, maintain more assets, and reduce overall costs.
Thousands of companies manage their assets with MaintainX

'%3e%3cpath%20fill='url(%23b)'%20d='M66.008%2080.068c-5.084-.786-9.763-3.834-12.442-8.68a16.942%2016.942%200%200%201-1.87-5.18c1.096.19%202.203.476%203.298.87%206.525%202.333%2010.836%207.68%2011.014%2012.99ZM51.47%2061.576c.488-5.524%203.62-10.716%208.847-13.597a17.132%2017.132%200%200%201%2011.335-1.882c-.798%208.145-7.43%2014.848-16.038%2015.599-1.417.119-2.799.07-4.144-.12Zm28.564-11.478a17.513%2017.513%200%200%201%203.727%204.62c4.608%208.335%201.584%2018.813-6.75%2023.409a16.988%2016.988%200%200%201-4.359%201.679%2019.624%2019.624%200%200%201-3.977-12.776c.346-7.561%204.942-13.931%2011.36-16.932Z'/%3e%3cpath%20fill='%23110F0D'%20fill-rule='evenodd'%20d='M142.831%2048.324h4.977V77.03h-4.977V48.324Zm27.278%2013.002c.322%201.048.453%202.263.453%203.62v12.073h-4.787V66.208c0-.75-.047-1.572-.154-2.143-.453-2.382-1.822-3.572-4.215-3.572-2.31%200-3.882%201.274-4.43%203.476-.143.596-.226%201.405-.226%202.25v10.8h-4.787V56.623h4.477v2.989c1.536-2.5%203.906-3.43%206.371-3.43%203.488%200%206.263%201.68%207.298%205.144Zm24.636%207.323c0%203.882-2.358%206.525-5.763%207.727-1.298.453-2.632.643-4.62.643h-10.169V48.324h9.085c1.691%200%203.156.143%204.049.38%203.465.93%205.727%203.68%205.727%207.335%200%202.441-.81%204.156-2.762%205.644%202.905%201.417%204.453%203.727%204.453%206.966Zm-15.634-8.656h4.584c1.024%200%201.917-.143%202.536-.417%201.215-.548%201.905-1.608%201.905-3.167%200-1.548-.643-2.572-1.845-3.132-.691-.31-1.762-.452-2.763-.452h-4.417v7.168Zm10.716%208.465c0-1.536-.893-3.37-3.227-3.893-.428-.095-1.036-.143-1.571-.143h-5.918v8.085h5.501c.56%200%201.429-.048%201.953-.167%201.94-.453%203.262-1.846%203.262-3.882Zm47.747-11.847-8.097%2020.408h-4.429l-8.109-20.408h5.191l5.192%2014.574%205.108-14.574h5.144Zm-20.218%2010.002c0%20.69-.036%201.262-.155%201.94h-15.943c.631%202.87%202.714%204.728%205.882%204.728%202.131%200%203.607-.882%204.703-2.525h4.87c-1.762%204.144-5.204%206.692-9.657%206.692-6.084%200-10.537-4.858-10.537-10.49%200-6.108%204.524-10.776%2010.335-10.776%206.239%200%2010.442%204.954%2010.502%2010.43Zm-4.763-1.405c-.333-2.846-2.643-4.858-5.691-4.858-2.894%200-5.287%201.929-5.621%204.858h11.312Zm-72.667%203.44c0%204.787-3.287%208.371-9.419%208.371H119.363V64.66c-1.917.274-3.87.69-5.811%201.238l4.537%2011.121h-5.418l-3.596-9.585c-5.144%202.084-10.085%205.216-14.217%209.585h-4.786L101.8%2048.312h4.56l5.68%2013.883a44.112%2044.112%200%200%201%207.323-1.774V48.312h9.084c1.703%200%203.156.143%204.061.393%203.453.929%205.727%203.667%205.727%207.323%200%201.917-.738%204.179-2.81%205.691%203.06%201.56%204.501%204.025%204.501%206.93Zm-15.634-8.667a62.664%2062.664%200%200%201%202.06-.036c1.703.012%203.239.131%204.608.37%201.441-.549%202.357-1.727%202.357-3.537%200-1.941-.881-3.144-2.488-3.667-.548-.18-1.358-.286-2.322-.286h-4.215v7.156Zm-16.55%203.905-3.715-9.894-6.394%2016.502c2.833-2.595%206.263-4.858%2010.109-6.608Zm27.254%204.74c0-2.775-3.131-4.347-8.513-4.418-.715%200-1.441.011-2.191.047v8.252h5.918c2.548%200%204.786-1.37%204.786-3.882Z'%20clip-rule='evenodd'/%3e%3c/g%3e%3cdefs%3e%3clinearGradient%20id='b'%20x1='51.47'%20x2='85.916'%20y1='62.946'%20y2='62.946'%20gradientUnits='userSpaceOnUse'%3e%3cstop%20stop-color='%23CD9F28'/%3e%3cstop%20offset='1'%20stop-color='%23ECD80B'/%3e%3c/linearGradient%3e%3cclipPath%20id='a'%3e%3cpath%20fill='%23fff'%20d='M51.47%2045.728h186.104V80.14H51.47z'/%3e%3c/clipPath%3e%3c/defs%3e%3c/svg%3e)


More from Caterpillar


Explore Other Assets


© 2026 MaintainX. All rights reserved.