


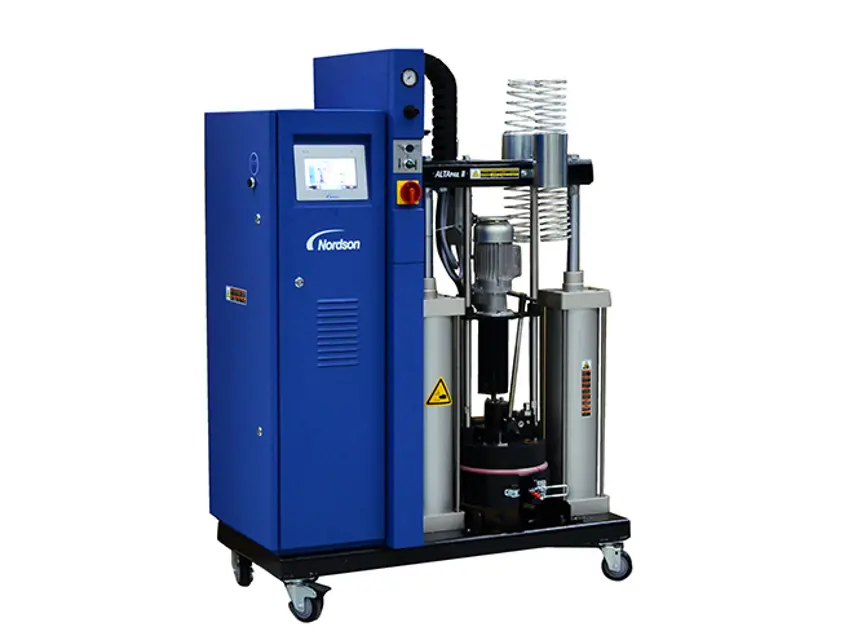
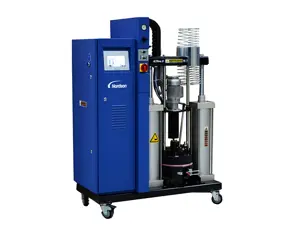
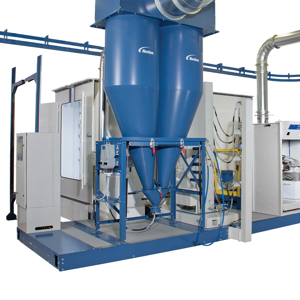
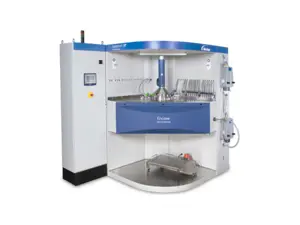
Nordson Bulk Melter 7407667
Need answers fast?
Explore the manual using AI.
Turn manuals into instant answers
with your AI-powered assistantTurn manuals into instant answers
with your AI-powered assistant
Manual for Nordson Bulk Melter 7407667
Complete asset maintenance, one click away
Get instant access to all the maintenance information you need. Empower technicians to perform preventive maintenance with asset packages, ready to use right out of the box.

Documents & Manuals
Find all the essential guides in one place.
 Tensioning Guide
- Belt-diagram
- C-120 pulleys
+ 13 more

Work Order Templates
Pre-built workflows to keep your asset running smoothly.
- Daily Electrical System Inspection
- Replace Roller and Pulley
- Install Engine B-120
+ 29 more

Procedures
Integrate maintenance plans directly into your work orders.
- Motion Industries
- Applied Industrial Technologies
- Electrical Brothers
+ 5 more

Parts
Access the parts list for your equipment in MaintainX.
- Drive Motor
- B2 Rollers
- Tensioning System
+ 40 more
Nordson Bulk Melter 7407667
Create an account to install this asset package.
Maintenance Plans for Nordson Bulk Melter Model 7407667
Integrate maintenance plans directly into your work orders in MaintainX.
Gear Pump Replacement
WARNING: System and material pressurized. Relieve bulk melter pressure before disconnecting pressurized components (e.g. hoses, pressure sensors). Failure to observe can result in serious burns. Refer to page 10-1, Relieving Pressure.
WARNING: Hot! Risk of burns. Wear heat-protective gloves.
Detaching Gear Pump:
NOTE: Detach the gear pump only when the material is soft (approx. 70 ° C/158 ° F, depending on material).
1. Remove the cover and detach the Cardan joint (1) from the pump shaft.
2. Detach pump.
3. Allow the bulk melter to cool to room temperature.
Attaching Gear Pump:
1. Clean the sealing surfaces on the plate and pump. If necessary, heat material residue with a hot air fan, then remove.

1 Daily Melter Cleaning
CAUTION: Observe the unit’s Degree of Protection when cleaning. Refer to page 12-3, Electrical Data.
CAUTION: Do not damage or remove safety labels. Damaged or removed safety labels must be replaced by new ones.
Remove material residue only with a cleaning agent recommended by the material supplier. Heat with an air heater if necessary.
Remove dust, flakes etc. with a vacuum cleaner or a soft cloth.
Motor / gear box: Clean fan cover
Sign off on the daily melter cleaning
Safety Valve Replacement
WARNING! For safety reasons, the safety valve may not be disassembled. The complete valve must be replaced every time.
WARNING: System and material pressurized. Relieve bulk melter pressure before disconnecting pressurized components (e.g. hoses, pressure sensors). Failure to observe can result in serious burns. Refer to page 10-1, Relieving Pressure.
WARNING: Hot! Risk of burns. Wear heat-protective gloves.
Bulk melter is heated
Replace the valve only when the bulk melter is heated. Otherwise the sealing rings could be damaged by charred material
Upload a photo of the applied high temperature grease to all threads and O-rings
Apply high temperature grease to all threads and O-rings (Refer to page 8-2, Processing Materials)
Enter the torque applied to the valve
Tighten valve with a torque wrench. Torque: 15 Nm (133 lbin).
Melter Check
- Melting plate:
Check melting plate for charred material, clean if necessary
- Base plate:
Check base plate for material residue or other impurities, clean if necessary;
Temperature Sensor Replacement
WARNING: Hot! Risk of burns. Wear heat-protective gloves.
WARNING: Risk of electrical shock. Failure to observe may result in personal injury, death, or equipment damage.
1. Disconnect the bulk melter from the line voltage.
2. Remove the cover (1).
3.:
Thermostat (2):
1. Apply heat transfer compound (Refer to page 8-2, Processing Materials) to the new thermostat and replace.
Temperature sensor (3)
1. Carefully pull the temperature sensor out of the melting plate by the connecting cable. If it cannot be pulled out easily, the melting plate must be removed. Refer to page 10-5, Replacing Melting Plate.
Parts for Nordson Bulk Melter 7407667
Access the parts list for your equipment in MaintainX.
Warning Label
290083
Warning Label
290082
Warning Label
421460
Tags, Sheet Of, Versa/Durablue LG, CE LANG
1059866
Tag,Unit Stamping, Altapail II
10000291
Warning Label
290083
Warning Label
290082
Warning Label
421460
Tags, Sheet Of, Versa/Durablue LG, CE LANG
1059866
Tag,Unit Stamping, Altapail II
10000291
Warning Label
290083
Warning Label
290082
Warning Label
421460
Tags, Sheet Of, Versa/Durablue LG, CE LANG
1059866
Tag,Unit Stamping, Altapail II
10000291
Unlock efficiency
with MaintainX CoPilot
MaintainX CoPilot is your expert colleague, on call 24/7, helping your team find the answers they need to keep equipment running.
Reduce Unplanned Downtime
Ensure your team follows consistent procedures to minimize equipment failures and costly delays.
Maximize Asset Availability
Keep your assets running longer and more reliably, with standardized maintenance workflows from OEM manuals.
Lower Maintenance Costs
Turn any technician into an expert to streamline operations, maintain more assets, and reduce overall costs.
Thousands of companies manage their assets with MaintainX

'%3e%3cpath%20fill='url(%23b)'%20d='M66.008%2080.068c-5.084-.786-9.763-3.834-12.442-8.68a16.942%2016.942%200%200%201-1.87-5.18c1.096.19%202.203.476%203.298.87%206.525%202.333%2010.836%207.68%2011.014%2012.99ZM51.47%2061.576c.488-5.524%203.62-10.716%208.847-13.597a17.132%2017.132%200%200%201%2011.335-1.882c-.798%208.145-7.43%2014.848-16.038%2015.599-1.417.119-2.799.07-4.144-.12Zm28.564-11.478a17.513%2017.513%200%200%201%203.727%204.62c4.608%208.335%201.584%2018.813-6.75%2023.409a16.988%2016.988%200%200%201-4.359%201.679%2019.624%2019.624%200%200%201-3.977-12.776c.346-7.561%204.942-13.931%2011.36-16.932Z'/%3e%3cpath%20fill='%23110F0D'%20fill-rule='evenodd'%20d='M142.831%2048.324h4.977V77.03h-4.977V48.324Zm27.278%2013.002c.322%201.048.453%202.263.453%203.62v12.073h-4.787V66.208c0-.75-.047-1.572-.154-2.143-.453-2.382-1.822-3.572-4.215-3.572-2.31%200-3.882%201.274-4.43%203.476-.143.596-.226%201.405-.226%202.25v10.8h-4.787V56.623h4.477v2.989c1.536-2.5%203.906-3.43%206.371-3.43%203.488%200%206.263%201.68%207.298%205.144Zm24.636%207.323c0%203.882-2.358%206.525-5.763%207.727-1.298.453-2.632.643-4.62.643h-10.169V48.324h9.085c1.691%200%203.156.143%204.049.38%203.465.93%205.727%203.68%205.727%207.335%200%202.441-.81%204.156-2.762%205.644%202.905%201.417%204.453%203.727%204.453%206.966Zm-15.634-8.656h4.584c1.024%200%201.917-.143%202.536-.417%201.215-.548%201.905-1.608%201.905-3.167%200-1.548-.643-2.572-1.845-3.132-.691-.31-1.762-.452-2.763-.452h-4.417v7.168Zm10.716%208.465c0-1.536-.893-3.37-3.227-3.893-.428-.095-1.036-.143-1.571-.143h-5.918v8.085h5.501c.56%200%201.429-.048%201.953-.167%201.94-.453%203.262-1.846%203.262-3.882Zm47.747-11.847-8.097%2020.408h-4.429l-8.109-20.408h5.191l5.192%2014.574%205.108-14.574h5.144Zm-20.218%2010.002c0%20.69-.036%201.262-.155%201.94h-15.943c.631%202.87%202.714%204.728%205.882%204.728%202.131%200%203.607-.882%204.703-2.525h4.87c-1.762%204.144-5.204%206.692-9.657%206.692-6.084%200-10.537-4.858-10.537-10.49%200-6.108%204.524-10.776%2010.335-10.776%206.239%200%2010.442%204.954%2010.502%2010.43Zm-4.763-1.405c-.333-2.846-2.643-4.858-5.691-4.858-2.894%200-5.287%201.929-5.621%204.858h11.312Zm-72.667%203.44c0%204.787-3.287%208.371-9.419%208.371H119.363V64.66c-1.917.274-3.87.69-5.811%201.238l4.537%2011.121h-5.418l-3.596-9.585c-5.144%202.084-10.085%205.216-14.217%209.585h-4.786L101.8%2048.312h4.56l5.68%2013.883a44.112%2044.112%200%200%201%207.323-1.774V48.312h9.084c1.703%200%203.156.143%204.061.393%203.453.929%205.727%203.667%205.727%207.323%200%201.917-.738%204.179-2.81%205.691%203.06%201.56%204.501%204.025%204.501%206.93Zm-15.634-8.667a62.664%2062.664%200%200%201%202.06-.036c1.703.012%203.239.131%204.608.37%201.441-.549%202.357-1.727%202.357-3.537%200-1.941-.881-3.144-2.488-3.667-.548-.18-1.358-.286-2.322-.286h-4.215v7.156Zm-16.55%203.905-3.715-9.894-6.394%2016.502c2.833-2.595%206.263-4.858%2010.109-6.608Zm27.254%204.74c0-2.775-3.131-4.347-8.513-4.418-.715%200-1.441.011-2.191.047v8.252h5.918c2.548%200%204.786-1.37%204.786-3.882Z'%20clip-rule='evenodd'/%3e%3c/g%3e%3cdefs%3e%3clinearGradient%20id='b'%20x1='51.47'%20x2='85.916'%20y1='62.946'%20y2='62.946'%20gradientUnits='userSpaceOnUse'%3e%3cstop%20stop-color='%23CD9F28'/%3e%3cstop%20offset='1'%20stop-color='%23ECD80B'/%3e%3c/linearGradient%3e%3cclipPath%20id='a'%3e%3cpath%20fill='%23fff'%20d='M51.47%2045.728h186.104V80.14H51.47z'/%3e%3c/clipPath%3e%3c/defs%3e%3c/svg%3e)


More from Nordson


Explore Other Assets


© 2026 MaintainX. All rights reserved.