


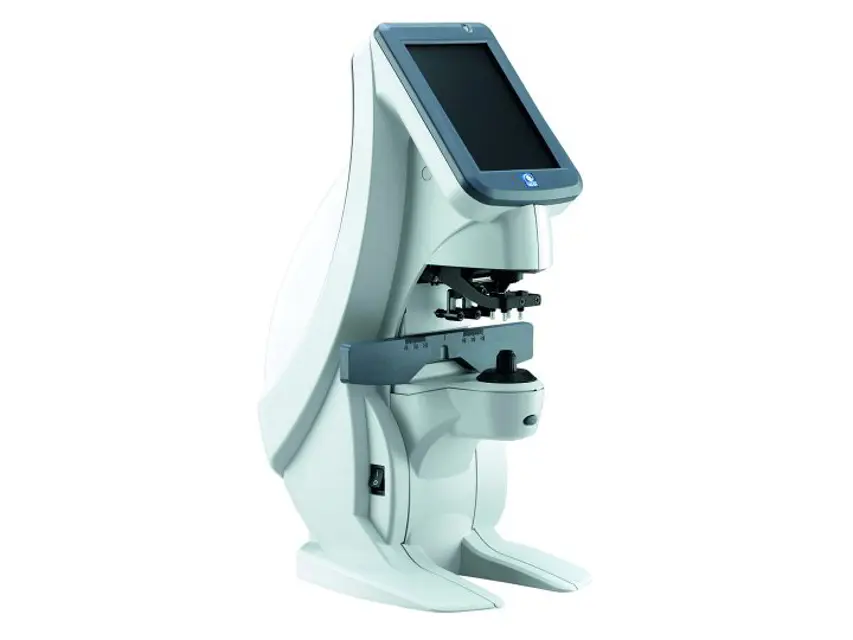
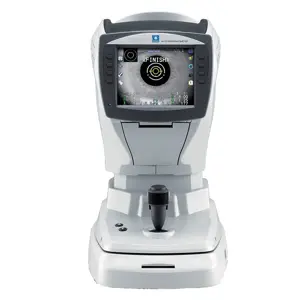
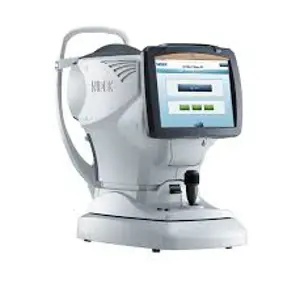
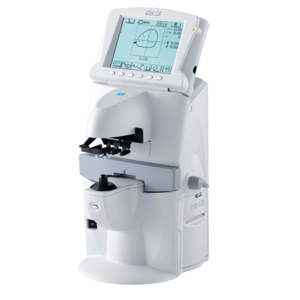
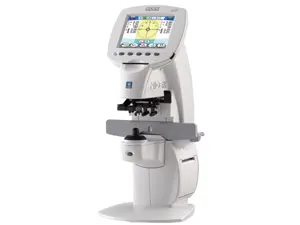
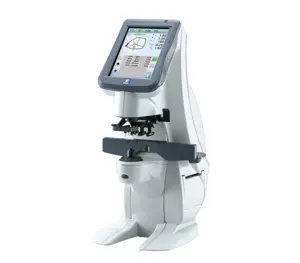
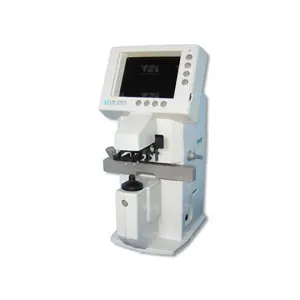
The Nidec Auto Lensmeter LM-7 is a precision optical measurement device designed for accurate lens analysis. This advanced lensmeter offers reliable performance and user-friendly features, making it essential for optical laboratories and practices. Ensure optimal functionality with proper maintenance and spare parts for the LM-7 model.
Turn manuals into instant answers
with your AI-powered assistantTurn manuals into instant answers
with your AI-powered assistant
Complete asset maintenance, one click away
Get instant access to all the maintenance information you need. Empower technicians to perform preventive maintenance with asset packages, ready to use right out of the box.

Documents & Manuals
Find all the essential guides in one place.
 Tensioning Guide
- Belt-diagram
- C-120 pulleys
+ 13 more

Work Order Templates
Pre-built workflows to keep your asset running smoothly.
- Daily Electrical System Inspection
- Replace Roller and Pulley
- Install Engine B-120
+ 29 more

Procedures
Integrate maintenance plans directly into your work orders.
- Motion Industries
- Applied Industrial Technologies
- Electrical Brothers
+ 5 more

Parts
Access the parts list for your equipment in MaintainX.
- Drive Motor
- B2 Rollers
- Tensioning System
+ 40 more
Nidec Auto Lensmeter LM-7
Create an account to install this asset package.
Maintenance Plans for Nidec Auto Lensmeter Model LM-7
Integrate maintenance plans directly into your work orders in MaintainX.
Auto Lensmeter Exterior Cleaning
CAUTION! Never use an organic solvent such as paint thinner. This could damage the surface of the device.
CAUTION! Lightly wipe the touch screen with a soft cloth. The surface of the LCD may be damaged. Device malfunction may also result.
CAUTION! Never use a sponge or cloth soaked in water. Water may leak into the interior of the device resulting in malfunction.
Is the cover or panel of the device soiled?
Upload a photo of the soiled device
Were persistent stains wiped away with a cloth soaked in a neutral detergent and wrung well?
Upload a photo of the device after cleaning persistent stains
Was the device wiped with a dry and soft cloth after cleaning?
Upload a photo of the device after final cleaning

Touch Screen Calibration
Warning: Calibration requires precision. Use a touch pen for more accurate calibration.
Does the position touched on the screen and the response position match?
If they do not match, proceed with the following steps.
Did you press the read button while turning on the power switch?
Did you continue pressing the read button until the calibration screen is displayed?
Did you press the blue squares that appear on the screen in order?
Did you press the squares in all four corners?
Sign off on the touch screen calibration
Printer Cleaning
Warning: This procedure requires careful handling of the printer
Open the printer cover and remove the printer paper
Apply the nozzle of a vacuum cleaner to the auto cutter to remove paper residue
Never blow off paper residue with a blower. If residue settles on the internal working structure, malfunction may result.
Load the printer paper as before
Sign off on the printer cleaning
Lens Table Adjustment
Warning: This procedure requires trained personnel!
Does the lens table lever feel too heavy or too light during use?
If the lever feels fine, stop the procedure
Upload a photo of the lens table lever before removal
Lens table lever removed straight out?
Setscrew on the adjustable screw loosened with a flatblade screwdriver?
Direction of adjustable screw rotation
Number of rotations of the adjustable screw
Warning: Do not rotate the adjustable screw by more than one rotation in either direction from the factory setting.
Printer Paper Replacement
Warning: Do not run the printer while the printer paper is not loaded.
Warning: Do not pull the paper from the printer forcefully.
Warning: Confirm that the printer paper is not reversed or tilted.
Warning: Confirm that the cover is securely closed.
Is the red line visible on the edge of the printer paper?
CAUTION! When replacing the printer paper, be careful not to touch the printer head.
Did you push the button on the rear of the device to open the printer cover and remove the printer paper?
Did you load the new printer paper so that the end of the printer paper comes out slightly from the cover?
Did you close the printer cover securely by pushing the right and left sides of the printer cover?
Parts for Nidec Auto Lensmeter LM-7
Access the parts list for your equipment in MaintainX.
Supplement Ink
31001-M231
Contact Cleaner
8060500023
Ink Pad
30282-M3332
Ink Cartridge
31001-3372
Printer Paper
8062000001
Supplement Ink
31001-M231
Contact Cleaner
8060500023
Ink Pad
30282-M3332
Ink Cartridge
31001-3372
Printer Paper
8062000001
Supplement Ink
31001-M231
Contact Cleaner
8060500023
Ink Pad
30282-M3332
Ink Cartridge
31001-3372
Printer Paper
8062000001
Unlock efficiency
with MaintainX CoPilot
MaintainX CoPilot is your expert colleague, on call 24/7, helping your team find the answers they need to keep equipment running.
Reduce Unplanned Downtime
Ensure your team follows consistent procedures to minimize equipment failures and costly delays.
Maximize Asset Availability
Keep your assets running longer and more reliably, with standardized maintenance workflows from OEM manuals.
Lower Maintenance Costs
Turn any technician into an expert to streamline operations, maintain more assets, and reduce overall costs.
Thousands of companies manage their assets with MaintainX

'%3e%3cpath%20fill='url(%23b)'%20d='M66.008%2080.068c-5.084-.786-9.763-3.834-12.442-8.68a16.942%2016.942%200%200%201-1.87-5.18c1.096.19%202.203.476%203.298.87%206.525%202.333%2010.836%207.68%2011.014%2012.99ZM51.47%2061.576c.488-5.524%203.62-10.716%208.847-13.597a17.132%2017.132%200%200%201%2011.335-1.882c-.798%208.145-7.43%2014.848-16.038%2015.599-1.417.119-2.799.07-4.144-.12Zm28.564-11.478a17.513%2017.513%200%200%201%203.727%204.62c4.608%208.335%201.584%2018.813-6.75%2023.409a16.988%2016.988%200%200%201-4.359%201.679%2019.624%2019.624%200%200%201-3.977-12.776c.346-7.561%204.942-13.931%2011.36-16.932Z'/%3e%3cpath%20fill='%23110F0D'%20fill-rule='evenodd'%20d='M142.831%2048.324h4.977V77.03h-4.977V48.324Zm27.278%2013.002c.322%201.048.453%202.263.453%203.62v12.073h-4.787V66.208c0-.75-.047-1.572-.154-2.143-.453-2.382-1.822-3.572-4.215-3.572-2.31%200-3.882%201.274-4.43%203.476-.143.596-.226%201.405-.226%202.25v10.8h-4.787V56.623h4.477v2.989c1.536-2.5%203.906-3.43%206.371-3.43%203.488%200%206.263%201.68%207.298%205.144Zm24.636%207.323c0%203.882-2.358%206.525-5.763%207.727-1.298.453-2.632.643-4.62.643h-10.169V48.324h9.085c1.691%200%203.156.143%204.049.38%203.465.93%205.727%203.68%205.727%207.335%200%202.441-.81%204.156-2.762%205.644%202.905%201.417%204.453%203.727%204.453%206.966Zm-15.634-8.656h4.584c1.024%200%201.917-.143%202.536-.417%201.215-.548%201.905-1.608%201.905-3.167%200-1.548-.643-2.572-1.845-3.132-.691-.31-1.762-.452-2.763-.452h-4.417v7.168Zm10.716%208.465c0-1.536-.893-3.37-3.227-3.893-.428-.095-1.036-.143-1.571-.143h-5.918v8.085h5.501c.56%200%201.429-.048%201.953-.167%201.94-.453%203.262-1.846%203.262-3.882Zm47.747-11.847-8.097%2020.408h-4.429l-8.109-20.408h5.191l5.192%2014.574%205.108-14.574h5.144Zm-20.218%2010.002c0%20.69-.036%201.262-.155%201.94h-15.943c.631%202.87%202.714%204.728%205.882%204.728%202.131%200%203.607-.882%204.703-2.525h4.87c-1.762%204.144-5.204%206.692-9.657%206.692-6.084%200-10.537-4.858-10.537-10.49%200-6.108%204.524-10.776%2010.335-10.776%206.239%200%2010.442%204.954%2010.502%2010.43Zm-4.763-1.405c-.333-2.846-2.643-4.858-5.691-4.858-2.894%200-5.287%201.929-5.621%204.858h11.312Zm-72.667%203.44c0%204.787-3.287%208.371-9.419%208.371H119.363V64.66c-1.917.274-3.87.69-5.811%201.238l4.537%2011.121h-5.418l-3.596-9.585c-5.144%202.084-10.085%205.216-14.217%209.585h-4.786L101.8%2048.312h4.56l5.68%2013.883a44.112%2044.112%200%200%201%207.323-1.774V48.312h9.084c1.703%200%203.156.143%204.061.393%203.453.929%205.727%203.667%205.727%207.323%200%201.917-.738%204.179-2.81%205.691%203.06%201.56%204.501%204.025%204.501%206.93Zm-15.634-8.667a62.664%2062.664%200%200%201%202.06-.036c1.703.012%203.239.131%204.608.37%201.441-.549%202.357-1.727%202.357-3.537%200-1.941-.881-3.144-2.488-3.667-.548-.18-1.358-.286-2.322-.286h-4.215v7.156Zm-16.55%203.905-3.715-9.894-6.394%2016.502c2.833-2.595%206.263-4.858%2010.109-6.608Zm27.254%204.74c0-2.775-3.131-4.347-8.513-4.418-.715%200-1.441.011-2.191.047v8.252h5.918c2.548%200%204.786-1.37%204.786-3.882Z'%20clip-rule='evenodd'/%3e%3c/g%3e%3cdefs%3e%3clinearGradient%20id='b'%20x1='51.47'%20x2='85.916'%20y1='62.946'%20y2='62.946'%20gradientUnits='userSpaceOnUse'%3e%3cstop%20stop-color='%23CD9F28'/%3e%3cstop%20offset='1'%20stop-color='%23ECD80B'/%3e%3c/linearGradient%3e%3cclipPath%20id='a'%3e%3cpath%20fill='%23fff'%20d='M51.47%2045.728h186.104V80.14H51.47z'/%3e%3c/clipPath%3e%3c/defs%3e%3c/svg%3e)


More from Nidec

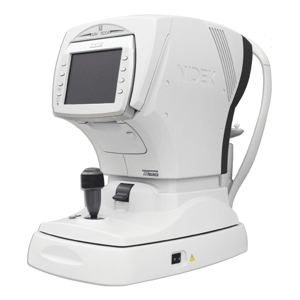

Explore Other Assets


© 2025 MaintainX. All rights reserved.