


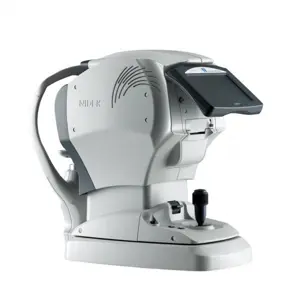
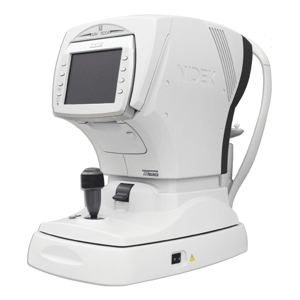
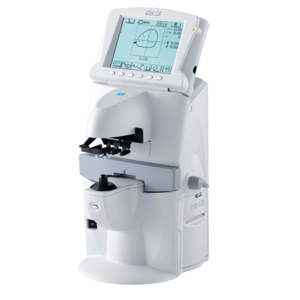
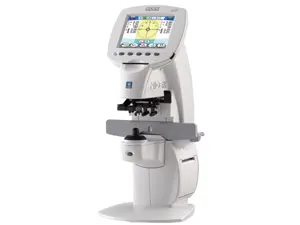
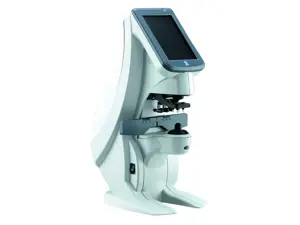
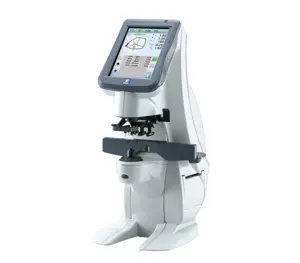
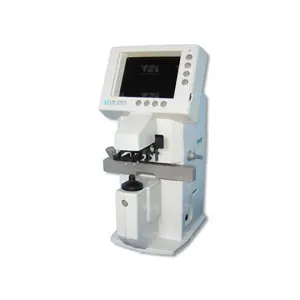
Nidec Auto Lensmeter LM-600P
Need answers fast?
Explore the manual using AI.

The Nidec Auto Lensmeter LM-600P is a precision optical measurement device designed for accurate lens testing and calibration. This advanced lensmeter combines user-friendly features with reliable performance, making it an essential tool for optical professionals seeking efficiency and accuracy in their measurements.
Turn manuals into instant answers
with your AI-powered assistantTurn manuals into instant answers
with your AI-powered assistant
Complete asset maintenance, one click away
Get instant access to all the maintenance information you need. Empower technicians to perform preventive maintenance with asset packages, ready to use right out of the box.

Documents & Manuals
Find all the essential guides in one place.
 Tensioning Guide
- Belt-diagram
- C-120 pulleys
+ 13 more

Work Order Templates
Pre-built workflows to keep your asset running smoothly.
- Daily Electrical System Inspection
- Replace Roller and Pulley
- Install Engine B-120
+ 29 more

Procedures
Integrate maintenance plans directly into your work orders.
- Motion Industries
- Applied Industrial Technologies
- Electrical Brothers
+ 5 more

Parts
Access the parts list for your equipment in MaintainX.
- Drive Motor
- B2 Rollers
- Tensioning System
+ 40 more
Nidec Auto Lensmeter LM-600P
Create an account to install this asset package.
Maintenance Plans for Nidec Auto Lensmeter Model LM-600P
Integrate maintenance plans directly into your work orders in MaintainX.
Eye Care Card Slot Cleaning
Warning: Turn off the power of the device before cleaning.
Is the Eye Care card slot visibly dirty?
Upload a photo of the dirty Eye Care card slot
Select the type of cleaner used
Did you wipe the Eye Care card with a soft cloth?
Did you immerse the cloth in a neutral detergent for persistent grime?
Did you wipe the Eye Care card with a dry and soft cloth after cleaning with detergent?
Note: The Eye Care card reader contacts are on the lower surface.
Did you insert the contact cleaner with the wiper part facing downward several times to clean the reader contacts?

Lens Table Adjustment
Warning: This procedure requires trained personnel!
Lens table lever removed
Setscrew on the adjustable screw loosened
Adjustable screw rotation
Note: The effective rotation range of the adjustable screw is one rotation, either clockwise or counterclockwise.
Setscrew on the adjustable screw tightened
Lens table lever attached and checked
Describe the feel of the lever movement
Sign off on the lens table adjustment
Protective Glass Cleaning
Warning: Dust detected. Please clean lens.
CAUTION! Clean the protective glass under the nosepiece with a blower brush. The dust may include sharp particles. Wiping them without the blower brush damages to the lens
Remove the nosepiece.
Clean the protective glass. Remove any dust on the glass with a blower brush.
If any dust remains, wipe gently with a lens cleaning cloth.
NOTE! Take special care not to scratch the protective glass. Flaws on the glass substantially lower the reliability of measurement.
Sign off on the protective glass cleaning
Ink Refilling
Are the markings faint?
If markings are faint, replace the ink cartridge. Use the specified cartridge for refills.
Upload a photo of the removed C-ring
When the C-ring is removed, the spring and cartridge fall off. Take care not to lose them.
Upload a photo of the new cartridge inserted into the marker holder
Match the shape of the cartridge to the hole of the marker holder by rotating until the cartridge can be inserted smoothly
Use the C-ring which is removed in the procedure 1 or the one attached to the cartridge as a replacement part.
Is the ink pad type optional?
If markings are faint, add some ink.
Printer Paper Replacement
Warning: Do not run the printer while the printer paper is not set. It may ruin the printer head.
Warning: Do not pull the printer paper forcefully. Doing so could cause malfunction of the printer.
Red line appears on the side of the printer paper?
If red line appears, stop using the printer and replace the roll with a new one.
Printer cover pulled towards the operator?
Printer cover lever at the rear of the device opened?
Remaining printer paper removed?
Caution: When replacing the printer paper, be sure not to touch the printer head on the upper part inside the printer paper holder. The printer head can get very hot and cause burns.
New printer paper set as shown in the figure to the right?
Parts for Nidec Auto Lensmeter LM-600P
Access the parts list for your equipment in MaintainX.
Ink Cartridge
31001-3373
Ink For Ink Pad
82001-IK004
Ink Cartridge
31001-3372
Ink Cartridge
31001-3371
Contact Cleaner
34086-7110
Ink Cartridge
31001-3373
Ink For Ink Pad
82001-IK004
Ink Cartridge
31001-3372
Ink Cartridge
31001-3371
Contact Cleaner
34086-7110
Ink Cartridge
31001-3373
Ink For Ink Pad
82001-IK004
Ink Cartridge
31001-3372
Ink Cartridge
31001-3371
Contact Cleaner
34086-7110
Unlock efficiency
with MaintainX CoPilot
MaintainX CoPilot is your expert colleague, on call 24/7, helping your team find the answers they need to keep equipment running.
Reduce Unplanned Downtime
Ensure your team follows consistent procedures to minimize equipment failures and costly delays.
Maximize Asset Availability
Keep your assets running longer and more reliably, with standardized maintenance workflows from OEM manuals.
Lower Maintenance Costs
Turn any technician into an expert to streamline operations, maintain more assets, and reduce overall costs.
Thousands of companies manage their assets with MaintainX

'%3e%3cpath%20fill='url(%23b)'%20d='M66.008%2080.068c-5.084-.786-9.763-3.834-12.442-8.68a16.942%2016.942%200%200%201-1.87-5.18c1.096.19%202.203.476%203.298.87%206.525%202.333%2010.836%207.68%2011.014%2012.99ZM51.47%2061.576c.488-5.524%203.62-10.716%208.847-13.597a17.132%2017.132%200%200%201%2011.335-1.882c-.798%208.145-7.43%2014.848-16.038%2015.599-1.417.119-2.799.07-4.144-.12Zm28.564-11.478a17.513%2017.513%200%200%201%203.727%204.62c4.608%208.335%201.584%2018.813-6.75%2023.409a16.988%2016.988%200%200%201-4.359%201.679%2019.624%2019.624%200%200%201-3.977-12.776c.346-7.561%204.942-13.931%2011.36-16.932Z'/%3e%3cpath%20fill='%23110F0D'%20fill-rule='evenodd'%20d='M142.831%2048.324h4.977V77.03h-4.977V48.324Zm27.278%2013.002c.322%201.048.453%202.263.453%203.62v12.073h-4.787V66.208c0-.75-.047-1.572-.154-2.143-.453-2.382-1.822-3.572-4.215-3.572-2.31%200-3.882%201.274-4.43%203.476-.143.596-.226%201.405-.226%202.25v10.8h-4.787V56.623h4.477v2.989c1.536-2.5%203.906-3.43%206.371-3.43%203.488%200%206.263%201.68%207.298%205.144Zm24.636%207.323c0%203.882-2.358%206.525-5.763%207.727-1.298.453-2.632.643-4.62.643h-10.169V48.324h9.085c1.691%200%203.156.143%204.049.38%203.465.93%205.727%203.68%205.727%207.335%200%202.441-.81%204.156-2.762%205.644%202.905%201.417%204.453%203.727%204.453%206.966Zm-15.634-8.656h4.584c1.024%200%201.917-.143%202.536-.417%201.215-.548%201.905-1.608%201.905-3.167%200-1.548-.643-2.572-1.845-3.132-.691-.31-1.762-.452-2.763-.452h-4.417v7.168Zm10.716%208.465c0-1.536-.893-3.37-3.227-3.893-.428-.095-1.036-.143-1.571-.143h-5.918v8.085h5.501c.56%200%201.429-.048%201.953-.167%201.94-.453%203.262-1.846%203.262-3.882Zm47.747-11.847-8.097%2020.408h-4.429l-8.109-20.408h5.191l5.192%2014.574%205.108-14.574h5.144Zm-20.218%2010.002c0%20.69-.036%201.262-.155%201.94h-15.943c.631%202.87%202.714%204.728%205.882%204.728%202.131%200%203.607-.882%204.703-2.525h4.87c-1.762%204.144-5.204%206.692-9.657%206.692-6.084%200-10.537-4.858-10.537-10.49%200-6.108%204.524-10.776%2010.335-10.776%206.239%200%2010.442%204.954%2010.502%2010.43Zm-4.763-1.405c-.333-2.846-2.643-4.858-5.691-4.858-2.894%200-5.287%201.929-5.621%204.858h11.312Zm-72.667%203.44c0%204.787-3.287%208.371-9.419%208.371H119.363V64.66c-1.917.274-3.87.69-5.811%201.238l4.537%2011.121h-5.418l-3.596-9.585c-5.144%202.084-10.085%205.216-14.217%209.585h-4.786L101.8%2048.312h4.56l5.68%2013.883a44.112%2044.112%200%200%201%207.323-1.774V48.312h9.084c1.703%200%203.156.143%204.061.393%203.453.929%205.727%203.667%205.727%207.323%200%201.917-.738%204.179-2.81%205.691%203.06%201.56%204.501%204.025%204.501%206.93Zm-15.634-8.667a62.664%2062.664%200%200%201%202.06-.036c1.703.012%203.239.131%204.608.37%201.441-.549%202.357-1.727%202.357-3.537%200-1.941-.881-3.144-2.488-3.667-.548-.18-1.358-.286-2.322-.286h-4.215v7.156Zm-16.55%203.905-3.715-9.894-6.394%2016.502c2.833-2.595%206.263-4.858%2010.109-6.608Zm27.254%204.74c0-2.775-3.131-4.347-8.513-4.418-.715%200-1.441.011-2.191.047v8.252h5.918c2.548%200%204.786-1.37%204.786-3.882Z'%20clip-rule='evenodd'/%3e%3c/g%3e%3cdefs%3e%3clinearGradient%20id='b'%20x1='51.47'%20x2='85.916'%20y1='62.946'%20y2='62.946'%20gradientUnits='userSpaceOnUse'%3e%3cstop%20stop-color='%23CD9F28'/%3e%3cstop%20offset='1'%20stop-color='%23ECD80B'/%3e%3c/linearGradient%3e%3cclipPath%20id='a'%3e%3cpath%20fill='%23fff'%20d='M51.47%2045.728h186.104V80.14H51.47z'/%3e%3c/clipPath%3e%3c/defs%3e%3c/svg%3e)


More from Nidec

Explore Other Assets


© 2025 MaintainX. All rights reserved.