


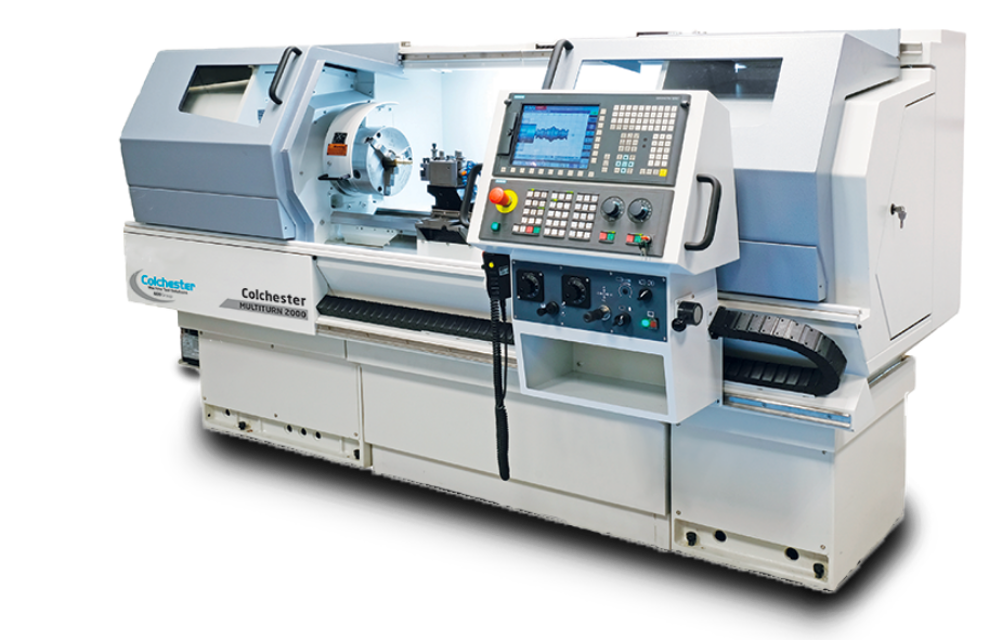
Mori Seiki CNC Vertical Machining Center MSD-680
Need answers fast?
Explore the manual using AI.
Turn manuals into instant answers
with your AI-powered assistantTurn manuals into instant answers
with your AI-powered assistant
Manual for Mori Seiki CNC Vertical Machining Center MSD-680
Complete asset maintenance, one click away
Get instant access to all the maintenance information you need. Empower technicians to perform preventive maintenance with asset packages, ready to use right out of the box.

Documents & Manuals
Find all the essential guides in one place.
 Tensioning Guide
- Belt-diagram
- C-120 pulleys
+ 13 more

Work Order Templates
Pre-built workflows to keep your asset running smoothly.
- Daily Electrical System Inspection
- Replace Roller and Pulley
- Install Engine B-120
+ 29 more

Procedures
Integrate maintenance plans directly into your work orders.
- Motion Industries
- Applied Industrial Technologies
- Electrical Brothers
+ 5 more

Parts
Access the parts list for your equipment in MaintainX.
- Drive Motor
- B2 Rollers
- Tensioning System
+ 40 more
Mori Seiki CNC Vertical Machining Center MSD-680
Create an account to install this asset package.
Maintenance Plans for Mori Seiki CNC Vertical Machining Center Model MSD-680
Integrate maintenance plans directly into your work orders in MaintainX.
1000 Hourly / 6 Monthly Air Filter Element Inspection
Warning: Ensure the power is turned off and the compressed air supply is shut off before starting the procedure.
Power turned off?
Compressed air supply shut off?
Turn the case assembly (1) 45 degrees while pressing the lock button down.
Case assembly turned 45 degrees?
Loosen the baffle (2). The element (3) can be taken out of the case assembly.
Baffle loosened and element taken out?
Wash the element (3) using neutral detergent.
Element washed with neutral detergent?

Zero Return Adjustment
NOTE: Zero return adjustment (from obtaining the reference point to setting parameters) should be carried out for each axis.
Set zero point setting parameters. Refer to manual prepared by CNC maker.
For the axis for which the zero point is to be set, obtain the reference point in the manner explained in 2.1, 'Obtaining the Reference Point'.
Carry out zero return operation.
Adjust the position of the dog so that the position data will be as indicated.
After the axis enters the range indicated above, note the current position display data. Then, reset the position display to '0'.
Turn the pulse handle to find the position where the zero return deceleration switch (SQ1 for X-axis, SQ2 for Y-axis, SQ3 for Z-axis) changes from the ON state to the OFF state.
Feed the axis by turning the pulse handle in the negative direction until the zero return deceleration switch state changes from '1' to '0'. After that, feed the axis in the zero return direction by turning the pulse handle to find the position where the zero return deceleration switch state changes from '0' to '1'.
At the position where the zero return deceleration switch state changes from '0' to '1', display the position display screen to check the position data.
Air Filter Lubrication
Warning: This procedure requires trained personnel with PPE!
Is the air filter type AF4000?
Enter the internal pressure inside the case
Is the float 1 at the bottom?
Is the valve 2 closing the slot in the chamber 3?
Is the piston 4 forced down due to spring 5 force?
Is the foreign matter entering the drain housing through the slot 3 in the chamber?
When pressure is applied, does the piston 4 move up, overcoming the spring 5 force, to come into contact with the O-ring 6, enclosing the inside of case 7?
When foreign matter accumulates inside the case, does the float 1 rise from buoyancy to open the slot in the chamber 3?
Spindle Cleaning
CAUTION: Follow the cautions when starting spindle rotation and cleaning the spindle.
Enter the low speed spindle rotation (min-1)
Enter the high speed spindle rotation (min-1)
Did you perform the break-in operation at low and high speed for 30 minutes each?
When cleaning the spindle, use soft rags to wipe off coolant, dust, and other foreign matter.
Did you use compressed air to clean the spindle?
Keep the spindle tapered hole clean. Foreign matter adhering on the tapered hole surface will deteriorate spindle accuracy or preclude tool clamping collet operation.
Is the spindle tapered hole clean?
If the temperature of the spindle rises abnormally during operation or abnormal noise is generated, contact Mori Seiki as soon as possible.
Spindle Head Maintenance
DANGER: Before carrying out oil cooler inspection and maintenance, always turn OFF the power supply.
Replenishing lubricating oil
Check if the machine is not operating before replenishing oil.
Check if the oil used is clean and as specified.
Check if the tank, oil strainer, and other parts are clean.
Condenser
Check if there is a large volume of dust and dirt accumulated on the condenser.
Cleaning the air filter
Check if the air filter is cleaned every two weeks with an air gun.
Unlock efficiency
with MaintainX CoPilot
MaintainX CoPilot is your expert colleague, on call 24/7, helping your team find the answers they need to keep equipment running.
Reduce Unplanned Downtime
Ensure your team follows consistent procedures to minimize equipment failures and costly delays.
Maximize Asset Availability
Keep your assets running longer and more reliably, with standardized maintenance workflows from OEM manuals.
Lower Maintenance Costs
Turn any technician into an expert to streamline operations, maintain more assets, and reduce overall costs.
Thousands of companies manage their assets with MaintainX

'%3e%3cpath%20fill='url(%23b)'%20d='M66.008%2080.068c-5.084-.786-9.763-3.834-12.442-8.68a16.942%2016.942%200%200%201-1.87-5.18c1.096.19%202.203.476%203.298.87%206.525%202.333%2010.836%207.68%2011.014%2012.99ZM51.47%2061.576c.488-5.524%203.62-10.716%208.847-13.597a17.132%2017.132%200%200%201%2011.335-1.882c-.798%208.145-7.43%2014.848-16.038%2015.599-1.417.119-2.799.07-4.144-.12Zm28.564-11.478a17.513%2017.513%200%200%201%203.727%204.62c4.608%208.335%201.584%2018.813-6.75%2023.409a16.988%2016.988%200%200%201-4.359%201.679%2019.624%2019.624%200%200%201-3.977-12.776c.346-7.561%204.942-13.931%2011.36-16.932Z'/%3e%3cpath%20fill='%23110F0D'%20fill-rule='evenodd'%20d='M142.831%2048.324h4.977V77.03h-4.977V48.324Zm27.278%2013.002c.322%201.048.453%202.263.453%203.62v12.073h-4.787V66.208c0-.75-.047-1.572-.154-2.143-.453-2.382-1.822-3.572-4.215-3.572-2.31%200-3.882%201.274-4.43%203.476-.143.596-.226%201.405-.226%202.25v10.8h-4.787V56.623h4.477v2.989c1.536-2.5%203.906-3.43%206.371-3.43%203.488%200%206.263%201.68%207.298%205.144Zm24.636%207.323c0%203.882-2.358%206.525-5.763%207.727-1.298.453-2.632.643-4.62.643h-10.169V48.324h9.085c1.691%200%203.156.143%204.049.38%203.465.93%205.727%203.68%205.727%207.335%200%202.441-.81%204.156-2.762%205.644%202.905%201.417%204.453%203.727%204.453%206.966Zm-15.634-8.656h4.584c1.024%200%201.917-.143%202.536-.417%201.215-.548%201.905-1.608%201.905-3.167%200-1.548-.643-2.572-1.845-3.132-.691-.31-1.762-.452-2.763-.452h-4.417v7.168Zm10.716%208.465c0-1.536-.893-3.37-3.227-3.893-.428-.095-1.036-.143-1.571-.143h-5.918v8.085h5.501c.56%200%201.429-.048%201.953-.167%201.94-.453%203.262-1.846%203.262-3.882Zm47.747-11.847-8.097%2020.408h-4.429l-8.109-20.408h5.191l5.192%2014.574%205.108-14.574h5.144Zm-20.218%2010.002c0%20.69-.036%201.262-.155%201.94h-15.943c.631%202.87%202.714%204.728%205.882%204.728%202.131%200%203.607-.882%204.703-2.525h4.87c-1.762%204.144-5.204%206.692-9.657%206.692-6.084%200-10.537-4.858-10.537-10.49%200-6.108%204.524-10.776%2010.335-10.776%206.239%200%2010.442%204.954%2010.502%2010.43Zm-4.763-1.405c-.333-2.846-2.643-4.858-5.691-4.858-2.894%200-5.287%201.929-5.621%204.858h11.312Zm-72.667%203.44c0%204.787-3.287%208.371-9.419%208.371H119.363V64.66c-1.917.274-3.87.69-5.811%201.238l4.537%2011.121h-5.418l-3.596-9.585c-5.144%202.084-10.085%205.216-14.217%209.585h-4.786L101.8%2048.312h4.56l5.68%2013.883a44.112%2044.112%200%200%201%207.323-1.774V48.312h9.084c1.703%200%203.156.143%204.061.393%203.453.929%205.727%203.667%205.727%207.323%200%201.917-.738%204.179-2.81%205.691%203.06%201.56%204.501%204.025%204.501%206.93Zm-15.634-8.667a62.664%2062.664%200%200%201%202.06-.036c1.703.012%203.239.131%204.608.37%201.441-.549%202.357-1.727%202.357-3.537%200-1.941-.881-3.144-2.488-3.667-.548-.18-1.358-.286-2.322-.286h-4.215v7.156Zm-16.55%203.905-3.715-9.894-6.394%2016.502c2.833-2.595%206.263-4.858%2010.109-6.608Zm27.254%204.74c0-2.775-3.131-4.347-8.513-4.418-.715%200-1.441.011-2.191.047v8.252h5.918c2.548%200%204.786-1.37%204.786-3.882Z'%20clip-rule='evenodd'/%3e%3c/g%3e%3cdefs%3e%3clinearGradient%20id='b'%20x1='51.47'%20x2='85.916'%20y1='62.946'%20y2='62.946'%20gradientUnits='userSpaceOnUse'%3e%3cstop%20stop-color='%23CD9F28'/%3e%3cstop%20offset='1'%20stop-color='%23ECD80B'/%3e%3c/linearGradient%3e%3cclipPath%20id='a'%3e%3cpath%20fill='%23fff'%20d='M51.47%2045.728h186.104V80.14H51.47z'/%3e%3c/clipPath%3e%3c/defs%3e%3c/svg%3e)


More from Mori Seiki


Explore Other Assets


© 2026 MaintainX. All rights reserved.